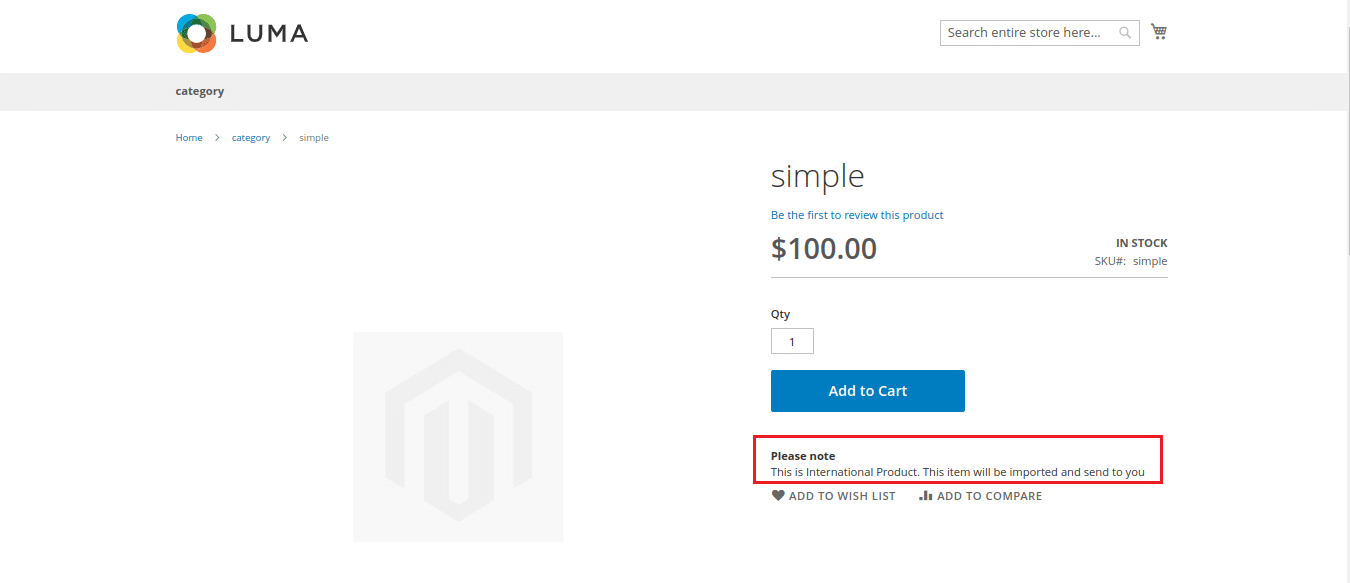
Serving a great shopping experience is a duty of store owner towards their Magento store customers. From landing on a store to check out of the product, the customer passes through the whole shopping funnel. Among which product page plays an important role for the customer to get detailed information about a product before making a purchase. But sometimes it’s not enough or there is information that the store owner is willing to let their customer know before making the purchase.
Recently, one of the clients suffering from the same situation where he was willing to let his customer knows some information before they add the product to their cart. The solution is simple, we have suggested them to add a block after add to cart button, so whenever a customer adds products to cart he or she can make note of it and can ensure that product is a perfect fit for them or not.
Using Block, we can display various information related to the product such as: chart, discount, offers & deals, terms and conditions or caution etc. That’s why today at MageComp blog we came up with an easy solution for adding a block on product page right after the add to cart button.
Steps to Add Block After Add to Cart Button in Magento 2 Product page:
Step 1: Create the “Enquiry.php” file inside the Extension view folder.
app\code\Vendor\Extension\Block\Catalog\Product\View\
<?php
namespace Vendor\Extension\Block\Catalog\Product\View;

class Enquiry extends \Magento\Framework\View\Element\Template
{
	public function __construct(\Magento\Framework\View\Element\Template\Context $context)
	{
		parent::__construct($context);
	}
}
Step 2: Now, create the “catalog_product_view.xml” file inside the Extension view folder.
app\code\Vendor\Extension\view\frontend\layout\
<?xml version="1.0"?>
<page xmlns:xsi="http://www.w3.org/2001/XMLSchema-instance" layout="1column" xsi:noNamespaceSchemaLocation="../../../../../../../lib/internal/Magento/Framework/View/Layout/etc/page_configuration.xsd">

   <body>
        <referenceContainer name="product.info.form.content">
            <block class="Vendor\Extension\Block\Catalog\Product\View\Enquiry" name="product.info.enquiry" after="product.info.addtocart" template="Vendor_Extension::catalog/product/view/file.phtml">
        </block>
        </referenceContainer>
   </body>
</page>
Step 3: Now, create the “file.phtml” file inside the Extension view folder.
app\code\Vendor\Extension\view\frontend\templates\catalog\product\view\
<?php /*file call*/ ?>
<div>
<b><?= __('Please note ') ?></b>
<p>?= __('This is International Product. This item will be imported and send to you') ?></p>
</div>
Output:

And that’s it! Now clear the cache and you are ready to go.
You can comment down below if you are looking for any help regarding this code.
Happy coding!


Hi,
The instruction above does not assist really because it isn’t a worked example. For example there should be some kind of usage used in “Enquiry.php” and “file.phtml” like if you wanted to show the discount between regular price and final price or some other usage.
Thanks anyway for your effort.
nice working
sorry, but this is not very helpful for a beginner. Expected even a simple example.
The beginner need to create other basic files which is required for extension creation, then implement this into custom extensions.