Hello E-commerce Friends,
Google Analytics helps you get insights into the website’s organic traffic, user behavior, and the success of your marketing goals.
Check – Best 7 Useful Google Analytics Insights You Can Check to Improve SEO
But you are not obtaining much value from the Google Analytics tool if you are not using Google Analytics Goals.
It is obvious that you have set specific goals for your business. Google Analytics Goals helps to create goals and get reports to analyze behavior, acquisition, and demographic data.
Let’s get rolling with Google Analytics Goals – The Ultimate Guide for Ecommerce Site
What are Google Analytics Goals?
Google Analytics Goals are the trackable data of your user that is important for your business. You can create goals to monitor user actions to determine whether your marketing efforts are creating favorable results or not.
You can set up Google Analytics Goals on purchases, lead forms, page visits, signups, and video watches. With Google Analytics Goals you can analyze data on the success of your website, performance comparison of different activities, and ROI for marketing.
Why are Google Analytics Goals Important?
When you anticipate your website goals with your objectives, you know how much your website is helping you to achieve your targets. Setting up goals is helpful for growing business and you have competitors in the market.
Without Goals, you might get insights from Google Analytics tool on the use of your website. But will only lead to questions like whether or not these insights are giving a positive or negative impact on your website.
It is advisable to define and track the Goals of your business in Google Analytics. You must define your Goals at the time of launching your website.
How to Setup Google Analytics Goals?
Here is the step-by-step guide to set up Google Analytics Goals
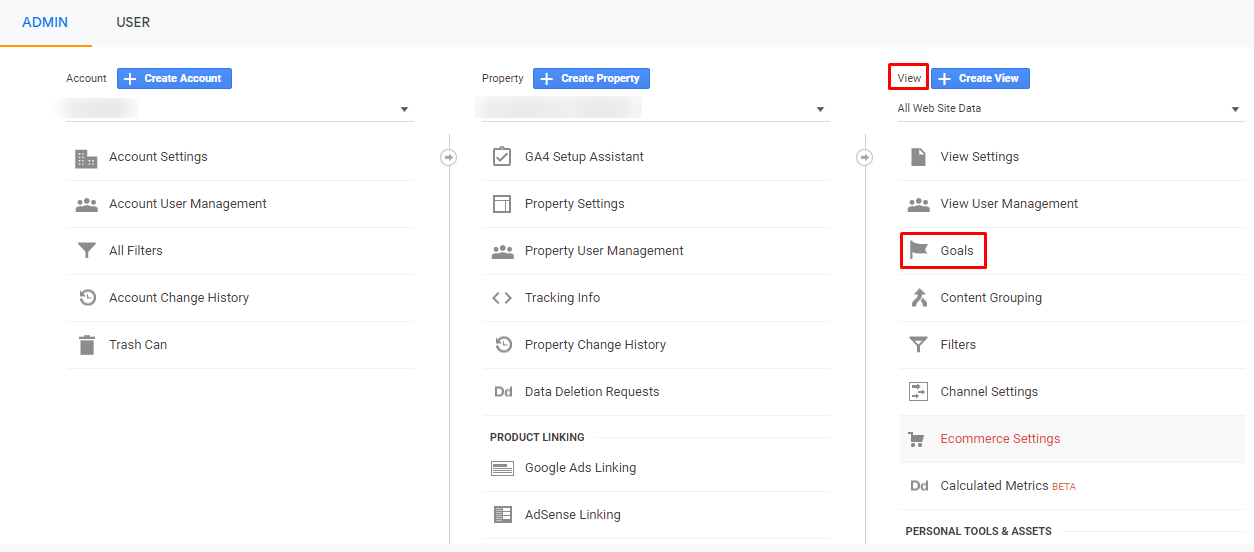
Step 1: Go to your Google Analytics Account. From the left panel, select Admin.
Step 2: Under the View section, select Goals.
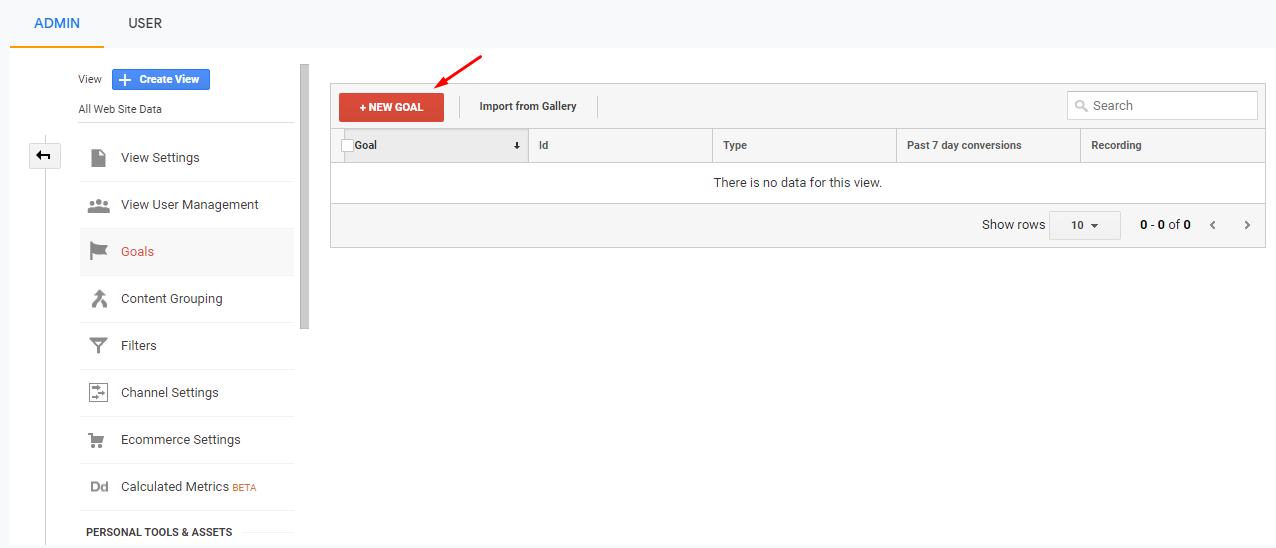
Step 3: In the next screen, select New Goals.
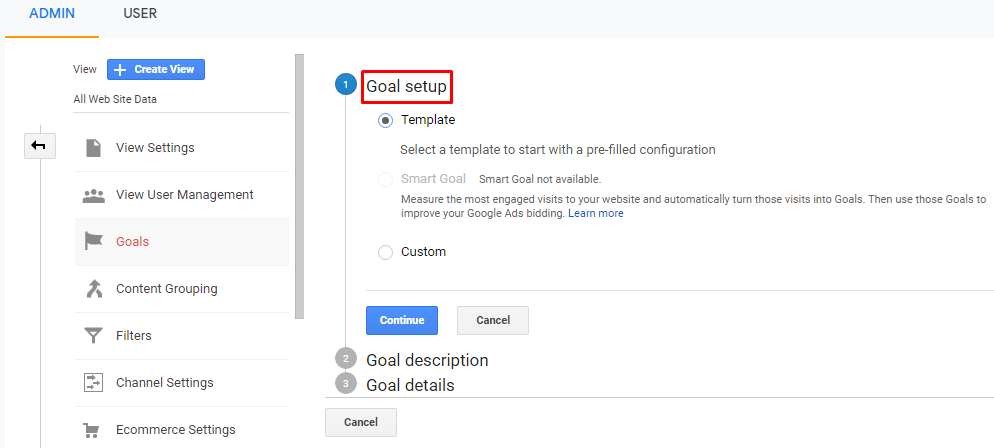
Step 4: The first stage is Goal Setup. Choose from options like Template, Smart Goal, or Custom. Goal templates can help you to get going with the goals. You can even make your custom goal to collect data. Then click Continue.
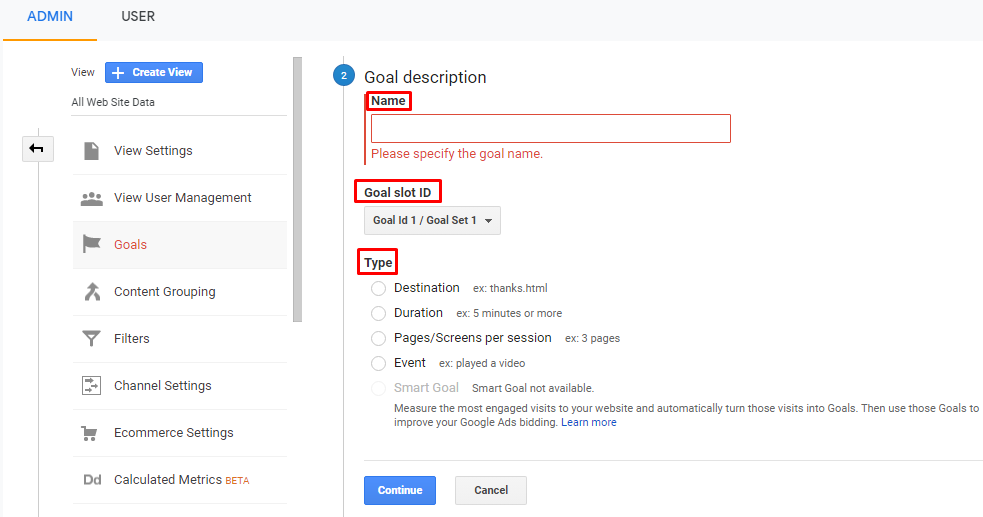
Step 5: Add the Goal Description.
- Add the Name of the Goal.
- Next, select Goal slot ID.
- Set the Goal Type, as on Destination, Duration, Pages/Screens per session, or Event.
- Then click Continue.
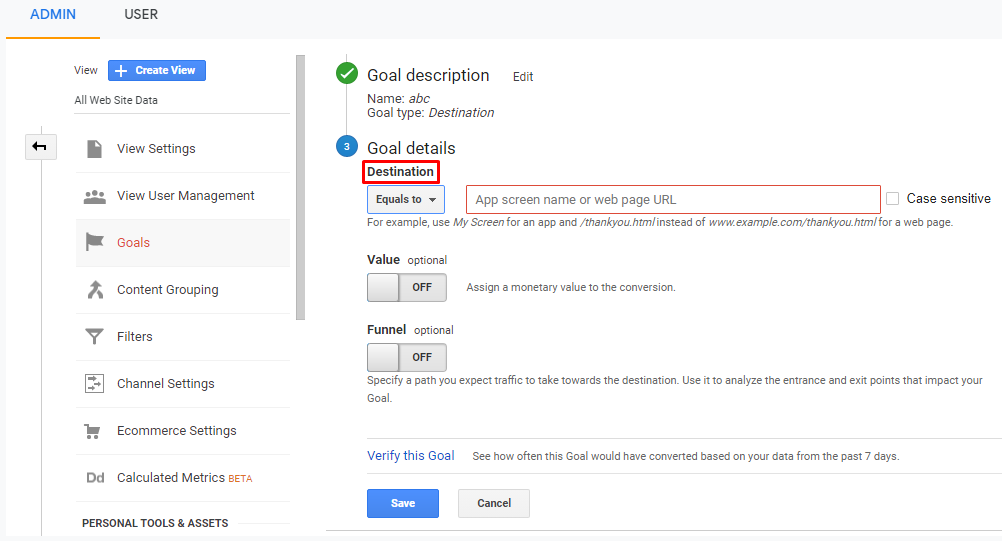
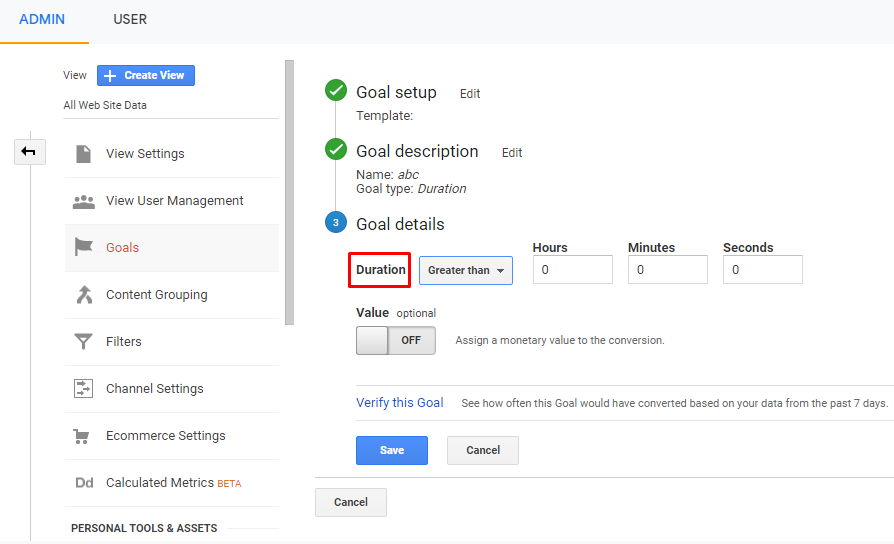
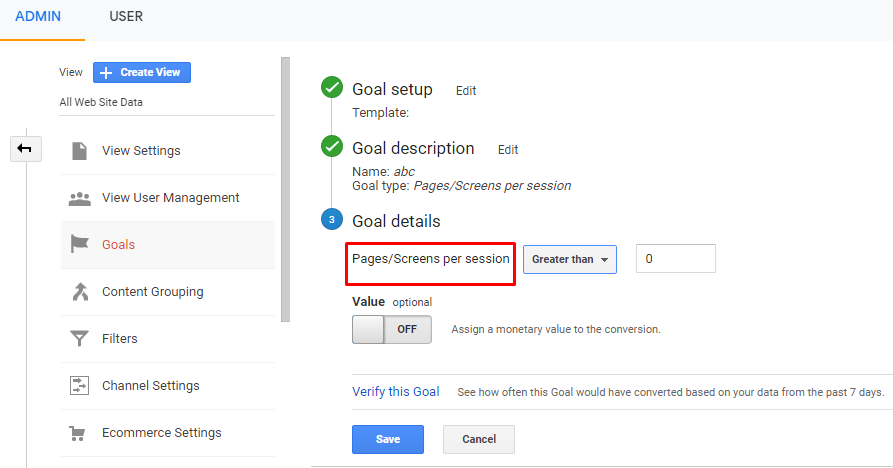
Step 6: Next, you need to add Goal Details based on your selected type of goal.
- Destination Goals: Here you can set the match type as Equals to, Begins with, or Regular Expression. Add URL to match with. The Value and Funnel fields are optional. You can set it as ON or OFF to add the monetary value and analyze the destination respectively.
- Duration Goals: This will define the duration of the Goal. It is ideal for websites having video or educational content. Set the time of the Goal in hours, minutes, and seconds. The Value field is optional.
- Pages/Screens per Session Goals: If you are concerned with ads, it is a relevant Goal type for you. You can monitor the achievement.
- Event Goals: These Goals are based on User Interactions. Set Category, Action, Label, and Value of the Goal.
Step 7: Before saving, Verify your Goal to rectify any mistake with the setup.
Step 8: Lastly, Save your Goal.
Now, you can successfully track your website conversions on the basis of Goals you have set up. You can On or Off your Goal anytime as and when required.
Wrap-up:
Hence, this was all about Google Analytics Goals. If you are not using Google Analytics Goals, you are missing a lot of valuable user data for your business. You just need to map out what’s important for your business. Share the article with your E-commerce friends and stay tuned with us for more information.
Happy Reading










Hey, It was amazing to go through your post, that was really so useful and informative!