Hello Magento Friends ?,
How are you doing? In this blog, I will justify How to Configure WYSIWYG Editor in Magento 2. Also, not miss out on our last published blog stating, How to Configure/Setup Value Added Tax (VAT) in Magento 2. Before looking for the steps, let us know what WYSIWYG Editor is.
What is a WYSIWYG Editor?
WYSIWYG (What You See Is What You Get) editor is used for editing content and determines the exact thing that is visible in the backend, will be visible the same in front-end. It eliminates the necessity to design the page and add text through HTML code which becomes complicated. Instead, you just need to add the things and preview the result that how it will be displayed after the final release.
You can Configure WYSIWYG editor for your Magento 2 store to quicken content editing. Let’s take a look for the steps to be carried out ?
Steps to Configure WYSIWYG Editor in Magento 2:
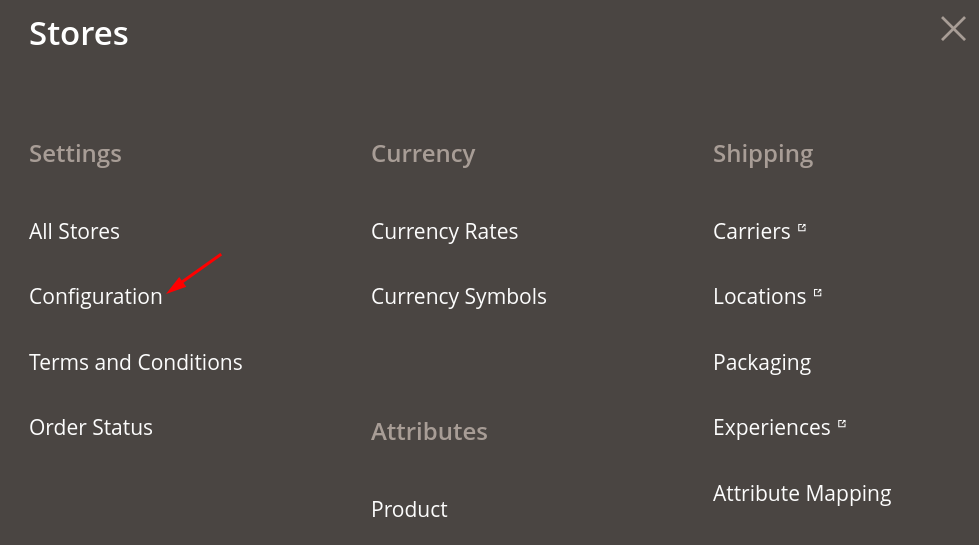
Step 1: Log in to the Admin Account and navigate to Stores > Configuration
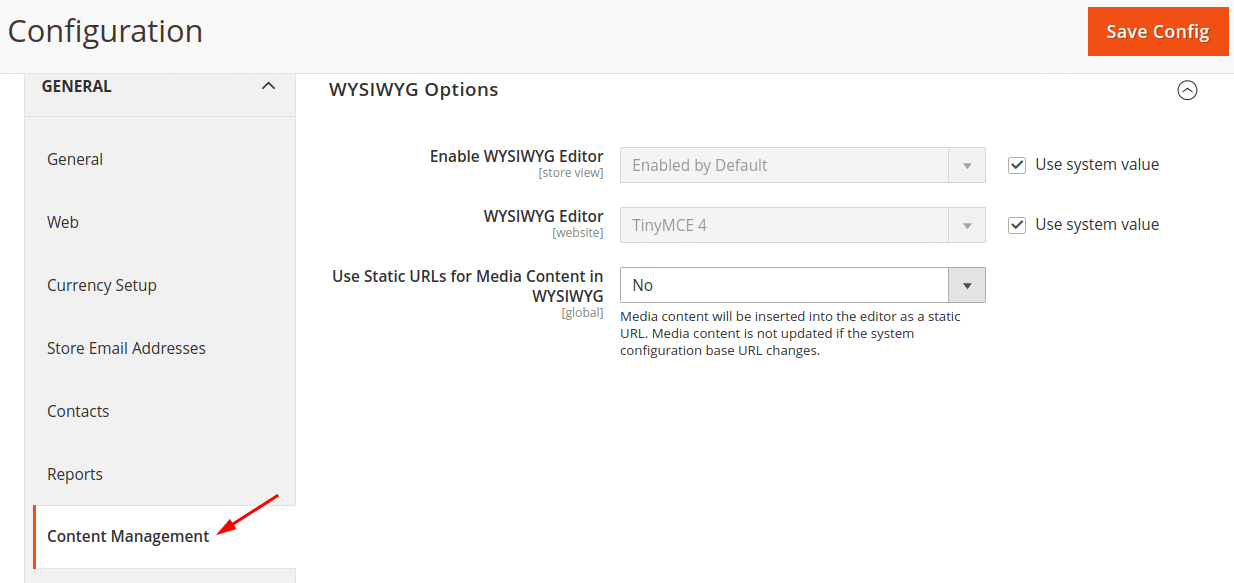
Step 2: From the left panel select General > Content Management
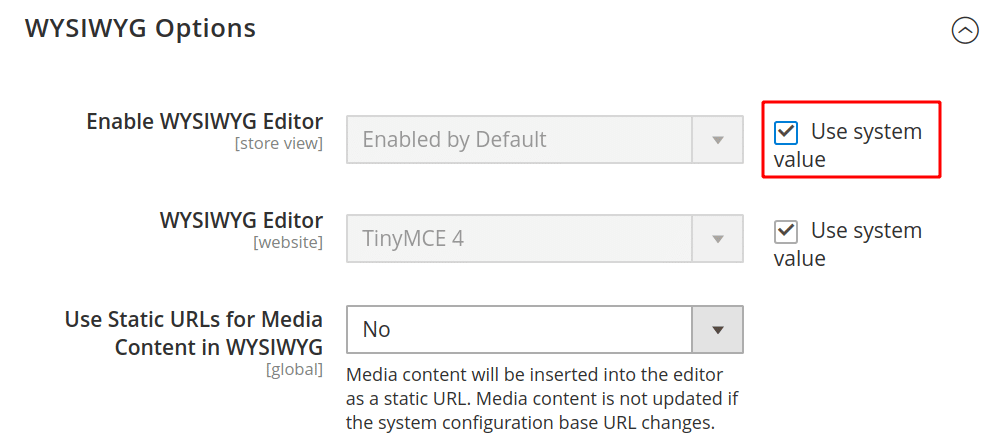
Step 3: To apply the WYSIWYG options for your store, deselect Use system value checkbox beside Enable WYSIWYG Editor field.
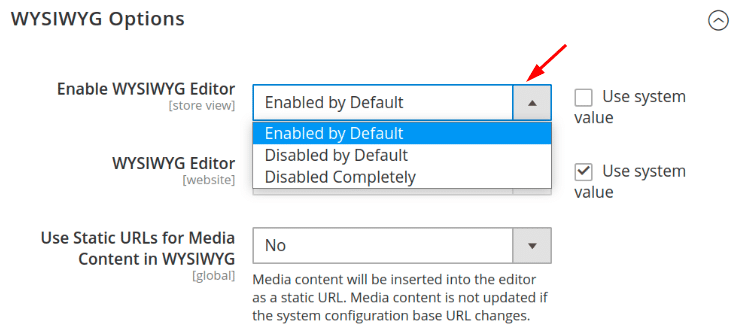
Step 4: Pick one of the options provided: Enabled by Default, Disabled by Default, Disabled Completely
After performing the above steps, click the Save Config button.
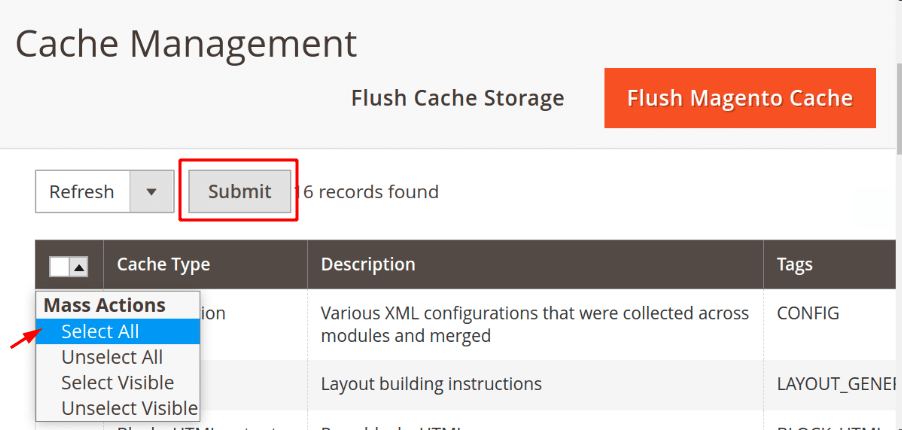
Step 5: At last empty the cache. For doing so, navigate to System < Cache Management. Then Select All and press the Submit button.
Ending Words:
In this manner, you can easily ConfigureWYSIWYG Editor in Magento 2. You can also execute Adding WYSIWYG Editor in Magento 2 Technically with the help of a PHP code. Let me know if you face any hardship by commenting below. I will happy to solve it. Do not forget to share the article with your Magento colleagues. Stay Happy, Stay Connected.
Happy Editing ?


