Are you an owner of a thriving Shopify business that easily gets a dozen or more orders within a week? Or do you run a seasonal business that is at its peak during the season? Then, handling such a huge number of orders single-handedly can be no less than a nightmare. But not with Shopify. Repeating once again, Shopify has everything an online business needs to flourish, and order tagging is one of them.

Hola, Shopify Amigos. ?
We are MageComp Blog here again with another interesting Shopify tutorial for you.
Today in this tutorial, we will look into easing up admins’ work of handling a bunch of orders smoothly, easily and speedily.
What Do Order Tags Mean in Shopify?
Order tags in Shopify is a feature that allows you to attach labels or keywords (tags) to individual orders. These tags serve as a way to categorize, organize, and manage your orders more efficiently. The primary purpose of order tagging is to help you keep track of, sort, and filter orders based on specific criteria or characteristics.
How are Order Tags Helpful to Shopify Admins?
1. Status Tracking
You can use tags to indicate the status of an order, such as “Processing,” “Shipped,” “Cancelled,” “Delivered,” or “On Hold.” This makes it easier to identify the current state of an order quickly.
2. Priority Level
Assign tags like “High Priority,” “Medium Priority,” or “Low Priority” to orders, allowing you to focus on orders that require immediate attention.
3. Customer Segmentation
Tag orders by customer type, such as “Wholesale,” “Retail,” or “VIP,” to differentiate between different customer groups and provide them with specific services or pricing.
4. Product Categories
Categorize orders by product type or category, helping you analyze sales data and manage inventory more effectively.
5. Marketing and Promotions
Tag orders associated with specific marketing campaigns or promotions so you can measure the effectiveness of your marketing efforts.
6. Geographical Factors
Tag orders by the region they are being shipped to or from, which can be useful for tracking shipping costs and logistics.
7. Custom Notes
You can add custom tags or notes to orders to include additional information or reminders related to the order.

Attach Tags to Orders in Shopify
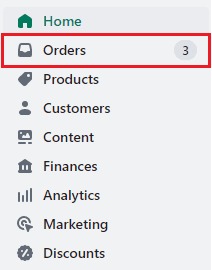
Step 1 –
Log in to your Shopify account and go to
Shopify admin panel → Orders
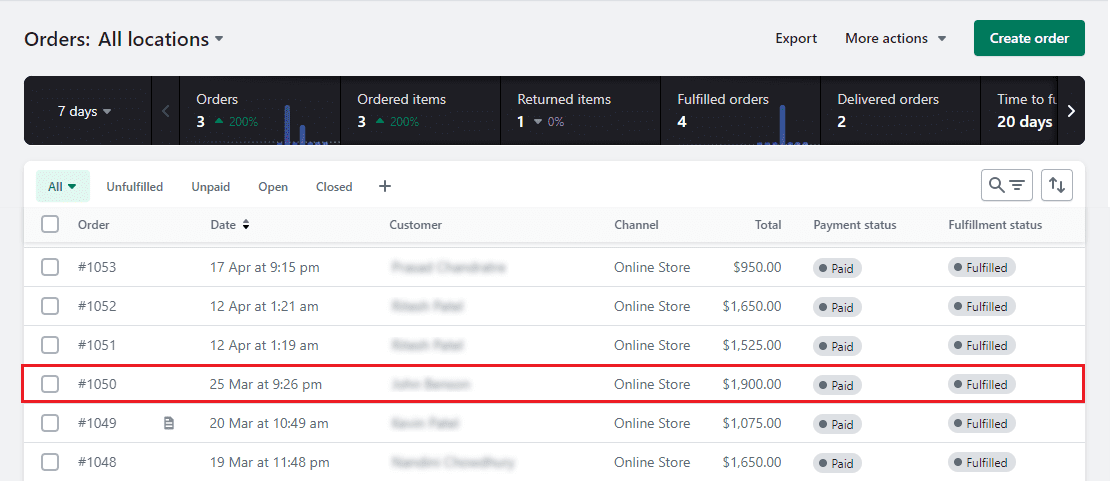
Step 2 –
Select any order from the order section.
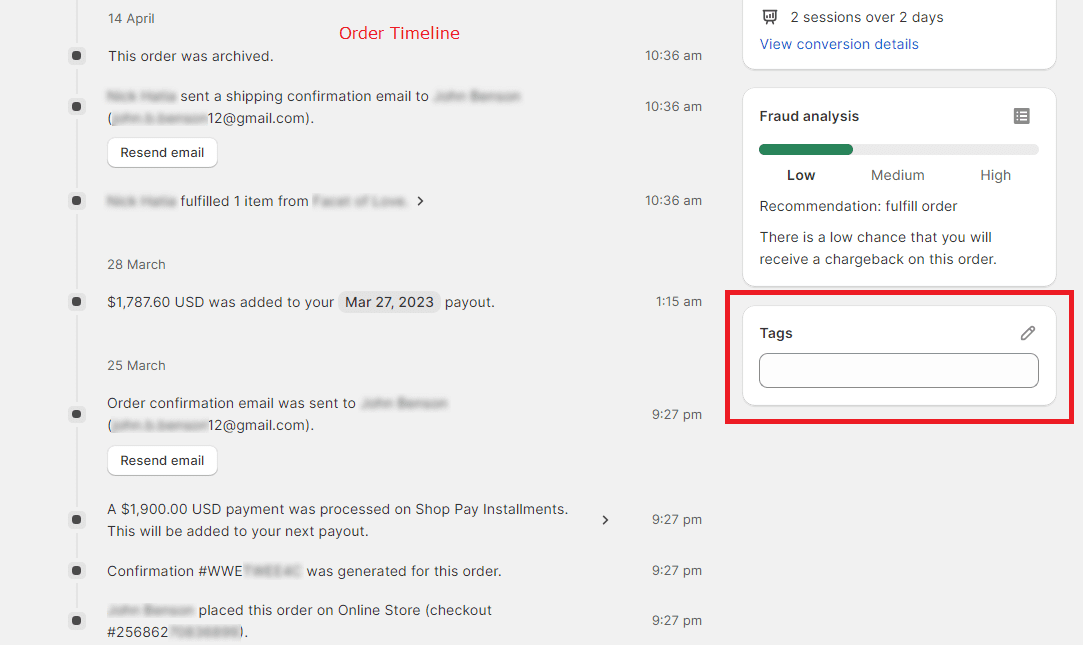
Step 3 –
Scroll down ⏬ the order page till you reach the end.
You will see a small field called Tags beside the Timeline in the right-hand corner.
Tags will be the last field in the right-side column of the order page.
Step 4 –
Add the tag that you want to add to this order.
Suppose you want to promote the product that this customer ordered.
So, you add the tag according to it.
Step 5 –
If you are done with making the changes, Save your changes to apply them to the order.

Final Verdict
Once tags are applied, you can easily filter and search for orders by tags, making it simpler to manage your orders and provide a more personalized experience to your customers.
Tags are highly customizable, and you can use them in a way that best suits your business’s needs and workflow.
If you need more guidance about this topic or the Shopify platform, kindly contact us or text us on our official Facebook page, and get your questions solved.

Happy Shopifying!!!