Hello Magento mates,
Today we will learn to add a call JS on the checkout pages of our Magento 2 stores.
Admins may need to call JavaScript on the Magento 2 checkout page to enhance functionality or customize the user experience. JavaScript can be utilized to add dynamic elements, validate input fields, integrate third-party services, or trigger specific actions based on user interactions.
By injecting JavaScript into the checkout page, admins can tailor the checkout process to align with their business requirements, streamline operations, and improve overall user satisfaction, ultimately leading to higher conversion rates and better customer engagement.
Steps to create call JS on the checkout page
Step 1 –
First, we need to create a “checkout_index_index” file inside the Extension layout folder.
app\code\Vendor\Extension\view\frontend\layout
<?xml version="1.0"?>
<page xmlns:xsi="http://www.w3.org/2001/XMLSchema-instance" xsi:noNamespaceSchemaLocation="urn:magento:framework:View/Layout/etc/page_configuration.xsd">
<referenceBlock name="content">
<block class="Magento\Framework\View\Element\Template" name="script" as="script" template="Vendor_Extension::script.phtml/>
</referenceBlock>
</page>
Step 2 –
After that, we need to create a “script.phtml” file inside the Extension templates folder.
app\code\Vendor\Extension\view\frontend\templates
 <?php $scriptString = <<<script
        require(['jquery'],function($){

	jQuery(document).ready(function(e) {
		 console.log("My Demo Script Call On Checkout.");
	});
});
script;
    ?>
    <?= /* @noEscape */ $secureRenderer->renderTag('script', [], $scriptString, false) ?>
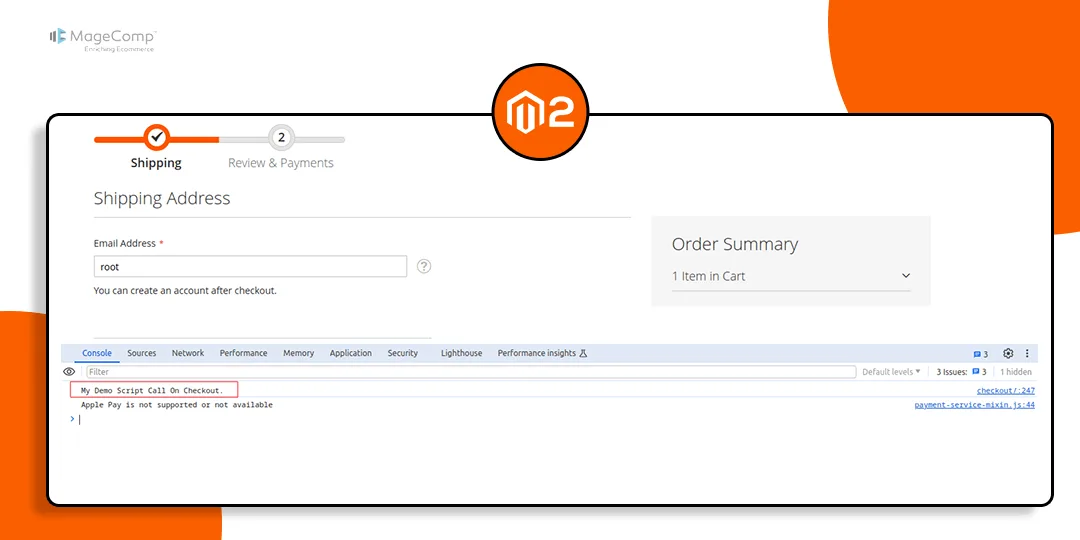
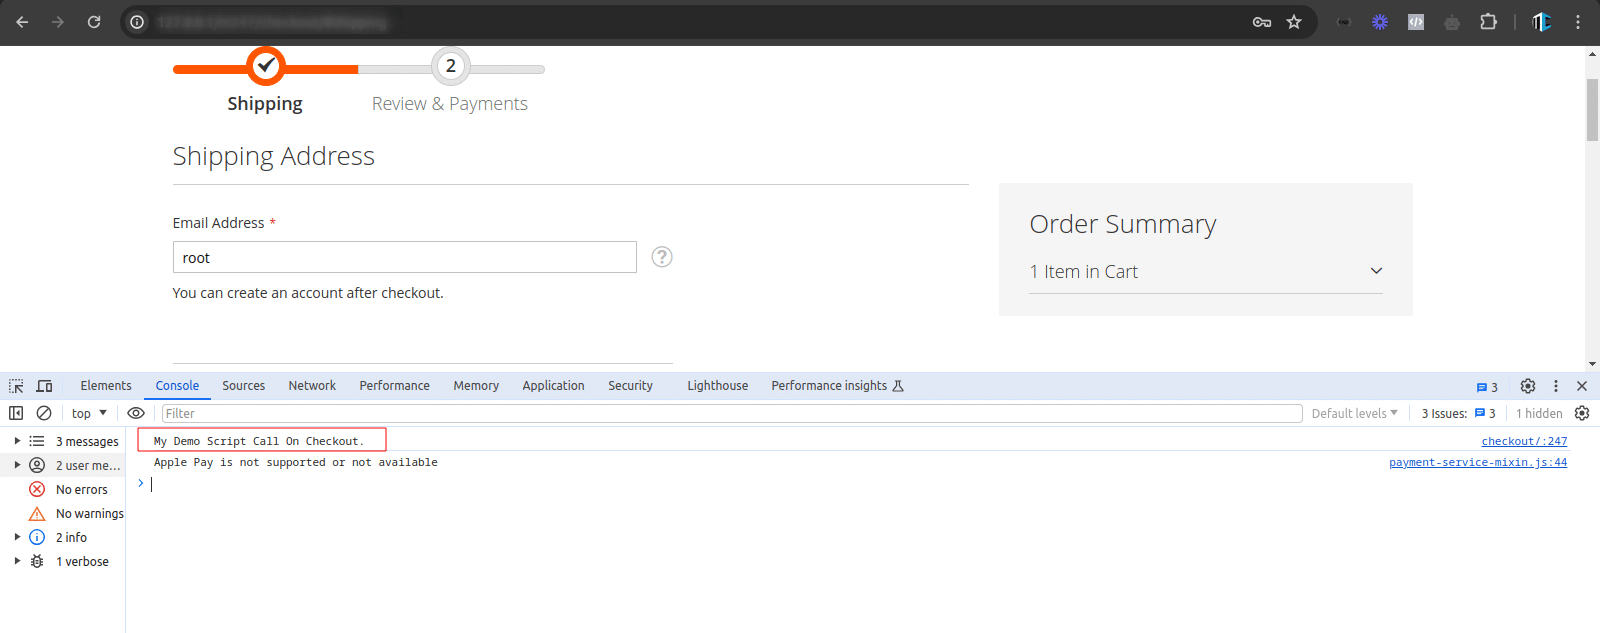
Output ?
Bottom Line
Implementing JavaScript on the Magento 2 checkout page is crucial for administrators to enhance user experience and optimize functionality.
By leveraging JavaScript, admins can customize checkout processes, validate form data in real-time, offer dynamic pricing options, integrate third-party services seamlessly, and provide interactive customer elements, ultimately leading to smoother transactions and higher conversion rates.
With JavaScript’s flexibility, admins can tailor the checkout experience to meet the specific needs of their business and clientele.
I hope this tutorial was helpful to you with your query. If you find any difficulties, kindly contact us or get in touch via our official Facebook page.
Thank you for reading!


