Hello Shopify Friends,
In today’s Shopify tutorial, we will learn about How to Set up Navigation Menu on Shopify.
A navigation menu typically appears at the top or in the header section and serves as a navigational tool for visitors to easily access different pages, collections, products, and other content within your Shopify store. The navigation menu helps organize and structure your store’s content, making it convenient for customers to browse and find what they want.
Shopify allows you to customize and manage your Shopify navigation menu through the Shopify admin panel. You can create multiple menus, set the order of menu items, create dropdown sub-menus, and customize the appearance and styling of your menu to match your store’s branding.
By strategically organizing and designing your navigation menu, you can enhance the user experience, improve navigation flow, and make it easier for customers to find what they need, leading to increased engagement and conversions on your Shopify store.
Steps to Set up Navigation Menu on Shopify:
Step 1: Shopify Admin Account
- Log in to your Shopify Admin.
Step 2: Navigation menu list
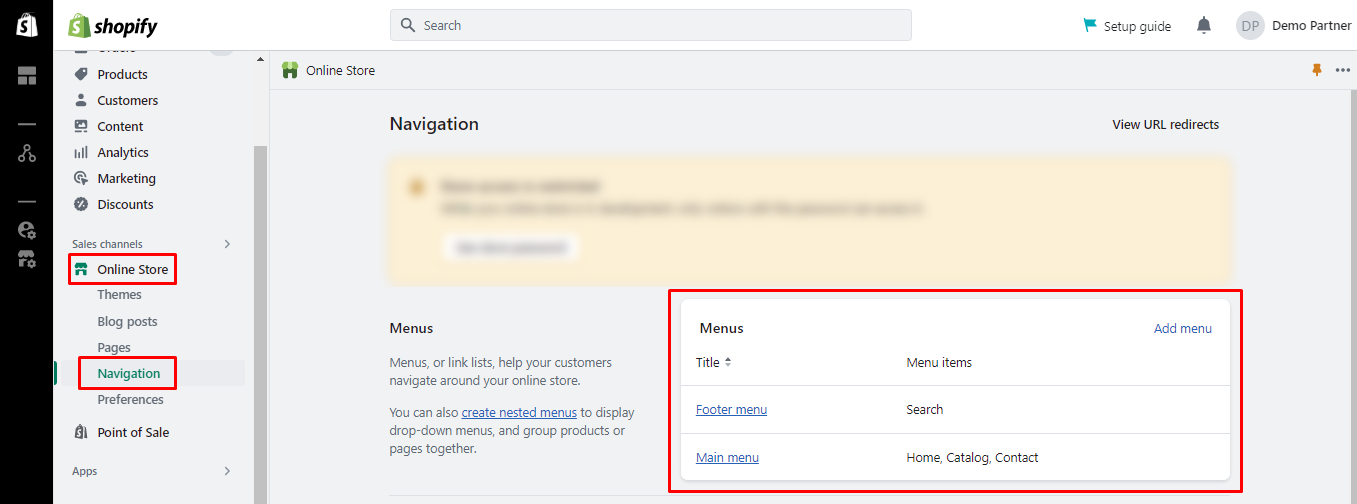
- Click on Online Store in the left-hand sidebar menu.
- In the Online Store section, click on Navigation.
- You will see a list of your existing menus, and you can even add a new menu.
Step 3: Edit the existing menu in Shopify
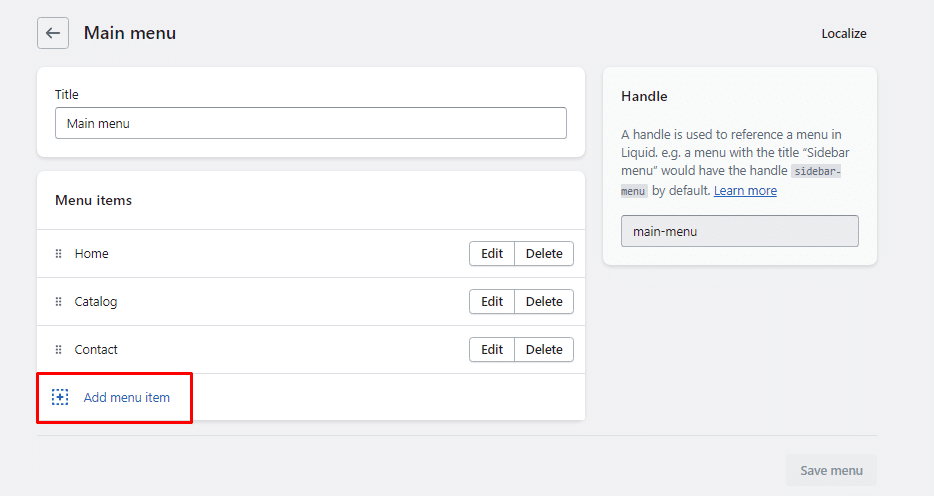
- To edit menu on Shopify that already exists, click on the menu name.
- On the menu editing page, you will see a list of links in the menu. To add a new menu link, click the Add menu item button.
- Enter the name of the menu item in the Name field. This will be the text that appears in the navigation menu.
- In the Link field, enter the URL or choose from the drop-down list to link to a specific page, collection, blog, or other content on your Shopify store.
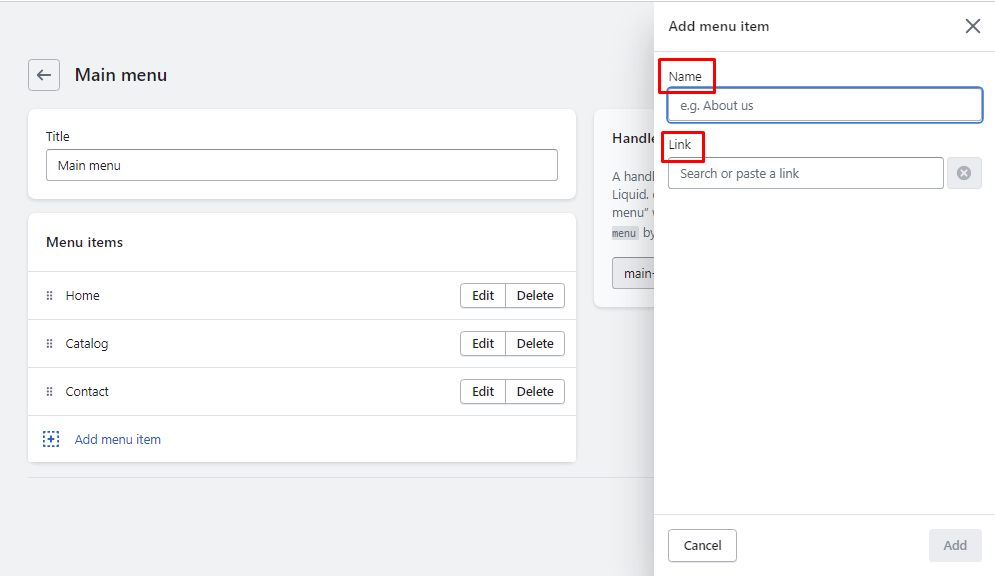
- At last, click on the Add button.
Step 4: Add a new menu in Shopify
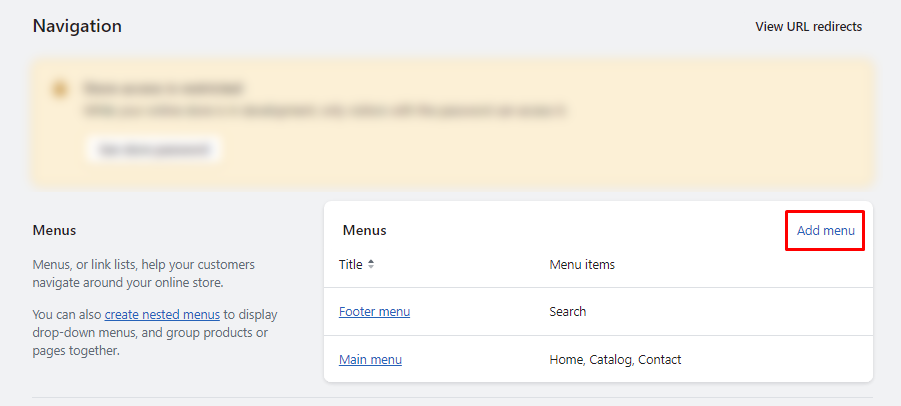
- If you want to create a new menu, click the Add menu button.
- Enter the Title of the sidebar menu.
- To add items to your new Shopify navigation menu, click on the Add menu item button. It will open a menu item detail box.
- Enter the name of the menu item in the Name field. This will be the text that appears in the navigation menu.
- In the Link field, enter the URL or choose from the drop-down list to link to a specific page, collection, blog, or other content on your Shopify store.
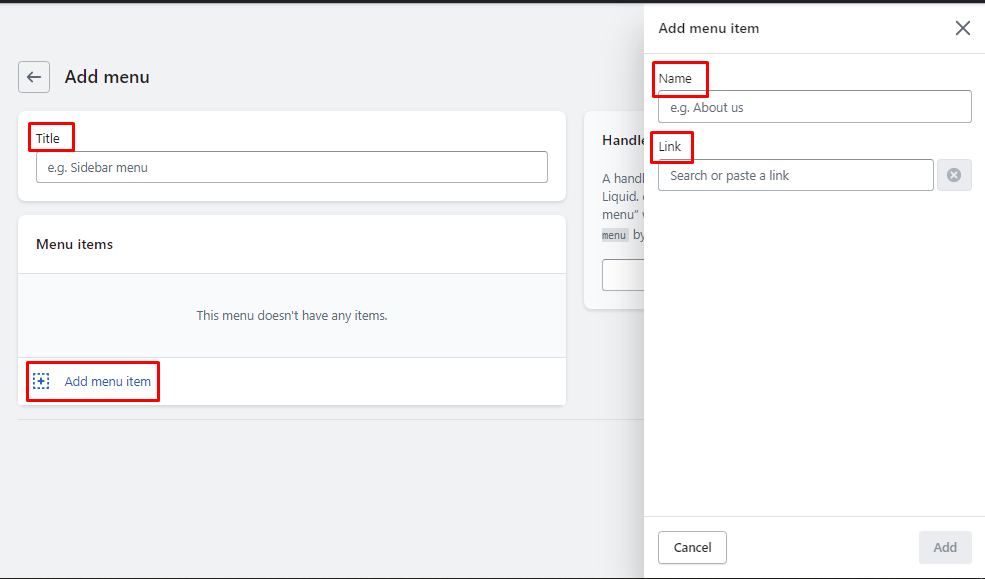
- At last, click on the Add button.
Step 5: Rearrange the menu items
- You can rearrange the order of the menu items by dragging and dropping them.
- To create a nested dropdown menu, drag a menu item slightly to the right underneath another menu item. It will become a sub-menu item.
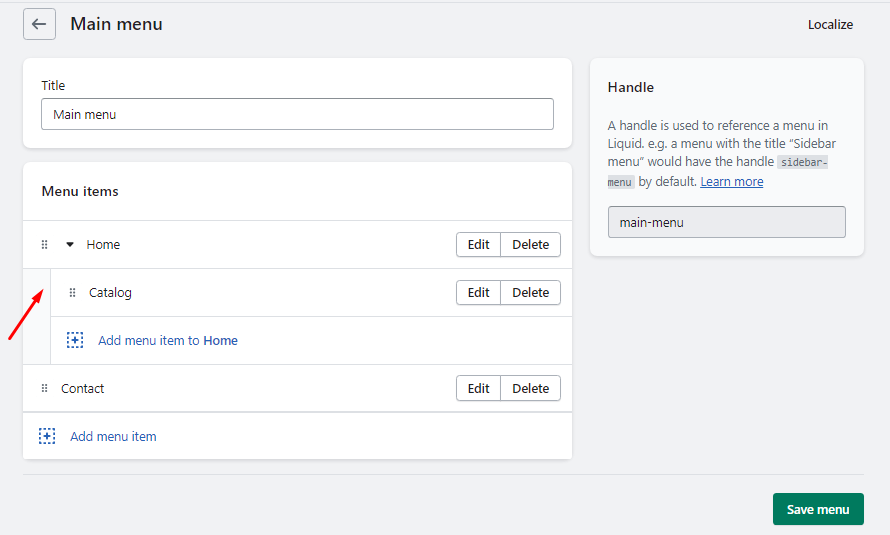
- Once you have finished editing your menu, click on the Save menu button.
Your Shopify navigation menu will now be updated with the changes you made. You can preview your store to see how the menu appears on the front end.
Wrapping Up:
Hope you successfully updated the navigation menu in Shopify. You can also create additional menus and configure them according to your store’s structure and navigation needs with the help of Shopify developers.
Share the tutorial with your friends to help them improve the navigation in Shopify. Stay in touch with us for more such Shopify tutorials.
Happy Reading!
—————————————————————————————————————————————–
Frequently Asked Questions
(1) What is a navigation menu in Shopify?
Answer: A navigation menu in Shopify refers to a set of links or buttons displayed on a website to help visitors navigate through different pages or sections of the online store.
(2) How do I set up a navigation menu in Shopify?
Answer: To set up a navigation menu in Shopify, follow these steps:
- Log in to your Shopify admin panel.
- From the left-hand menu, go to “Online Store” and select “Navigation.”
- Click on the “Add menu” button.
- Enter a name for your menu (e.g., “Main Menu”).
- Click on the “Add menu item” button to add individual links to your menu.
- Enter the name and URL for each menu item.
- To create a dropdown menu, click on the “Add submenu” button below a menu item and repeat the process.
- Drag and drop the menu items to arrange them in the desired order.
- Click “Save menu” when you’re done.
(3) How do I edit or delete menu items in Shopify?
Answer: To edit or delete menu items in Shopify, follow these steps:
- Log in to your Shopify admin panel.
- From the left-hand menu, go to “Online Store” and select “Navigation.”
- Locate the menu containing the item you want to edit or delete.
- Click on the menu to expand its options.
- To edit a menu item, click on the pencil icon next to the item and make the necessary changes. Click “Save menu” when you’re done.
- To delete a menu item, click on the trash can icon next to the item. Confirm the deletion when prompted.
(4) How do I display the navigation menu on my Shopify store?
Answer: By default, Shopify automatically displays the navigation menu on your store’s website. You can customize its appearance and placement using your chosen theme’s settings or by modifying the theme’s code if necessary.
(5) Can I have multiple navigation menus on my Shopify store?
Answer: Yes, Shopify allows you to create and display multiple navigation menus on your store. You can set up additional menus for specific purposes or sections of your website and customize their content and placement accordingly.