Hello Magento Mates,
Welcome to another Magento 2 technical blog.
Today’s technical blog is about resizing images for specific products based on the admin configuration.

Every eCommerce admin is very well aware with the importance of creating an attractive and engaging shopping experience is extremely important and product images are one of the factors that help in crafting amazing shopping journey. However, admins commonly encounter challenges of handling product images and maintaining their quality with appropriate dimensions.
The flexible framework of Magento 2 enables store owners to control image resizing using admin configurations. Within this blog we will examine the procedure of dynamic product image resizing through Magento 2 platform capabilities.

Steps to Resize Image of Specific Products Based on Admin Configuration
Step 1: First, we need to create a route.xml file at the given path
app/code/Vendor/Extension/etc/adminhtml/route.xml
Now add the code as follows:
<?xml version="1.0"?>
<config xmlns:xsi="http://www.w3.org/2001/XMLSchema-instance" xsi:noNamespaceSchemaLocation="urn:magento:framework:App/etc/routes.xsd">
    <router id="admin">
        <route id="imageresize" frontName="imageresize">
            <module name="Vendor_Extension"/>
        </route>
    </router>
</config>
Step 2: After that, create a system.xml file at the given path
app/code/Vendor/Extension/etc/adminhtml/system.xml
Now add the code as follows:
<?xml version="1.0"?>
<config xmlns:xsi="http://www.w3.org/2001/XMLSchema-instance"
xsi:noNamespaceSchemaLocation="urn:magento:module:Magento_Config:etc/system_file.xsd">
<system>
<tab id="your_id" translate="label" sortOrder="100" class="your_class">
<label><![CDATA[]]></label>
</tab>
<section id="imageresize" sortOrder="150" type="text" showInDefault="1" showInWebsite="1" showInStore="1">
<label>Imageresize</label>
<tab>Tab_Name</tab>
<resource>Vendor_Extension::config_imageresize</resource>
<group id="image_resize" translate="label" sortOrder="10" showInDefault="1" showInWebsite="1" showInStore="1">
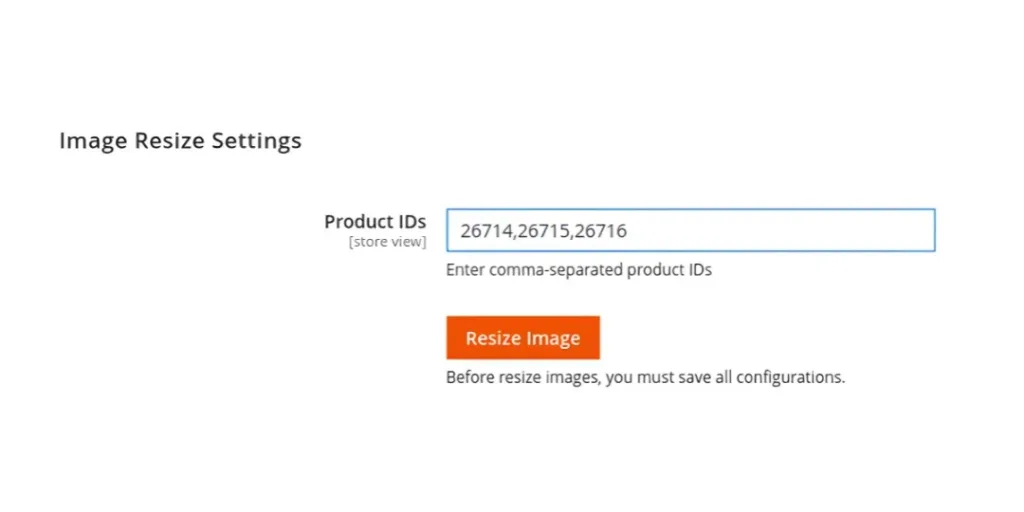
<label>Image Resize Settings</label>
<field id="product_ids" translate="label" type="text" sortOrder="10" showInDefault="1" showInWebsite="1" showInStore="1">
<label>Product IDs</label>
<comment>Enter comma-separated product IDs</comment>
</field>
<field id="image_resize_button" translate="label" type="text" sortOrder="30" showInDefault="1" showInWebsite="1" showInStore="1">
<label></label>
<frontend_model>Vendor\Extension\Block\Adminhtml\System\Config\Imageresize</frontend_model>
<comment>
<![CDATA[Before resize images, you must save all configurations.]]></comment>
</field>
</group>
</section>
</system>
</config>
Step 3: For the third step, create a di.xml file at the given path
app/code/Vendor/Extension/etc/di.xml
Now add the code as follows:
<?xml version="1.0"?>
<config xmlns:xsi="http://www.w3.org/2001/XMLSchema-instance"
    xsi:noNamespaceSchemaLocation="urn:magento:framework:ObjectManager/etc/config.xsd">
    <type name="Magento\Framework\Console\CommandListInterface">
        <arguments>
            <argument name="commands" xsi:type="array">
                <item name="imagesResizeCommand" xsi:type="object">
                    Vendor\Extension\Console\Command\ImagesResizeCommand
                </item>
            </argument>
        </arguments>
    </type>
    <type name="Vendor\Extension\Console\Command\ImagesResizeCommand">
        <arguments>
            <argument name="imageResizeScheduler" xsi:type="object">
                Magento\MediaStorage\Service\ImageResizeScheduler\Proxy
            </argument>
        </arguments>
    </type>
</config>
Step 4: Now, you need to create the Imageresize.php file at the below path
app/code/Vendor/Extension/Block/Adminhtml/System/Config/Imageresize.php
Then add the following code:
<?php

namespace Vendor\Extension\Block\Adminhtml\System\Config;

class Imageresize extends \Magento\Config\Block\System\Config\Form\Field
{
    protected $_template = 'Vendor_Extension::Imageresize.phtml';

    public function __construct(
        \Magento\Backend\Block\Template\Context $context,
        array $data = []
    ) {
        parent::__construct($context, $data);
    }

    public function render(\Magento\Framework\Data\Form\Element\AbstractElement $element)
    {
        $element->unsScope()->unsCanUseWebsiteValue()->unsCanUseDefaultValue();
        return parent::render($element);
    }

    protected function _getElementHtml(\Magento\Framework\Data\Form\Element\AbstractElement $element)
    {
        return $this->_toHtml();
    }

    public function getAjaxUrl()
    {
        return $this->getUrl('imageresize/index/imageresize');
    }

    public function getButtonHtml()
    {
        $button = $this->getLayout()->createBlock(
            'Magento\Backend\Block\Widget\Button'
        )->setData(
            [
                'id' => 'imageresize',
                'label' => __('Resize Image'),
                'class' => 'primary'
            ]
        );

        return $button->toHtml();
    }
}
Step 5: Now, you need to create the ImagesResizeCommand.php file at the below path
app/code/Vendor/Extension/Console/Command/ImagesResizeCommand.php
Then add the following code:
<?php

declare(strict_types=1);

namespace Vendor\Extension\Console\Command;

use Magento\Framework\App\Area;
use Magento\Framework\App\State;
use Magento\Framework\Console\Cli;
use Magento\MediaStorage\Service\ImageResize;
use Magento\MediaStorage\Service\ImageResizeScheduler;

use Symfony\Component\Console\Helper\ProgressBar;
use Symfony\Component\Console\Helper\ProgressBarFactory;
use Symfony\Component\Console\Input\InputInterface;
use Symfony\Component\Console\Output\OutputInterface;
use Symfony\Component\Console\Input\InputOption;
use Symfony\Component\Console\Command\Command;
use Symfony\Component\Console\Input\InputArgument;

use Magento\Framework\DB\Query\Generator;
use Magento\Framework\DB\Select;
use Magento\Framework\App\ResourceConnection;
use Magento\Catalog\Model\ResourceModel\Product\Gallery;
use Magento\Catalog\Model\ResourceModel\Product\Image as ProductImage;

class ImagesResizeCommand extends Command
{
    const ASYNC_RESIZE = 'async';

    private $imageResizeScheduler;

    private $imageResize;

    private $appState;

    private $progressBarFactory;

    private $productImage;

    private $resourceConnection;

    protected $batchQueryGenerator;

    public function __construct(
        State $appState,
        ImageResize $imageResize,
        ImageResizeScheduler $imageResizeScheduler,
        ProgressBarFactory $progressBarFactory,
        ProductImage $productImage,
        Generator $generator,
        ResourceConnection $resourceConnection
    )
    {
        parent::__construct();
        $this->appState = $appState;
        $this->imageResize = $imageResize;
        $this->imageResizeScheduler = $imageResizeScheduler;
        $this->progressBarFactory = $progressBarFactory;
        $this->productImage = $productImage;
        $this->batchQueryGenerator = $generator;
        $this->resourceConnection = $resourceConnection;
    }

    protected function configure()
    {
        $this->setName('test:product:resize')
        ->setDefinition($this->getOptionsList());
        $this->addOption(
            'product_id',
            null,
            InputOption::VALUE_REQUIRED,
            'Add Product ID'
        );
    }

    private function getOptionsList() : array
    {
        return [
            new InputOption(
                self::ASYNC_RESIZE,
                'a',
                InputOption::VALUE_NONE,
                'Resize image in asynchronous mode'
            ),
        ];
    }
    protected function execute(InputInterface $input, OutputInterface $output)
    {
        $product_id = $input->getOption('product_id');
        $result = $this->executeAsync($output, $product_id);
        return $result;
    }

    private function executeAsync(OutputInterface $output, $product_id): int
    {
        try
        {
            $errors = [];
            $this->appState->setAreaCode(Area::AREA_GLOBAL);
            $progress = $this->progressBarFactory->create(
                [
                    'output' => $output,
                    'max' => $this->getCountUsedProductImages($product_id)
                ]
            );
            $progress->setFormat(
                "%current%/%max% [%bar%] %percent:3s%% %elapsed% %memory:6s% \t| <info>%message%</info>"
            );
            if ($output->getVerbosity() !== OutputInterface::VERBOSITY_NORMAL)
            {
                $progress->setOverwrite(false);
            }
            $productImages = $this->getUsedProductImages($product_id);
            foreach ($productImages as $image)
            {
                $result = $this->imageResizeScheduler->schedule($image['filepath']);
                if (!$result)
                {
                    $errors[$image['filepath']] = 'Error image scheduling: ' . $image['filepath'];
                }
                $progress->setMessage($image['filepath']);
                $progress->advance();
            }
        }
        catch (\Exception $e)
        {
            $output->writeln("<error>{$e->getMessage()}</error>");
            return Cli::RETURN_FAILURE;
        }
        $output->write(PHP_EOL);
        if (count($errors))
        {
            $output->writeln("<info>Product images resized with errors:</info>");
            foreach ($errors as $error)
            {
                $output->writeln("<error>{$error}</error>");
            }
        }
        else
        {
            $output->writeln("<info>Product images scheduled successfully</info>");
        }
        return Cli::RETURN_SUCCESS;
    }

    private function getUsedProductImages($product_id): \Generator
    {
        $batchSelectIterator = $this->batchQueryGenerator->generate(
            'value_id',
            $this->getUsedImagesSelect($product_id),
            100,
            \Magento\Framework\DB\Query\BatchIteratorInterface::NON_UNIQUE_FIELD_ITERATOR
        );
        foreach ($batchSelectIterator as $select)
        {
            foreach ($this->resourceConnection->getConnection()->fetchAll($select) as $key => $value)
            {
                yield $key => $value;
            }
        }
    }

    private function getUsedImagesSelect($product_id): Select
    {
        $query = 'images.disabled = 0 AND image_value.disabled = 0 AND image_value.entity_id = '.$product_id;
        return $this->resourceConnection->getConnection()->select()->distinct()
        ->from(
            ['images' => $this->resourceConnection->getTableName(Gallery::GALLERY_TABLE)],
            'value as filepath'
        )->joinInner(
            ['image_value' => $this->resourceConnection->getTableName(Gallery::GALLERY_VALUE_TABLE)],
            'images.value_id = image_value.value_id',
            []
        )->where($query);
    }

    private function getCountUsedProductImages($product_id): int
    {
        $select = $this->getUsedImagesSelect($product_id)
        ->reset('columns')
        ->reset('distinct')
        ->columns(
            new \Zend_Db_Expr('count(distinct value)')
        );
        return (int) $this->resourceConnection->getConnection()->fetchOne($select);
    }
}
Step 6: Now, you need to create the Imageresize.php file at the below path
app/code/Vendor/Extension/Controller/Adminhtml/Index/Imageresize.php
Then add the following code:
<?php

namespace Vendor\Extension\Controller\Adminhtml\Index;

use Magento\Backend\App\Action;
use Magento\Backend\App\Action\Context;
use Symfony\Component\Console\Input\ArrayInput;
use Symfony\Component\Console\Output\BufferedOutput;
use Magento\Framework\App\Config\ScopeConfigInterface;
use Magento\Catalog\Api\ProductRepositoryInterface;
use Magento\Framework\Message\ManagerInterface;

class Imageresize extends Action
{

    const CONFIG_PATH_PRODUCT_IDS = 'imageresize/image_resize/product_ids';

    protected $scopeConfig;

    protected $productRepository;

    protected $messageManager;

    public function __construct(
        Context $context,
        ScopeConfigInterface $scopeConfig,
        ProductRepositoryInterface $productRepository,
        ManagerInterface $messageManager
    ) {
        $this->scopeConfig = $scopeConfig;
        $this->productRepository = $productRepository;
        $this->messageManager = $messageManager;
        parent::__construct($context);
    }

    public function execute()
    {
        try {
            $productIds = $this->scopeConfig->getValue(
                self::CONFIG_PATH_PRODUCT_IDS,
                \Magento\Store\Model\ScopeInterface::SCOPE_STORE
            );
            if (empty($productIds)) {
                $outputMessages[] = "please enter valid product ids";
                $this->getResponse()->representJson(json_encode([
                    'status' => 'success',
                    'message' => $outputMessages,
                    'details' => $outputMessages,
                ]));
            }
            else{
                $productIdsArray = array_filter(array_map('trim', explode(',', $productIds)));
                foreach ($productIdsArray as $product_id) {
                    try {
                        $product = $this->productRepository->getById($product_id);
                    } catch (\Magento\Framework\Exception\NoSuchEntityException $e) {
                        $outputMessages[] = "Product with ID {$product_id} not found.";
                        $this->getResponse()->representJson(json_encode([
                            'status' => 'success',
                            'message' => $outputMessages,
                            'details' => $outputMessages,
                        ]));
                        return false;
                    } catch (\Exception $e) {
                        $this->messageManager->addErrorMessage(__('An error occurred while checking product ID %1: %2', $product_id, $e->getMessage()));
                    }
                }

                $outputMessages = [];
                foreach ($productIdsArray as $productId) {
                    $command = "php bin/magento test:product:resize --product_id={$productId}";
                    chdir(BP);
                    $output = [];
                    $returnVar = 0;
                    exec($command, $output, $returnVar);

                    if ($returnVar !== 0) {
                        $outputMessages[] = "Error resizing product ID {$productId}: Return code {$returnVar}";
                    } else {
                        $outputMessages[] = "Successfully resized product ID {$productId}: " . implode("\n", $output);
                    }
                }
                // Return JSON response
                $this->getResponse()->representJson(json_encode([
                    'status' => 'success',
                    'message' => 'Command executed.',
                    'details' => $outputMessages,
                ]));
            }

        } catch (\Exception $e) {
            $this->getResponse()->representJson(json_encode([
                'status' => 'error',
                'message' => $e->getMessage(),
            ]));
        }
    }

    protected function _isAllowed()
    {
        return true;
    }
}
Step 7: Now, you need to create the Imageresize.phtml file at the below path
app/code/Vendor/Extension/view/adminhtml/templates/Imageresize.phtml
Then add the following code:
<script>
    require([
        'jquery',
        'prototype',
    ], function ($) {
        function function_name() {
            new Ajax.Request('<?php echo $block->getAjaxUrl(); ?>', {
                loaderArea: false,
                asynchronous: true,
                onCreate: function() {
                    $('body').loader('show');
                },
                onSuccess: function (response) {
                    $('body').loader('hide');
                    $(".response_message").addClass('successMessage');
                    setTimeout(function () {
                        $(".response_message").text("");
                    }, 5000);
                    if (response.responseJSON.status == true) {
                       $(".response_message").text(response.responseJSON.message);
                       $(".response_message").addClass('successMessage');
                       $('.response_message').removeClass('failureMessage');
                    }
                    else {
                        $(".response_message").text(response.responseJSON.message);
                        $('.response_message').removeClass('successMessage');
                        $(".response_message").addClass('failureMessage');
                    }
                }
            });
        }

        $('#imageresize').click(function () {
            function_name();
        });
    });
</script>

<?php echo $block->getButtonHtml() ?>
<div class="response_message" style="float: left;width: 100%"></div>
<style>.successMessage{color:green;} .failureMessage{color:red;} </style>
Output:
Final Say
Resizing product images based on admin configurations in Magento 2 is a highly customizable way to improve the visual appeal and performance of your online store. By following the steps outlined in this guide, you can dynamically resize images and create a better user experience for your customers.
Implement these steps in your Magento 2 store today and ensure your product visuals are optimized for success!

If you find any difficulties while performing these steps, feel free to contact us and get expert help.
Thank you for reading!