Howdy Magento people,
Last time we have seen the difference between Allowed Countries, EU Countries, and Top Destinations in Magento.
So let’s continue backend configurations and move to the next locale options available in Magento 2. There are so many Locale options available let’s start one by one.
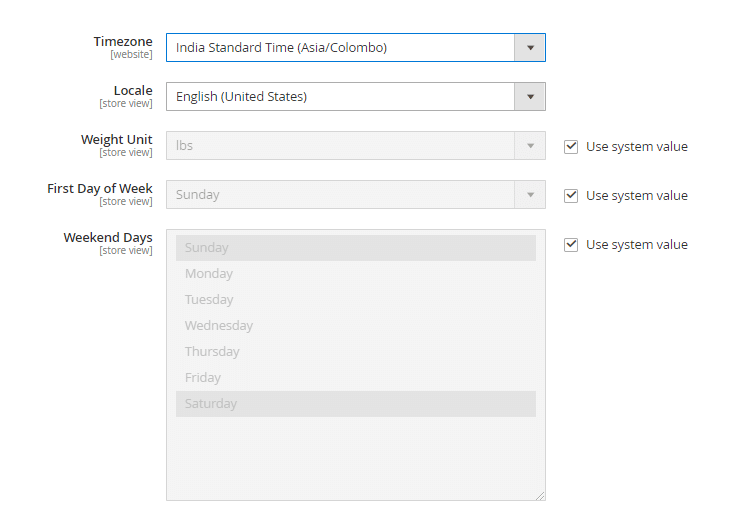
Timezone:
Using this timezone configuration, you can set your local time in your Magento 2 store and same the timezone will be used everywhere in Magento details. Like, when order is placed, invoice generation date, shipment dare, registration time, the product created date, product update, and so many other places. If you Magento timezone will not match your local time, it will be difficult for you to match your data.

Locale:
The locale is the language that you want to use in the frontend. You can set Locale language for globally, website vise as well as store view vise. This option is very useful when you want to set country-specific site using the local language.
By default, Magento comes with US English language, so it will be selected by default. If you have chosen a different language, you have to manually download and install the respective language pack in your Magento 2 store. Use below link to download the language pack.
Download the specific language pack and install it.
Weight Unit:
Weight Unit is generally used for product weight that you wants to use inside your store.
This weight unit is vary depending on your logistic partner and country. You need to add your preferred product weight in lbs or kgs. By default, it’s in lbs but you can change it if you want. If you don’t
Forgetting this can create an issue when you have order and you need to ship. So please take care of this before you start selling on your website.
First Day of Week:
You can select the first day of the week here. Now you would be thinking about why this option? Generally, the week starts from Monday itself. But For your information, in the UAE, they start a week from Sunday.
Weekend Days:
Same like above you need to select the weekend days here, the reason and example is same, UAE has weekend days Friday and Saturday and they consider Sunday as their First day of the week.
Now why these settings are important to configure,
Magento sends the Email notifications, where it has the general information and sentence about the support. Email templates use variables, which takes value from this configuration, so it’s very important to configure these settings in admin so that your Email templates, don’t go with wrong information.
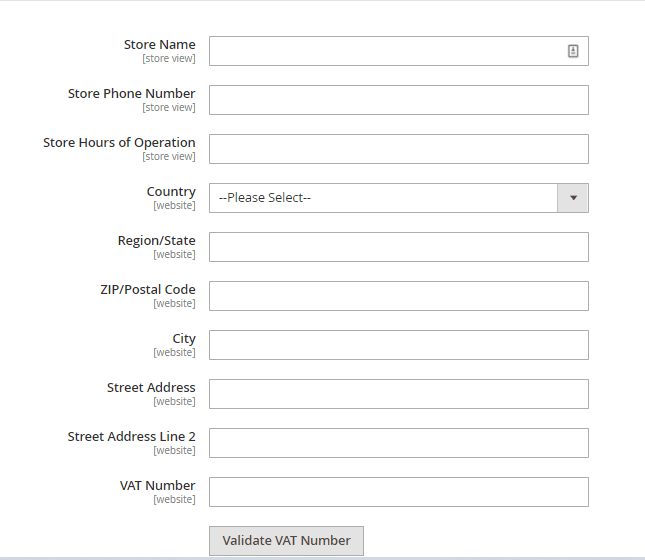
Store Information:
There are various fields here for configuring the store’s information. All this information is used again across multiple email templates.
Store name: Enter your Company/website name
Store Phone number: Any customer care number, if a customer can reach you for support.
Store hours of operation: Open time of your business
Country, Region/state, Zip, City, Street Address, Street Address Line 2, VAT number: All general information about your store address and VAT number. You can even validate your VAT number by clicking on the button there to make sure it is correct.

Make sure that you configure all the details of your Magento store, as this information is being used somewhere in the Emails and Magento in the form of variables for taking the details.
Single store mode is our next topic so stay tune with me.
That’s it. Asking the Certified Magento Expert or Choosing the right Magento Development Company will always help you in a pocket-friendly way.
Stay tuned for more such Magento Tutorials.


