With privacy and security becoming top priorities for users, Sign in with Apple has emerged as a trusted authentication method—especially for iOS apps. If your React Native app supports social login, Apple Sign-In is no longer optional. If an application has login options through other platforms (e.g., Facebook, Google), it must also support Sign In with Apple.

This guide will show you how to add Sign In with Apple into a React Native application, including how to set up the necessary accounts and create an effective example of the Sign In process.
Steps to Implement Apple Sign-In in a React Native App
Step 1: Configure Your Apple Developer Account
Enable “Sign In with Apple” for your App ID:
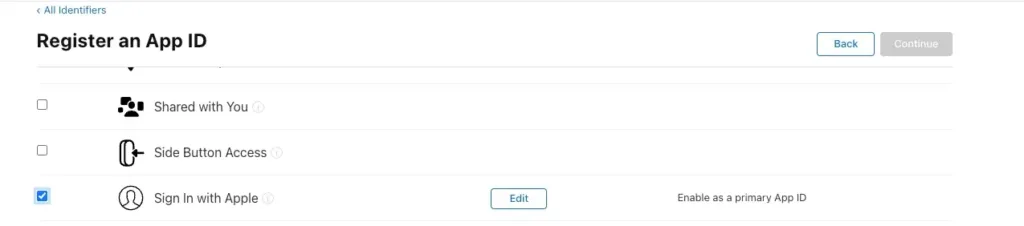
- In the Apple Developer portal, navigate to Certificates, Identifiers & Profiles > Identifiers.
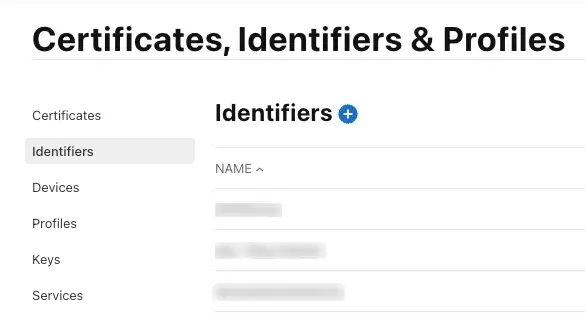
- Select App ID
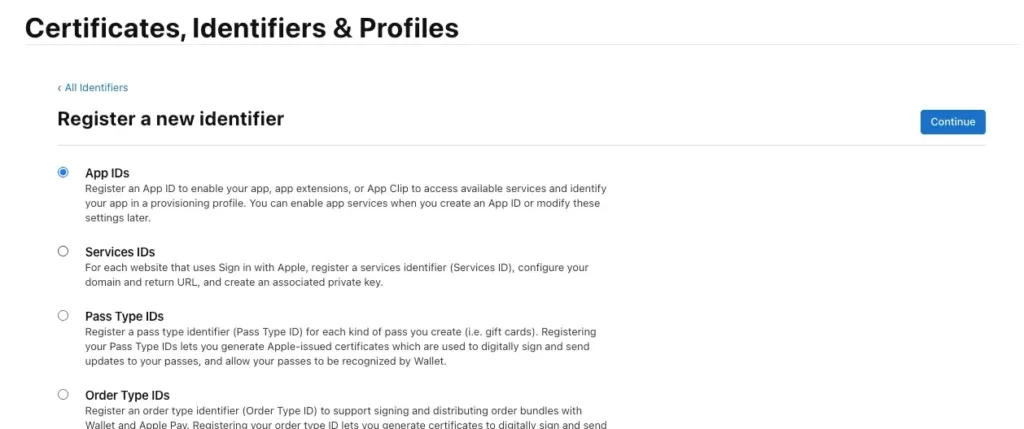
- Check the box for Sign In with Apple, then follow the prompts to save.
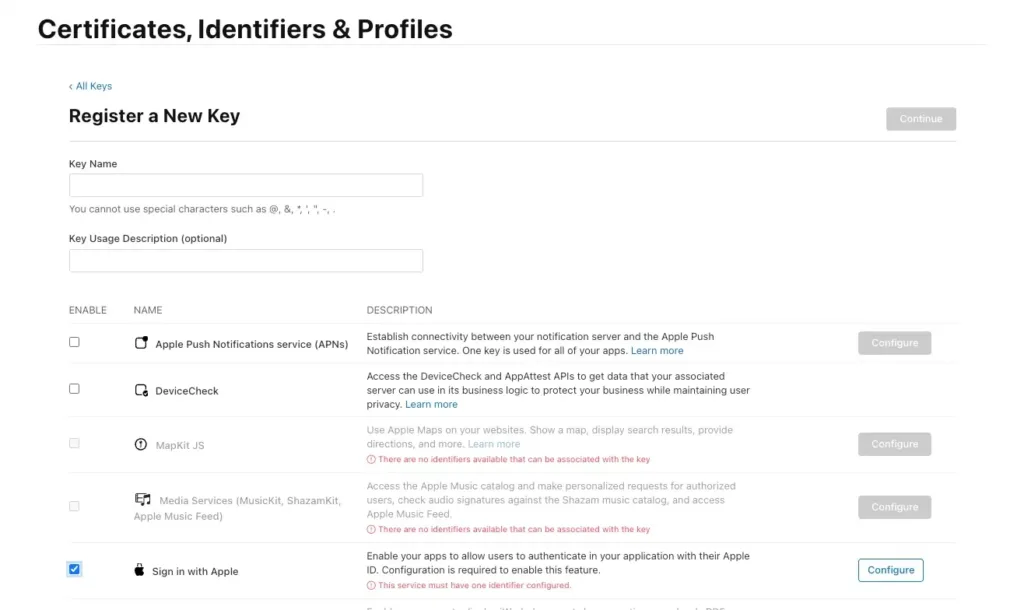
Create a Key:
- To create a key, navigate to the “Keys” section of your Apple Developer account and create a new key.
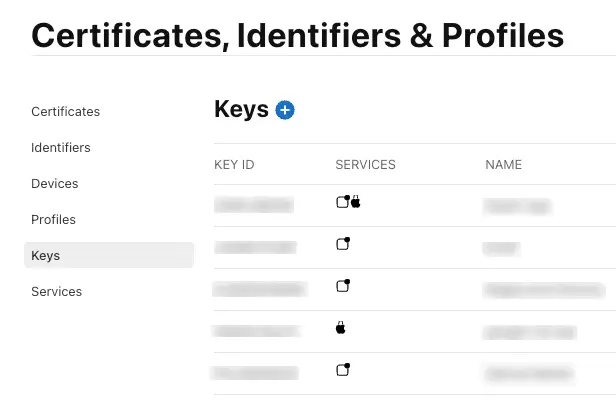
- Enable Sign In with Apple, configure it with your Primary App ID, and download the generated .p8 file. Note the Key ID and your Team ID (found in the top right of your account dashboard).
Step 2: Install Necessary Libraries
Using yarn
yarn add @invertase/react-native-apple-authentication

cd ios && pod install
Using npm
npm install @invertase/react-native-apple-authentication

cd ios && pod install
Step 3. Configure Xcode
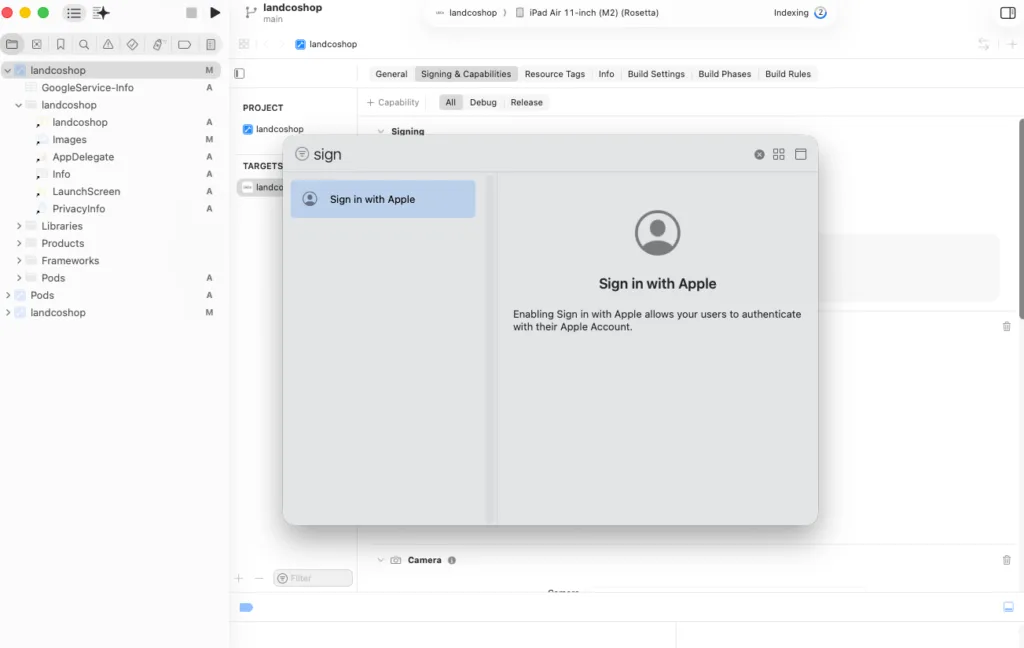
Open your React Native project in Xcode by navigating to the “ios” folder and double-clicking on the .xcworkspace file. In Xcode, go to the “Signing & Capabilities” tab for your project target, and under “Signing”, select your team and the “Sign In with Apple” capability.
Example:
import React from 'react';
import { View } from 'react-native';
import appleAuth from '@invertase/react-native-apple-authentication';
const App = () => {
  const onAppleButtonPress = async () => {
    try {
      const appleAuthRequestResponse = await appleAuth.performRequest({
        requestedOperation: appleAuth.Operation.LOGIN,
        requestedScopes: [
          appleAuth.Scope.EMAIL,
          appleAuth.Scope.FULL_NAME,
        ],
      });
      const {
        user,
        email,
        fullName,
        identityToken,
        authorizationCode,
      } = appleAuthRequestResponse;
      console.log('Apple User:', user);
      console.log('Email:', email);
      console.log('Full Name:', fullName);
      console.log('Identity Token:', identityToken);
} catch (error) {
      console.log('Apple Login Error:', error);
    }
  };
  return (
    <View>
      <appleAuth.AppleButton
        buttonStyle={appleAuth.AppleButton.Style.BLACK}
        buttonType={appleAuth.AppleButton.Type.SIGN_IN}
        style={{ width: '100%', height: 45 }}
        onPress={onAppleButtonPress}
      />
    </View>
  );
};
export default App;
Conclusion:
By following Apple’s setup and following the best practices for implementing Sign In with Apple in your React Native application you will have a working version that complies with Apple’s expectations for privacy and security, that increases consumer trust and conversion rates, as well as an effortless user authentication experience.
If the target audience of your application is iOS users, then adding the Apple Sign-In feature is essential when you are providing social login features in your application.
FAQ
1. Is Apple Sign-In mandatory for iOS apps?
Yes. If your app offers third-party social login options, Apple requires you to include Sign in with Apple.
2. Does Apple Sign-In work on Android?
No. Apple Sign-In using @invertase/react-native-apple-authentication works only on iOS.
3. Is Apple Sign-In secure?
Yes. Apple uses industry-standard OAuth 2.0 and JWT-based authentication with strong privacy controls.