Creating custom post types (CPTs) using WordPress allows you to create or manage content types other than the default post and page. By using CPTs, your website will be better organized and scalable, whether you create a portfolio, testimonials, events, or products. Metaboxes will allow you to store additional information for each item in the CPT you create. These fields enable admins to store detailed information and then display it in a user-friendly manner.
In this tutorial, I will show you how to create a custom post type and then add custom metaboxes to store additional information.
What This Example Does:
In this example, we’ll:
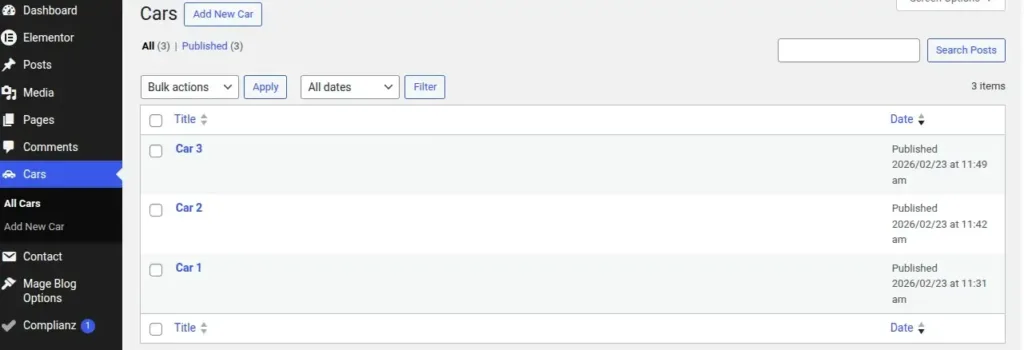
- Create a Custom Post Type (CPT) called Cars
- Create Custom Metaboxes for Cars (Brand, Price, Mileage, Fuel Type)
- Store the metabox values securely using nonce and sanitization.
- Create a shortcode to display Cars on the frontend
This tutorial covers the following:
- register_post_type()
- add_meta_box()
- save_post
- get_post_meta()
- Shortcodes
Steps to Create Custom Post Types with Meta Boxes in WordPress:
Step 1: Registering Custom Post Type (Cars)
function create_cars_post_type()
{
    register_post_type('cars', array(
        'labels' => array(
            'name' => 'Cars',
            'singular_name' => 'Car',
            'add_new' => 'Add New Car',
            'add_new_item' => 'Add New Car',
            'edit_item' => 'Edit Car',
            'all_items' => 'All Cars'
        ),
        'public' => true,
        'has_archive' => true,
        'menu_icon' => 'dashicons-car',
        'supports' => array('title', 'editor', 'thumbnail')
    ));
}
add_action('init', 'create_cars_post_type');
Here, register_post_type() – Creates the CPT
- ‘cars’ – CPT slug used for queries and URLs
- labels – Text to be displayed in the WordPress admin
- public => true – Visible to end- users
- has_archive => true – Allows for archive pages
- menu_icon – Show the icon in the WordPress admin menu
- supports – Enables title, content editor, featured image
- add_action(‘init’, …) – Runs when WordPress initializes
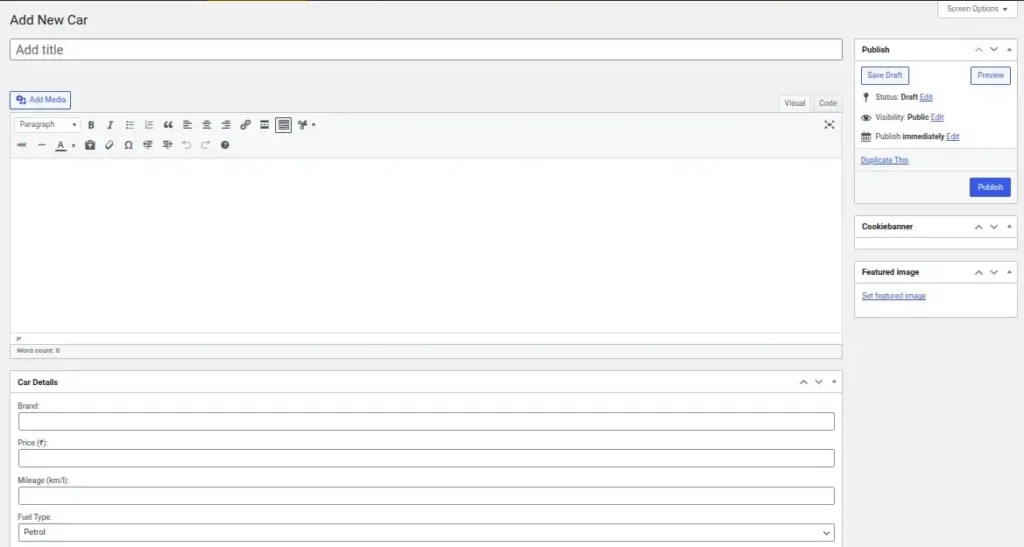
Step 2: Add Meta Box to Cars Editor
function add_car_meta_boxes()
	{
    		add_meta_box(
       			 'car_details',
        			'Car Details',
        			'car_details_callback',
        			'cars',
        			'normal',
        			'high'
    		);
	}
	add_action('add_meta_boxes', 'add_car_meta_boxes');
Here, add_meta_box() – Registers a custom box
- ‘car_details’ – Unique Identifier
- ‘Car Details’ – Title to be displayed in the WordPress admin
- ‘car_details_callback’ – Function used to render fields
- ‘cars’ – Target CPT
- ‘normal’ – Main content area
- ‘high’ – High display priority
Step 3: Create Meta Box Fields (Brand, Price, etc.)
function car_details_callback($post)
{
    wp_nonce_field('save_car_details', 'car_nonce');

    $brand   = get_post_meta($post->ID, '_car_brand', true);
    $price   = get_post_meta($post->ID, '_car_price', true);
    $mileage = get_post_meta($post->ID, '_car_mileage', true);
    $fuel    = get_post_meta($post->ID, '_car_fuel', true);
?>
    <p>
        <label>Brand:</label><br>
        <input type="text" name="car_brand" value="<?php echo esc_attr($brand); ?>" style="width:100%;">
    </p>

    <p>
        <label>Price (₹):</label><br>
        <input type="number" name="car_price" value="<?php echo esc_attr($price); ?>" style="width:100%;">
    </p>

    <p>
        <label>Mileage (km/l):</label><br>
        <input type="text" name="car_mileage" value="<?php echo esc_attr($mileage); ?>" style="width:100%;">
    </p>

    <p>
        <label>Fuel Type:</label><br>
        <select name="car_fuel" style="width:100%;">
            <option value="Petrol" <?php selected($fuel, 'Petrol'); ?>>Petrol</option>
            <option value="Diesel" <?php selected($fuel, 'Diesel'); ?>>Diesel</option>
            <option value="Electric" <?php selected($fuel, 'Electric'); ?>>Electric</option>
        </select>
    </p>
<?php
}
Here,
- wp_nonce_field() – Security token to prevent unauthorized saving
- get_post_meta() – Retrieves saved values
- esc_attr() – Escapes data for safe output
- selected() – Marks selected dropdown option
- Fields collect brand, price, mileage, fuel type
Step 4: Save Meta Box Data Securely
function save_car_meta_data($post_id)
{
    if (!isset($_POST['car_nonce']) || !wp_verify_nonce($_POST['car_nonce'], 'save_car_details')) {
        return;
    }

    if (defined('DOING_AUTOSAVE') && DOING_AUTOSAVE) {
        return;
    }

    if (isset($_POST['car_brand'])) {
        update_post_meta($post_id, '_car_brand', sanitize_text_field($_POST['car_brand']));
    }

    if (isset($_POST['car_price'])) {
        update_post_meta($post_id, '_car_price', sanitize_text_field($_POST['car_price']));
    }

    if (isset($_POST['car_mileage'])) {
        update_post_meta($post_id, '_car_mileage', sanitize_text_field($_POST['car_mileage']));
    }

    if (isset($_POST['car_fuel'])) {
        update_post_meta($post_id, '_car_fuel', sanitize_text_field($_POST['car_fuel']));
    }
}
add_action('save_post', 'save_car_meta_data');
Step 5: Display Cars on Frontend
function display_cars_frontend()
{
    $args = array(
        'post_type' => 'cars',
        'posts_per_page' => -1
    );

    $cars = new WP_Query($args);

    if ($cars->have_posts()) {

        $output = '<div class="car-grid">';

        while ($cars->have_posts()) {
            $cars->the_post();

            $brand   = get_post_meta(get_the_ID(), '_car_brand', true);
            $price   = get_post_meta(get_the_ID(), '_car_price', true);
            $mileage = get_post_meta(get_the_ID(), '_car_mileage', true);
            $fuel    = get_post_meta(get_the_ID(), '_car_fuel', true);

            $output .= '<div class="car-card">';

            if (has_post_thumbnail()) {
                $output .= get_the_post_thumbnail(get_the_ID(), 'medium');
            }

            $output .= '<div class="car-card-content">';
            $output .= '<h2>' . get_the_title() . '</h2>';
            $output .= '<p><strong>Brand:</strong> ' . esc_html($brand) . '</p>';
            $output .= '<p><strong>Price:</strong> ₹' . esc_html($price) . '</p>';
            $output .= '<p><strong>Mileage:</strong> ' . esc_html($mileage) . ' km/l</p>';
            $output .= '<p><strong>Fuel:</strong> ' . esc_html($fuel) . '</p>';
            $output .= '<div>' . get_the_excerpt() . '</div>';
            $output .= '</div></div>';
        }

        $output .= '</div>';

        wp_reset_postdata();

        return $output;

    } else {
        return '<p>No Cars Found</p>';
    }
}

add_shortcode('cars_list', 'display_cars_frontend');
Step 6: Use shortcode
[cars_list]You can use this short code to list the custom post types throughout the whole website system using any WordPress page.
Real-Life Use Cases:
Here are some examples of Real-World applications of Custom Post Types via a REST API:
- Products
- Real-Estate listings
- Team/Staff profiles
- Events management
- Portfolio project
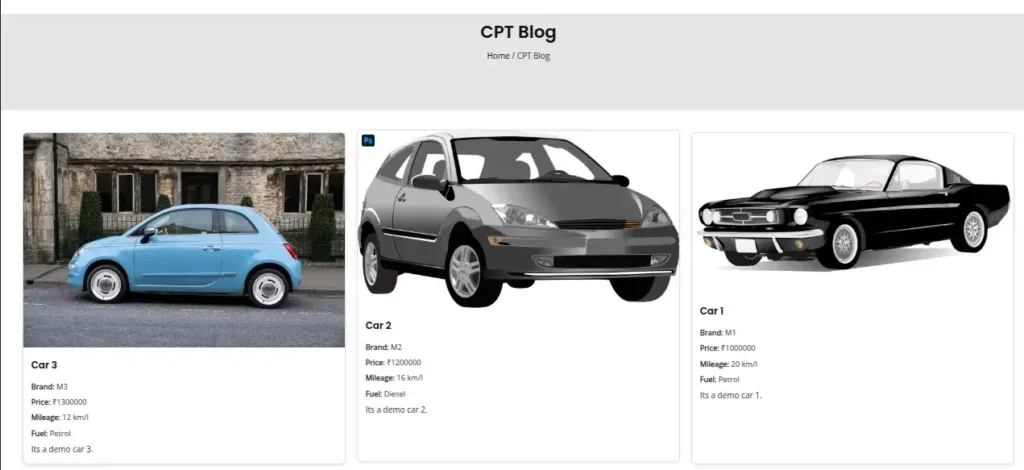
Output:
Conclusion:
Create professional, scalable, and ordered websites by using Custom Post Types (CPT’s) using Custom Meta Boxes in WordPress. Whether you are developing a client project or your own site, if you have mastered creating and managing CPTs & custom fields, you will have complete control over how you manage content.
You can create powerful solutions for your business using WordPress CPTs by implementing proper data validation/verification, security, and structure.
Happy Coding!
FAQ
1. What are Custom Post Types in WordPress?
Custom Post Types (CPTs) in WordPress give you the ability to create alternative content formats in addition to Post and Page. CPTs can help you organize your content into categories such as Portfolio, Testimonials, Events, Products, etc.
2. What are Meta Boxes in WordPress?
Meta Boxes are custom fields (the type of input field can vary) you can add to your WordPress post edit screen for entering other types of information, e.g., a Client Name, Price, Event Date, or Project URL.
3. Do I need coding knowledge to create Custom Post Types?
A basic understanding of PHP helps when creating CPTs manually, but you can also use plugins for creating custom post types without having any coding skills whatsoever.