Hello Magento Friends,
Welcome to Magento Tutorials by MageComp. Today I will be describing How to Add Custom Notice to Page Top in Magento 2. In case you skipped checking out on our previous blog, How to Upload Product Image Placeholder in Magento 2.
Overview:
Magento store owners are always looking for ways to catch customer’s attention. One of the best ways is to display a notification bar at the top of every page of your website. Store merchants use it to display offers, discounts, new product launches, etc. The notification bar at the top can easily grab the attention of anyone visiting your store.
Magento offers to display a custom notification bar at the top of your website’s page. The store owners have complete control over the appearance of the custom notice. This helps to boost store revenue without impacting the user experience. Let us look at the steps for How to Add Custom Notice to Page Top in Magento 2.
Steps to Add Custom Notice to Page Top in Magento 2:
Step 1: Log in to Admin Dashboard and navigate to Content > Elements > Blocks and click on Add New Block.
Step 2: Fill up the information for the New Block
Block Title – Enter the title of the block.
Identifier – Enter the value with which the block will be identified.
Store View – Choose the store view of the block.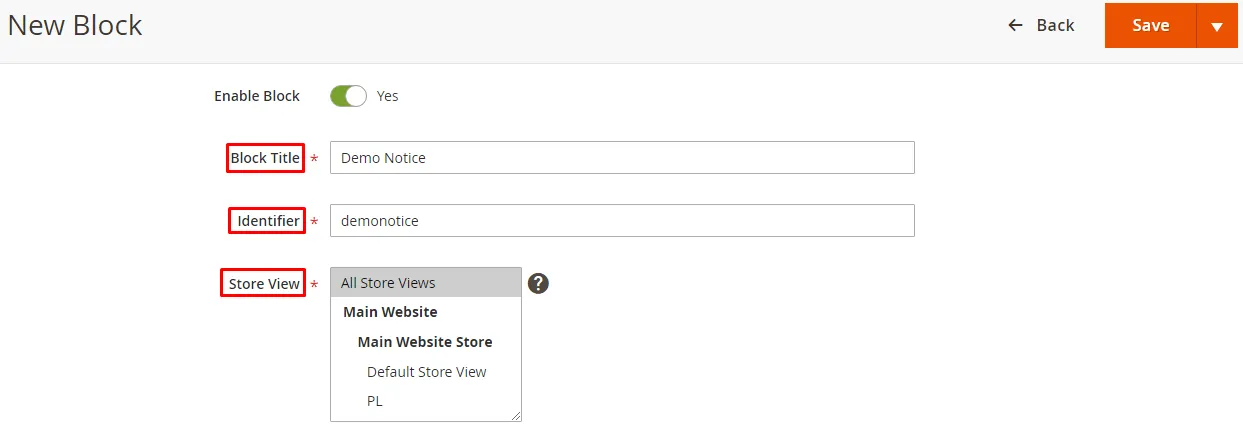
Enter the code in the editor as mentioned below to display the custom notice to page top in Magento 2. However, you are allowed to change the code according to your needs.
<div class="main"> <div class="demonotice" style="text-align: center; background: orange; padding: 10px; font-size: 20px; font-family: forte;"> New Year Sale Live Now! Get upto 60% Discount</div> </div>
At last, click Save.
Step 3: Navigate to Content > Elements > Widgets and click on Add Widget.
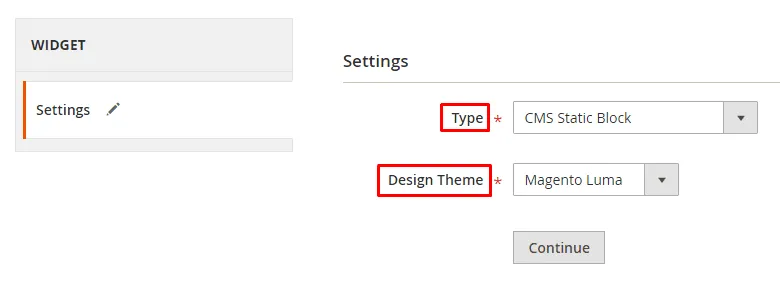
Step 4: Select CMS Static Block in the Type field. Select Design Theme as Magento Luma. Then click on Continue.
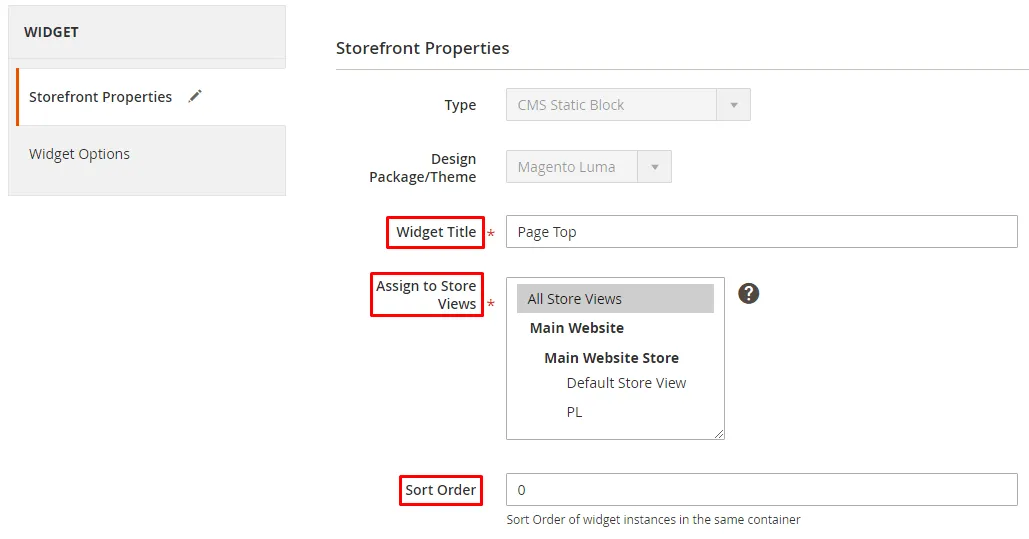
Step 5: Fill up the information in the Storefront Properties section
Widget Title – Enter the title of the widget.
Assign to Store Views – Choose the store view to display the widget.
Sort Order – Enter the sort order value of the widget.
Step 6: Then in the Layout Updates section, select Add Layout Update. Select All Pages in the Display On field and Page Top as Container. Then click Save.

Step 7: In the Widget Options, select the Block you have created and click Save.

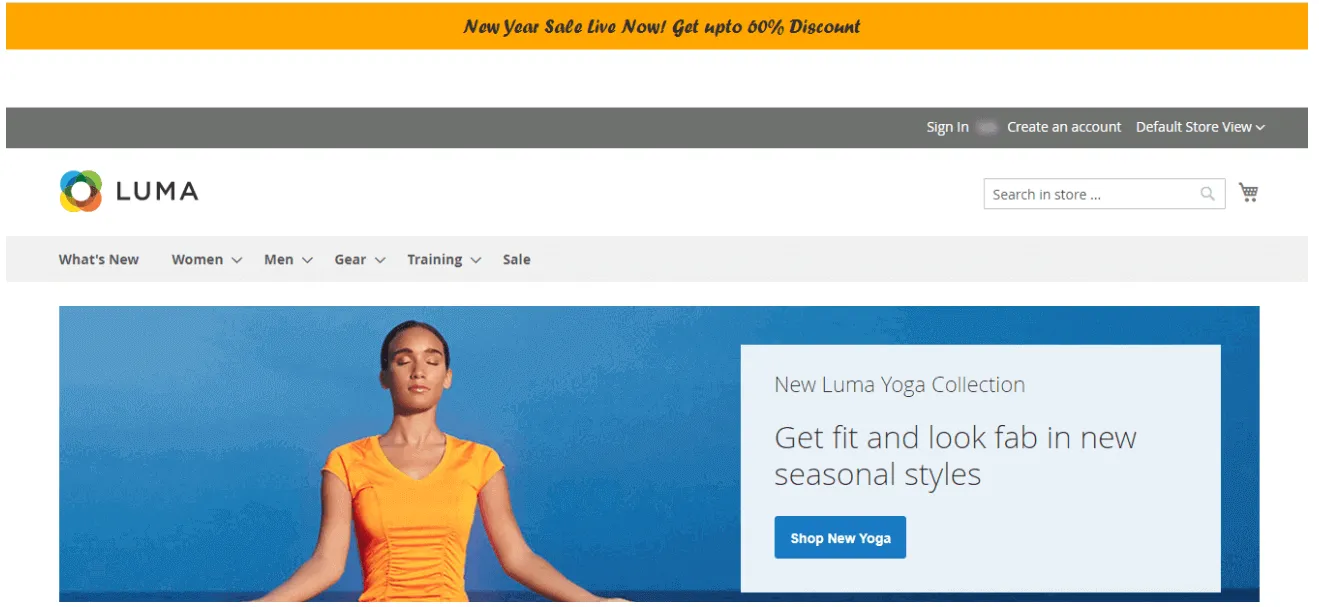
That’s it! Check the result in Magento 2 Frontend.
Conclusion:
Thereby you can Add Custom Notice to Page Top in Magento 2. Eliminate the above steps and effortlessly display custom notification bar by integrating Notification Bar Extension for Magento 2. In case you face any problem with the above steps, kindly mention it in the comment part below.
Found the article useful? Hit the 5 stars and share it further. Keep learning, keep in touch with us.
Happy Reading


