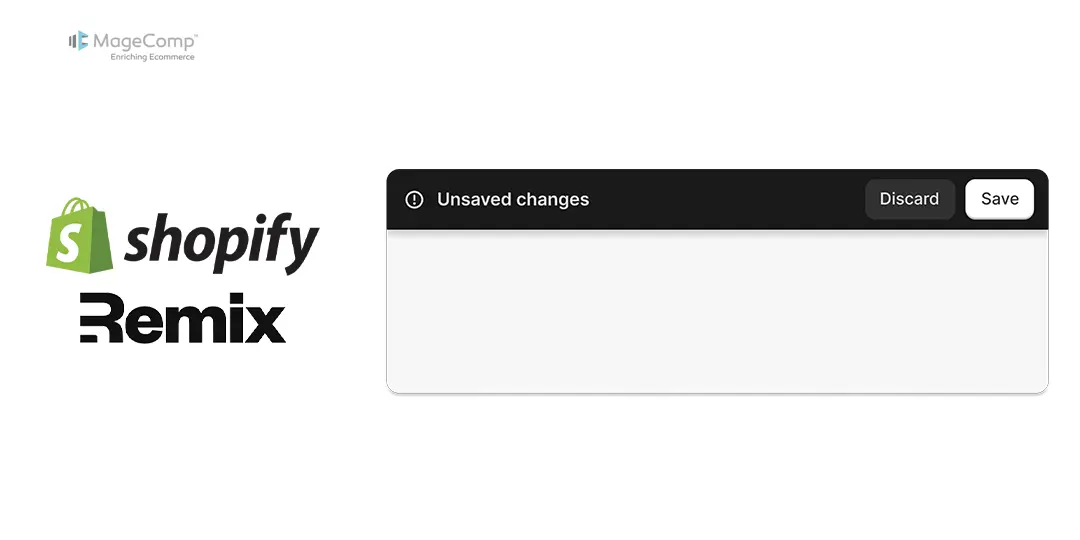
In creating a Shopify Remix app, giving users a smooth and easy-to-use experience is important. Save buttons sometimes go unnoticed, resulting in data loss. Shopify’s App Bridge React library includes a component, the `SaveBar`, which will enable developers to provide a persistent save feature, i.e., users will be alerted of unsaved changes and have simple access to saving or discarding operations.

In this tutorial, we will take a look at how to implement the `SaveBar` component into a Shopify Remix app, so as to come up with a better user experience than the default save button.
What Are the Reasons for Using SaveBar in the Shopify Remix Apps?
The `SaveBar` component has certain advantages over standard save buttons:
- Carries a persistent visible interface for saving changes.
- Makes usability simpler by having the save actions always easily accessible.
- Reduces data loss chances by notifying whenever there are unsaved changes.
- Completely integrates thus usable in the Shopify App Bridge React environment.
Prerequisites
Before you start, make sure you have the following setup:
- A Shopify Remix app installed and configured.
- `@shopify/app-bridge-react` installed in your project.
- Fundamental React and Remix framework knowledge.
Steps to Utilize the React SaveBar Component for Shopify Remix App:
Step 1: Install App Bridge React
If `@shopify/app-bridge-react` is not already installed in your project, you must install it:
npm install @shopify/app-bridge-reactOr
yarn add @shopify/app-bridge-reactStep 2: Integrate SaveBar within a Shopify Remix Component
The `SaveBar` component will be used together with `useAppBridge` to achieve effective save and discard operations within a Shopify Remix app:
//savebartest.jsx
import { SaveBar} from "@shopify/app-bridge-react";
import { useState } from "react";

export default function MyApp() {
  const [isDirty, setIsDirty] = useState(false);

  const handleSave = () => {
    console.log("Saving");
    shopify.saveBar.hide("my-save-bar");
    setIsDirty(false);
  };

  const handleDiscard = () => {
    console.log("Discarding");
    shopify.saveBar.hide("my-save-bar");
    setIsDirty(false);
  };

  return (
    <>
      <input
        type="text"
        placeholder="Edit something..."
        onChange={() => setIsDirty(true)}
      />
      <button onClick={() => shopify.saveBar.show("my-save-bar")}>
        Show Save Bar
      </button>
      {isDirty && (
        <SaveBar id="my-save-bar">
          <button variant="primary" onClick={handleSave}>Save</button>
          <button onClick={handleDiscard}>Discard</button>
        </SaveBar>
      )}
    </>
  );
}
Step 3: Understanding SaveBar Functionality
- The `isDirty` state means there are unsaved changes.
- `shopify.saveBar.show(“my-save-bar”)` causes `SaveBar` to appear on the screen.
- `handleSave` saves changes and hides the `SaveBar`.
- `handleDiscard` resets and unmounts the `SaveBar`.
Conclusion
By including Shopify’s `SaveBar` component in a Remix app, we enhance user experience and avoid unwanted data loss by making save and discard choices more visible. With this implementation, merchants using the app will enjoy a clean, consistent, and intuitive experience.
Related Tutorial –
How to Set Contextual Save Bar instead of Save Button in Shopify Remix App