Hello to Magento Lovers,
Last time we have seen the article to Configure Locale Option and Store Configurations in Magento 2. Now let’s move ahead and work on Tax configurations Magento 2.
When it comes to doing business, one must have to comply with country-specific business rules and taxation. But configuring such options in Magento 2 that work seamlessly is might be tricky for you if you are a newbie.
Generally, Tax rules are a combination of product class, customer class, and tax rates. Each customer is assigned to a customer tax class, and each product is assigned a product tax class. Magento 2 analyzes the shopping cart of each customer and calculates the appropriate tax according to the customer and product classes, and the region (based on the customer’s shipping address, billing address or shipping origin). So let’s dig-in and clear all your doubts related to tax configuration in Magento 2.
To simplify tax rule process rules you can also import such configuration in Magento 2.
Step 1: Complete the Tax Rule Information
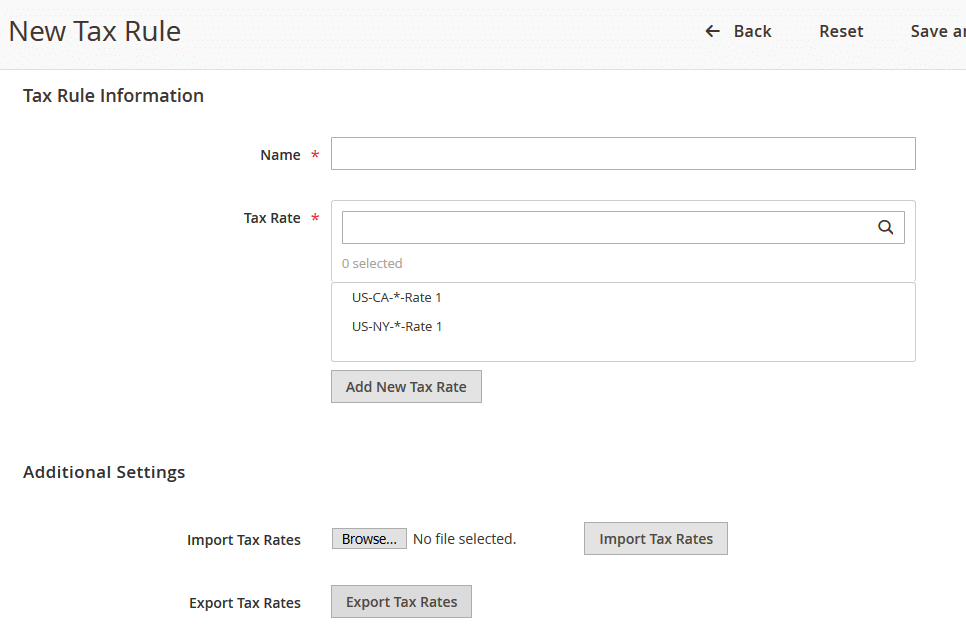
- Log in to your Magento 2 and on the Admin sidebar, Go to Stores –> Taxes –> Tax Rules.
- In the upper-right corner, you will find an option to add a New Tax Rule.
- Now set your tax rule name.
- Choose the Tax Rate that applies to the rule. If you need to edit an existing tax rate, do the following:
- Hover over the tax rate, and click the Edit icon.
- Update the form as needed, and click Save.
- To enter tax rates, use either of the following methods.
Method 1: Enter Tax Rates Manually – Click Add New Tax Rate.

Method 2: Setup according to Tax zones and Rates.
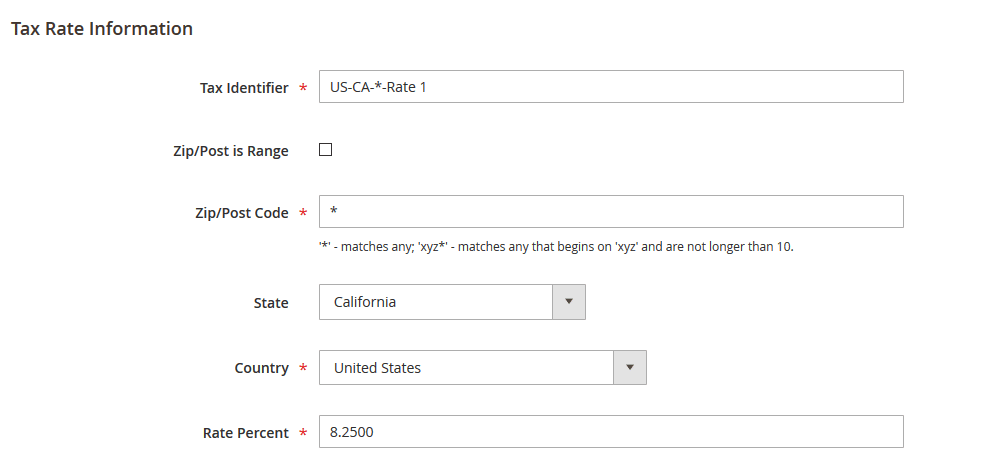
- To define a new tax rate, navigate to Admin sidebar then click on Stores –> taxes –> Tax Zone and Rates.
- In the upper-right corner, you will find an option to Add New Tax Rate.
- Enter a Tax Identifier.
- To apply the tax rate on a single ZIP or postal code, enter the code in the Zip/Post Code field.
- The asterisk wildcard () can be used to match up to ten characters in the code. For example, 90 represents all ZIP codes from 90000 through 90999.
- To apply the tax rate to a range of ZIP or postal codes do the following thing:
- Mark the Zip/Post is Range checkbox. Then in the Range from and Range To fields, enter the first and last ZIP or postal code to define the range.

- Choose the State where the tax rate applies.
- Choose the country where the tax rate applies.
- Enter the Rate Percent that is used for the tax rate calculation.
- When complete click on save.
Method 2: Import Tax Rates
On the Magento 2 Admin sidebar, navigate to Stores –> Taxes –> Tax Rules. There is an option to import as well as export tax rules using the CSV file. You can also find the same import Export Tax option under the hood of Magento 2 as Import/Export Tax Rates.

Step 2: Complete the Additional Settings
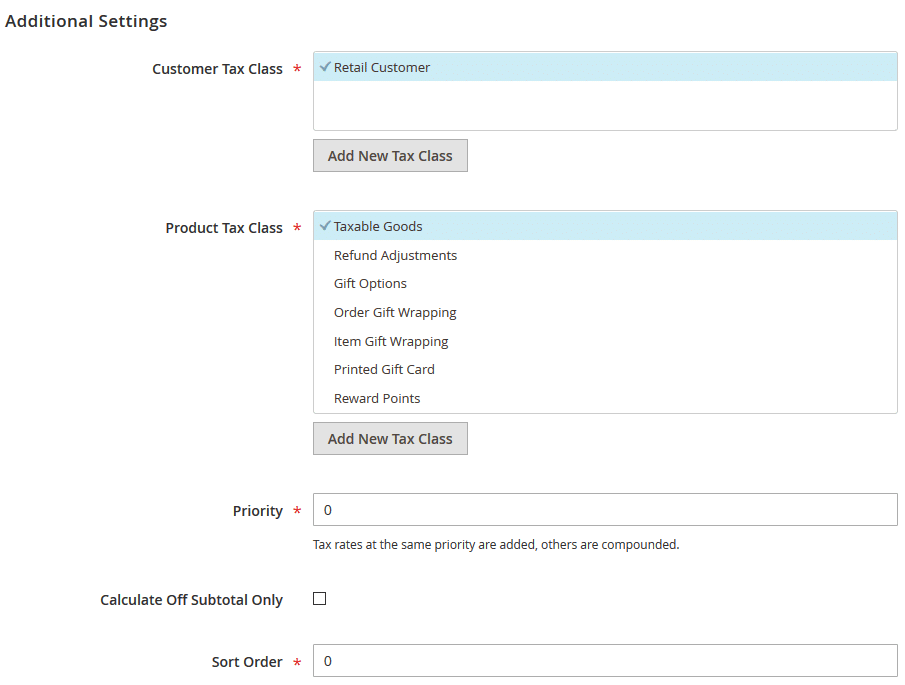
- Click Additional Settings to open the section in the same tax rules setting section. By default it’s collapsed, you have to click on the title to expand it.

- Choose the Customer Tax Class to which the rule applies.
- To edit a customer tax class, click the edit icon. Then, update the form as needed, and click Save.
- To create a new tax class, click Add New Tax Class. Then, complete the form as needed, and click Save.
- Choose the Product Tax Class to which the rule applies.
- To edit a product tax class, click the edit icon. Then, update the form as needed, and click Save.
- To create a new tax class, click Add New Tax Class. Then, complete the form as needed, and click Save.
- In the Priority field, enter a number to indicate the tax priority. When there is a number of taxes that are configured and the two tax rules have the same priorities then the taxes are added together. If two taxes with different priorities, then the taxes are compounded.
- If you want to apply taxes to be based on the order subtotal, you can mark it to Calculate off Subtotal Only checkbox.
- Sort Order field is for sorting when listed with other tax rules, enter a number to indicate the order of this tax rule when listed with others.
- Save the configuration and you are done.
That’s it. Asking the Certified Magento Expert or Choosing the right Magento Development Company will always help you in a pocket-friendly way.
Stay tuned for more such Magento Tutorials.


