Customization and flexibility of delivery options contribute significantly to conversion rates and enrich the customer experience. Shopify developers have the facility to create custom delivery options based on the business case, including scheduled delivery, same-day delivery, or location-based delivery.

In this tutorial, we shall assist you in deploying a custom delivery option feature in Shopify.
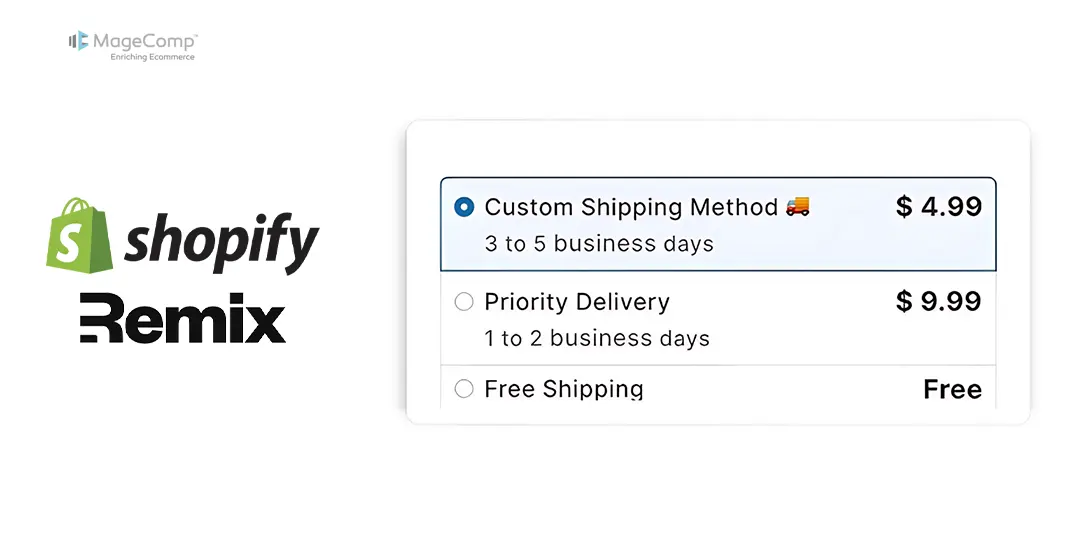
Understanding Shopify’s Delivery Options
Shopify by default offers flat rate, free, and calculated shipping types to its users. Nonetheless, in the event that you need more flexibility, you are able to acquire custom delivery options through either Shopify Scripts (Shopify Plus) or Shopify Functions.

Pre-Requisites
- Make a Partner account and a development store.
- Install Shopify CLI version 3.49.5 or later.
- Make sure Node.js version 16 or later is installed.
- For Rust-based development, install Rust and the build tools required.
Steps to Build the Delivery Options Function in Shopify
Step 1: Setting Up Your Environment
- Make a development store and set up tools.
- Use the command to clone the delivery customizations sample app.
shopify app init --template https://github.com/Shopify/function-examples/sample-apps/delivery-customizations Step 2: Creating the Delivery Customization Function
- Navigate to your app directory and generate a new delivery customization extension.
shopify app generate extension --template delivery_customization --name delivery-customizationStep 3: Defining Input with GraphQL
- Replace the contents of src/run.graphql with the necessary input query to capture delivery options.
query RunInput {
  cart {
    deliveryGroups {
     deliveryAddress {
       provinceCode
      }
      deliveryOptions {
        handle
        title
      }
    }
  }
}
Step 4: Implementing Function Logic
- Write the logic to insert messages to delivery options based on shipping addresses.
javascript

export function run(input) {
  const message = "May be delayed due to weather conditions";
  let toRename = input.cart.deliveryGroups
    .filter(group => group.deliveryAddress?.provinceCode == "NC")
    .flatMap(group => group.deliveryOptions)
    .map(option => ({
      rename: {
        deliveryOptionHandle: option.handle,
        title: option.title ? `${option.title} - ${message}` : message
      }
    }));
  return { operations: toRename };
}
Step 5: Previewing Your Function
- Run a local server using the Shopify CLI so that you can preview your app.
shopify app devStep 6: Creating Delivery Customization with GraphQL
- Using the GraphQL app, create a delivery customization and link it to your function.
mutation {
  deliveryCustomizationCreate(deliveryCustomization: {
    functionId: "YOUR_FUNCTION_ID_HERE"
    title: "Add message to delivery options for state/province"
    enabled: true
  }) {
    deliveryCustomization {
      id
    }
    userErrors {
      message
    }
  }
}
Step 7: Testing Your Customization
- Verify the delivery options in your dev store to confirm the messages show appropriately depending on the shipping address.
shopify app function replayConclusion
Shopify custom delivery options can be used to improve user experience and meet specific business needs. With Shopify Functions, you can create a customized delivery solution that dynamically adjusts options based on customer specifications.
Would you like help implementing this for your shop? Let us know!