Hello, Magento Buddies!
Keen to know How to Add Custom Checkbox to Checkout in Magento 2 store? I’ve got you covered.
To drive your online business to the path of success, an appealing checkout page can be a significant factor to consider. There are methods through which you can make your checkout page faultless and one of them can be to add a custom checkbox to the checkout page.
It is pivotal to make the online sales journey of customers as simple as possible and the checkout page is the most decisive one throughout the online sales journey. The store owners lookout to make the checkout page as complete and thorough as possible by the addition or removal of certain fields.
The admins could possibly want to add the Custom Checkbox in their Magento 2 Checkout page. Taking an instance, the admins may look to add a custom checkbox to the terms and conditions and the newsletter checkbox.
In this tutorial, I will walk you through the 2 fundamental ways you can Add a Custom checkbox to the Checkout Page in your Magento 2 store.
Add Custom Checkbox to Checkout Programmatically
Step 1: Firstly, create the checkout_index_index.xml file in the below-given path.
app\code\Vendor\Extension\view\frontend\layout\
Now, add the below-given code:
<?xml version="1.0"?>

<page xmlns:xsi="http://www.w3.org/2001/XMLSchema-instance" layout="1column" xsi:noNamespaceSchemaLocation="urn:magento:framework:View/Layout/etc/page_configuration.xsd">

    <body>

        <referenceBlock name="checkout.root">

            <arguments>

                <argument name="jsLayout" xsi:type="array">

                    <item name="components" xsi:type="array">

                        <item name="checkout" xsi:type="array">

                            <item name="children" xsi:type="array">

                                <item name="steps" xsi:type="array">

                                    <item name="children" xsi:type="array">

                                        <item name="shipping-step" xsi:type="array">

                                            <item name="children" xsi:type="array">

                                                <item name="shippingAddress" xsi:type="array">

                                                    <item name="children" xsi:type="array">

                                                        <item name="form-data" xsi:type="array">

                                                            <item name="children" xsi:type="array">

                                                                <item name="newsletter" xsi:type="array">

                                                                    <item name="component" xsi:type="string">Vendor_Extension/js/view/checkout-form-js</item>

                                                                </item>

                                                            </item>

                                                        </item>

                                                    </item>

                                                </item>

                                            </item>

                                        </item>

                                    </item>

                                </item>

                            </item>

                        </item>

                    </item>

                </argument>

            </arguments>

        </referenceBlock>

    </body>

</page>
Step 2: Next, create the checkout-form-js.js in the below-given path.
app\code\Vendor\Extension\view\frontend\web\js\view\
Now, add the below-mentioned code:
define([

        'ko',

        'uiComponent'

], function (ko, Component) {

        "use strict";

        return Component.extend({

            defaults: {

                template: 'Vendor_Extension/checkout-form'

            },

            isRegisterNewsletter: true

        });

    }

);
Step 3: Next, create the checkout-form.html in the below-given path.
app\code\Vendor\Extension\view\frontend\web\template\
Now, add the below-mentioned code:
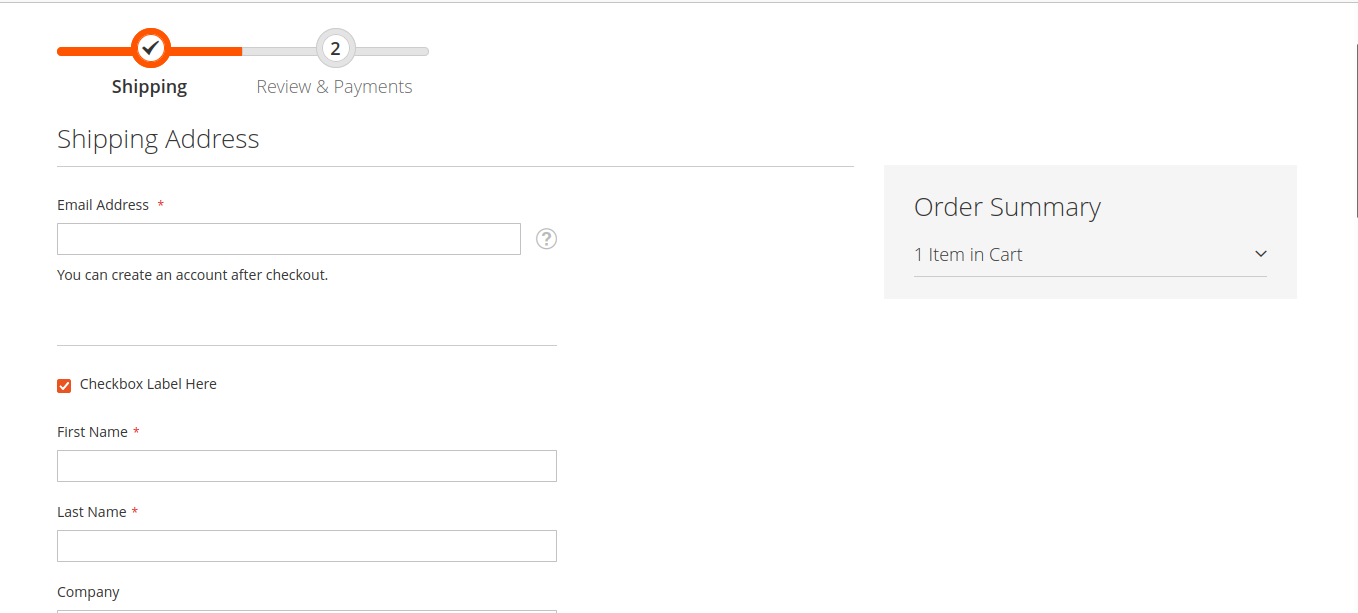
<div class="custom-checkbox">

    <input type="checkbox" data-bind="checked: isRegisterNewsletter, attr: {id: 'place-order-newsletter'}"/>

    <label data-bind="attr: {for: 'place-order-newsletter'}"><span data-bind="i18n: 'Checkbox Label Here'"></span></label>

</div>
The output of the above code will look as given below:
Hence these were the main steps you can add a custom checkbox at the checkout page in Magento 2 by technically appending the code mentioned above. Also, install Custom Checkout Fields which helps the store admin customize the checkout page by adding extra fields.
I hope this helps you! Any queries are appreciated through the comments section below.
Grab our Magento Custom Extension Development Service and custom-develop extensions according to your requirement to make your store bountiful of resources. Or you can also check Magento Development Services.
Happy Coding!
In this guide, we'll explore how to integrate ChatGPT, an AI-powered chatbot, with a Laravel…
In the world of business, understanding financial metrics is crucial for making informed decisions and…
Welcome to the MageComp Monthly Digest, where we bring you the latest updates, releases, and…
In this era, businesses are always on the lookout for ways to engage with their…
Managing a Shopify store efficiently involves keeping your product catalog organized. This includes removing outdated…
E-commerce has transformed the way consumers shop for products and services and interact with businesses.…