Step 1: Login to the Firebase Console using the below URL.
https://console.firebase.google.com/
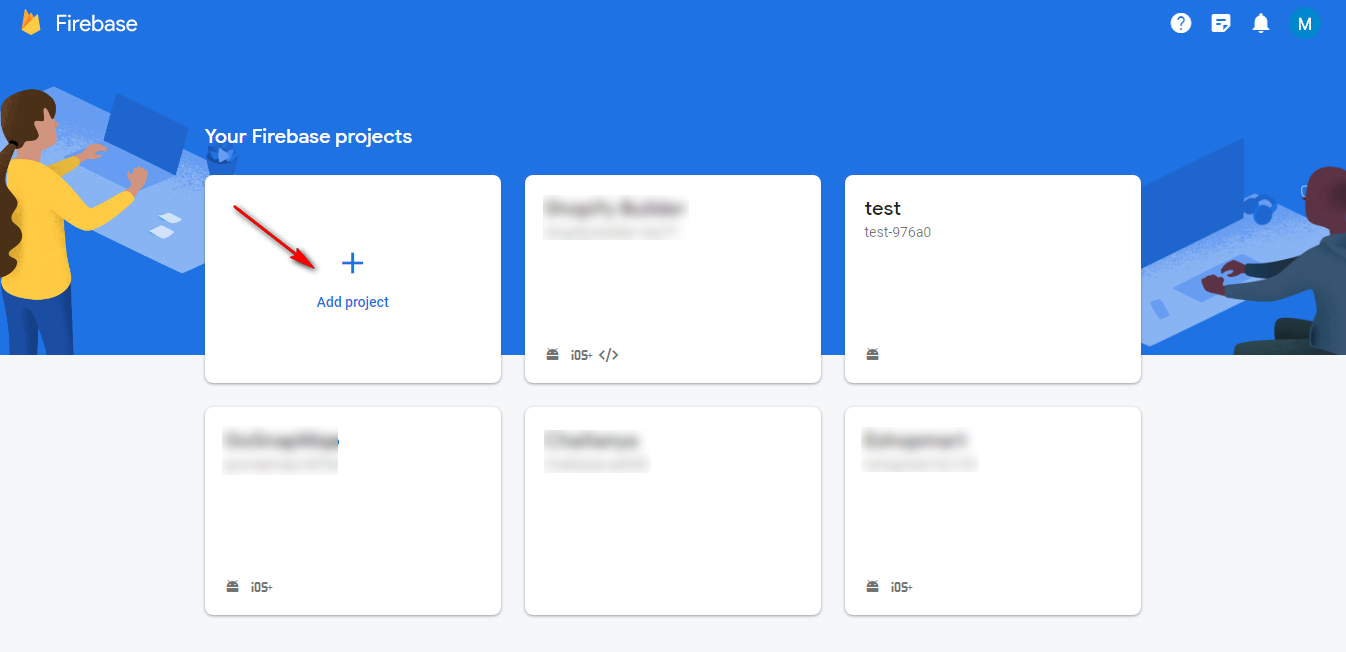
Step 2: Create New Project or select an existing project. To create a new project, click on “Add Project”. If you choose an existing project, then skip Steps 3 and 4.
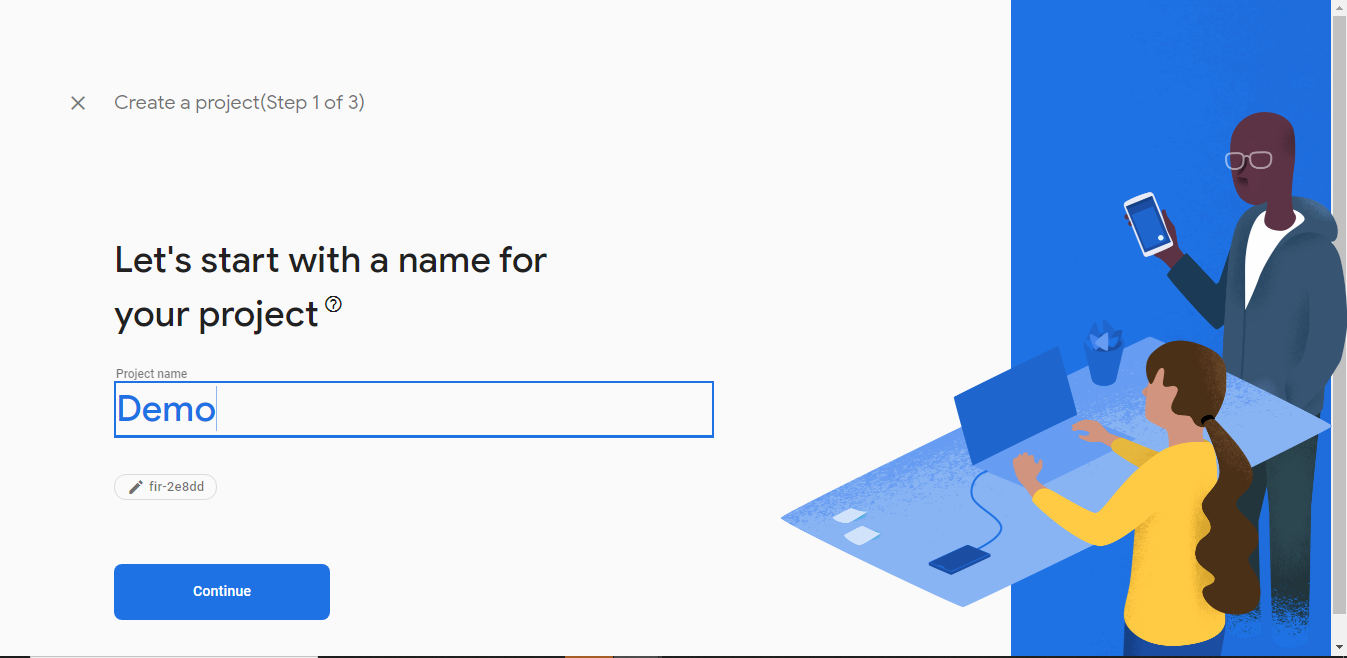
Step 3: Give the Name of your project and press Continue. In the next step, click on Continue.
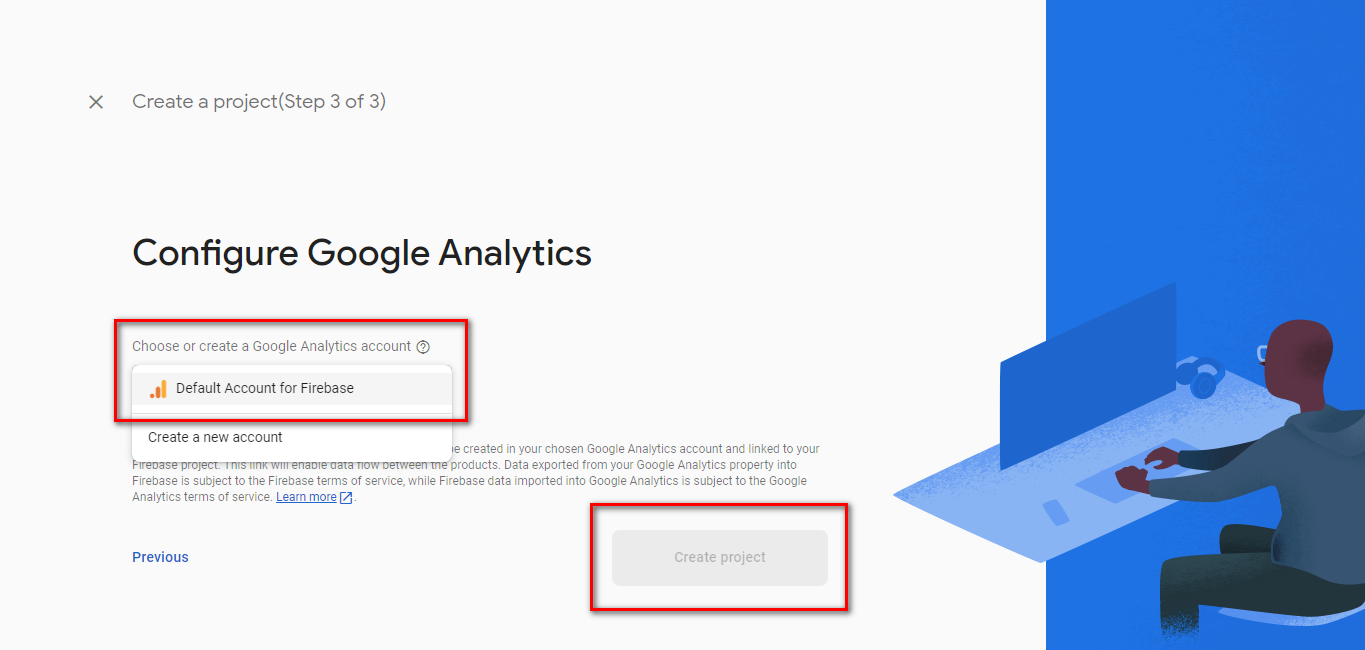
Step 4: Select Default Account for Firebase as your Google Analytics account and click Create Project button.
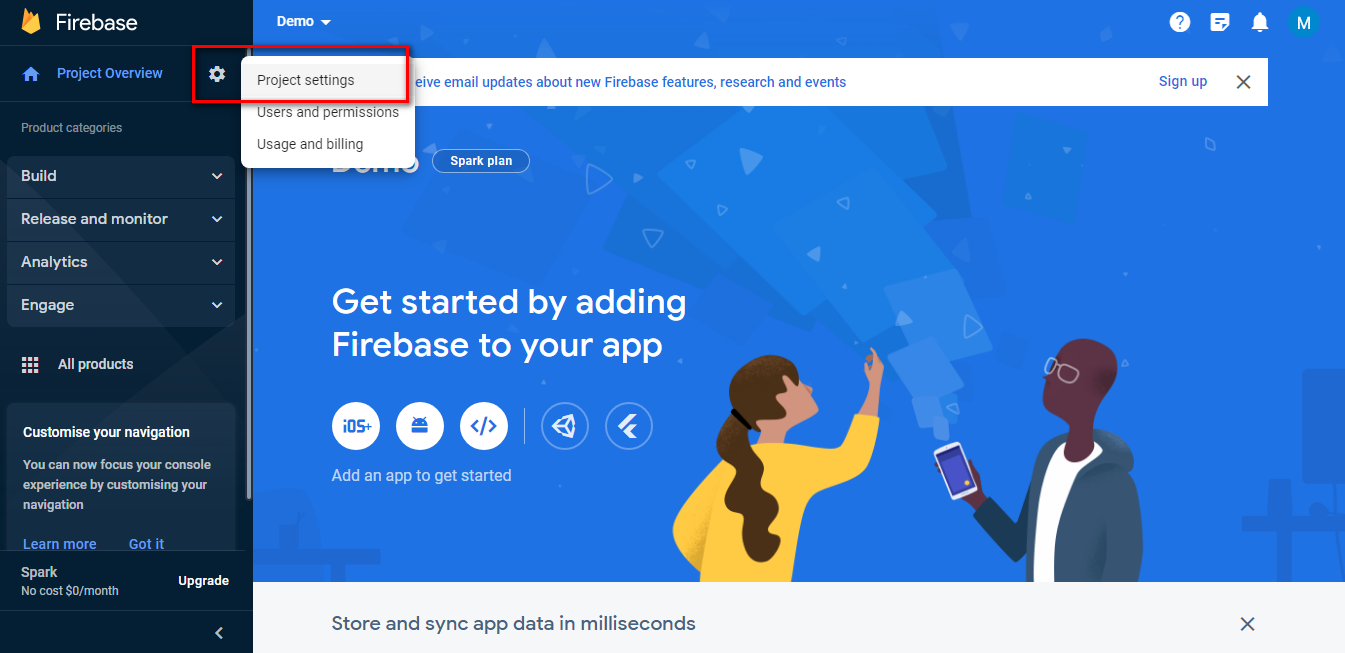
Step 5: Click on the gear icon in the top left corner and select Project settings.
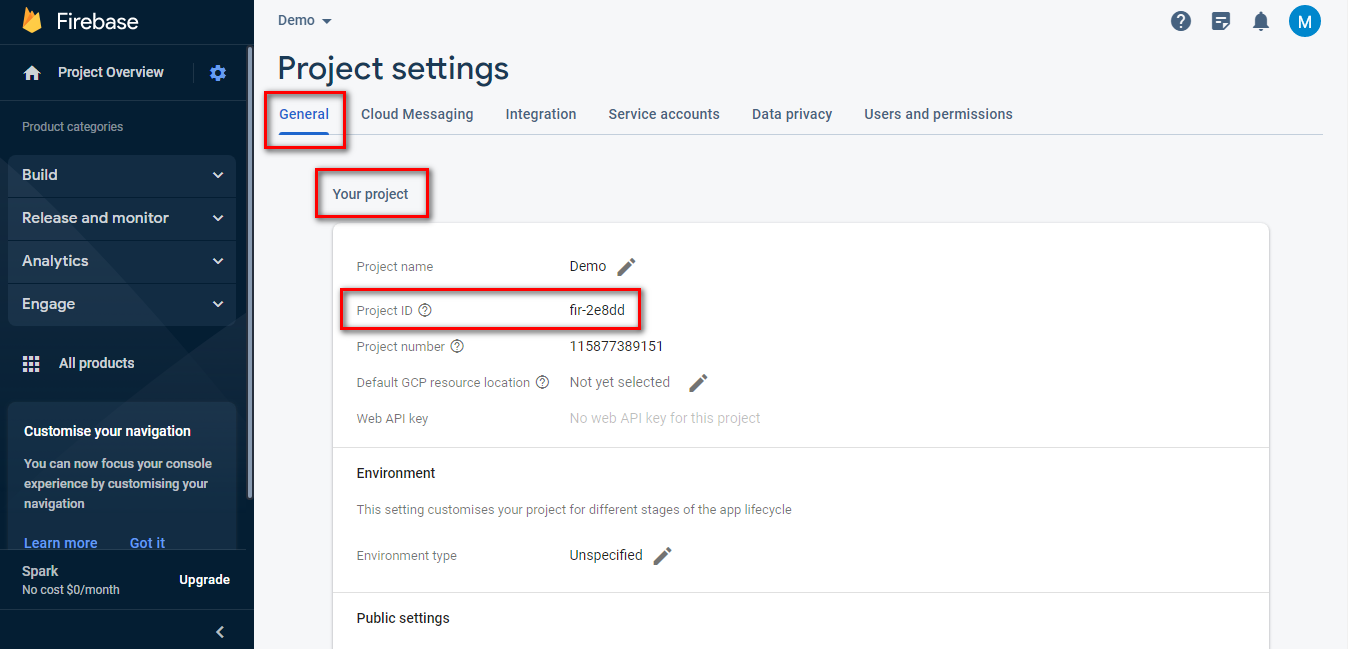
Step 6: You can find Project ID under the Your Project section in the General tab. You can copy it from there.
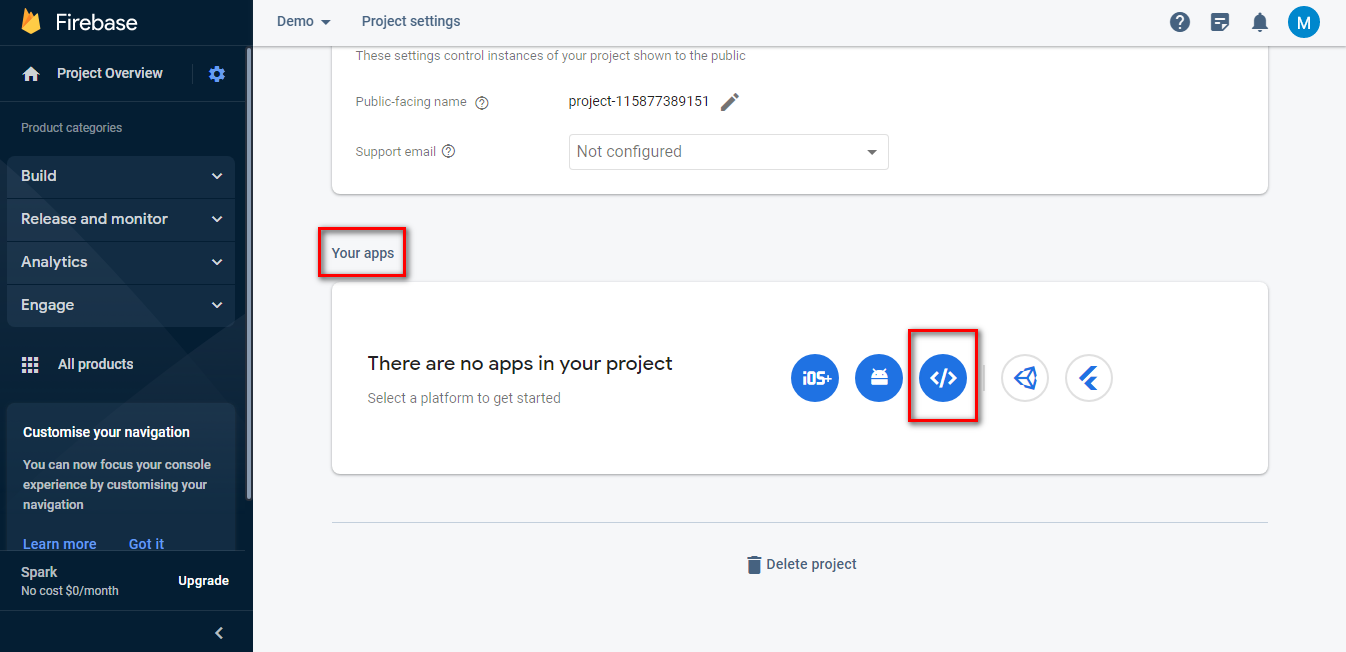
Step 7: Scroll down in the General tab and click on the Web App sign from Your Apps section.
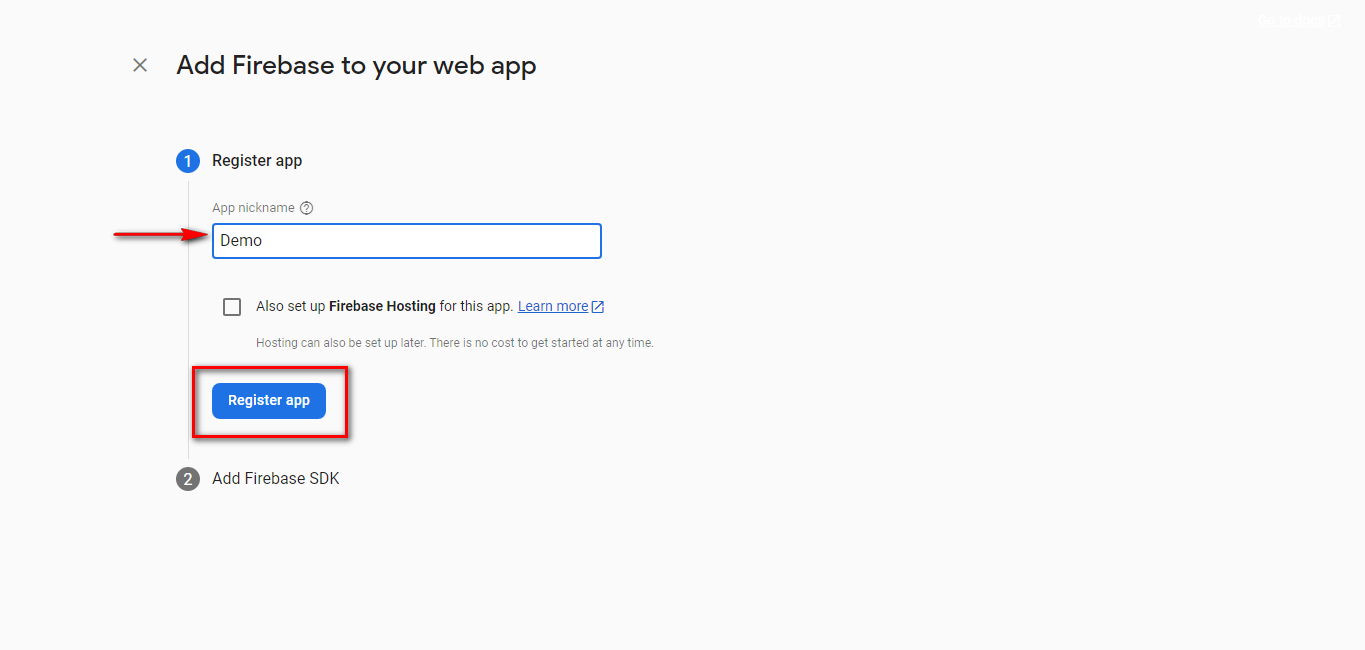
Step 8: Give a nickname to the app and click on Register App.
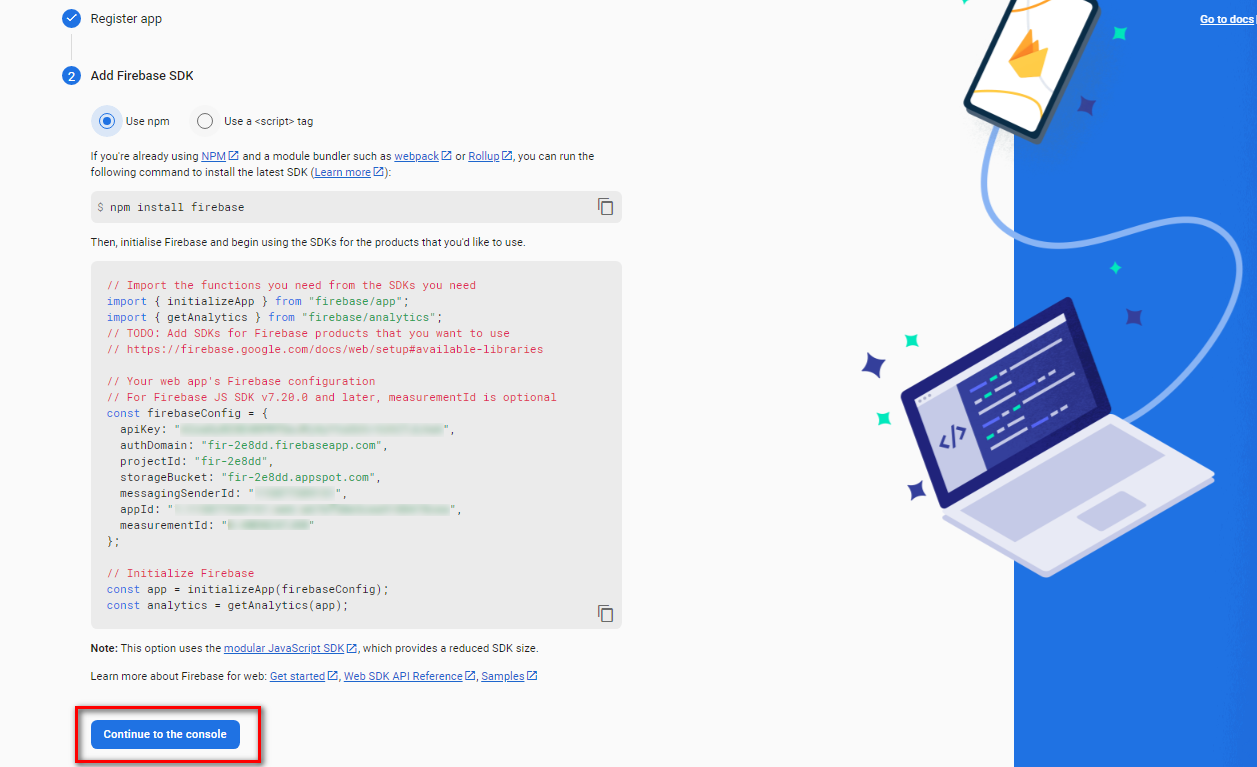
Step 9: Now click on Continue to Console.
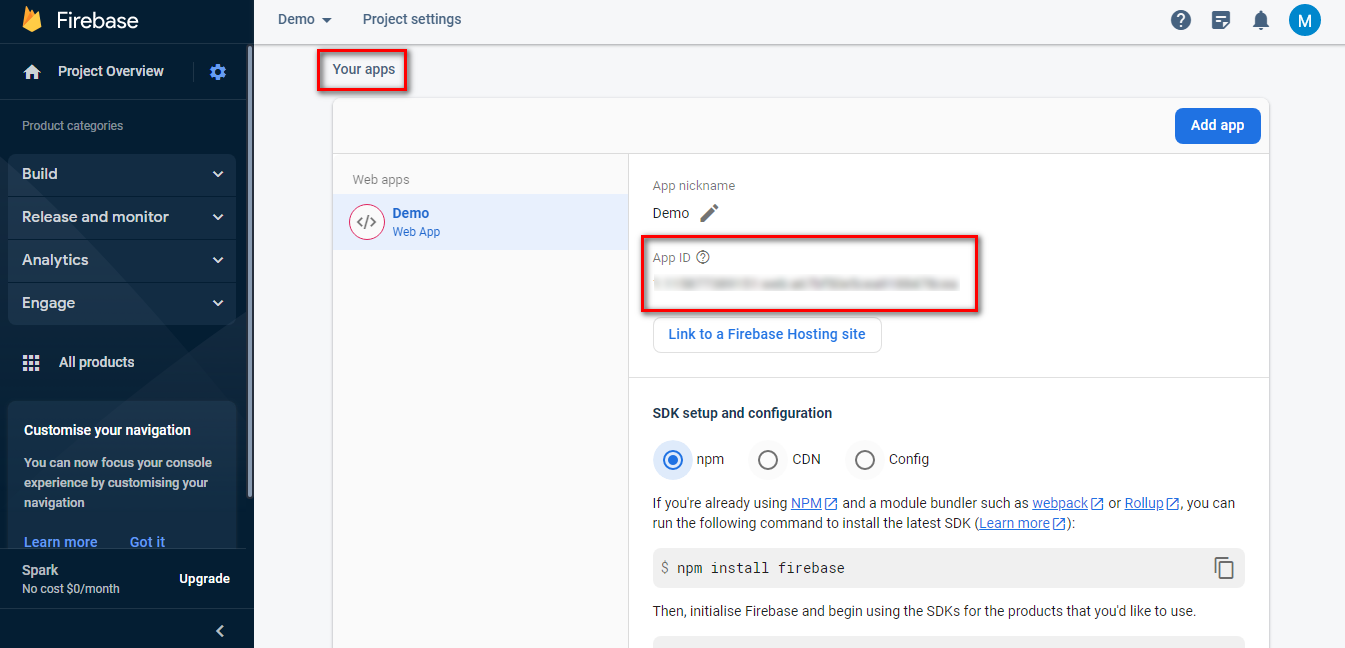
Step 10: You can copy the App ID from the Your Apps section.
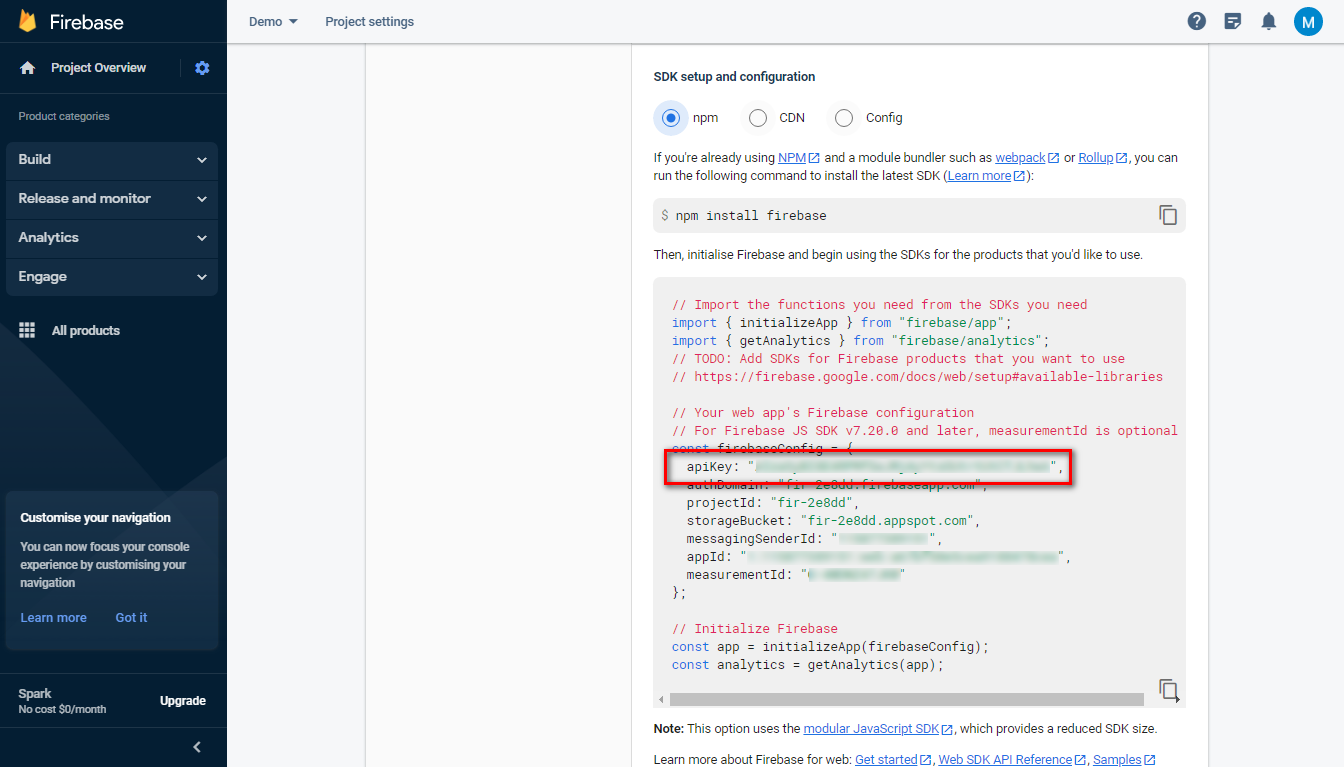
Step 11: Also copy the API Key from the Your Apps section.
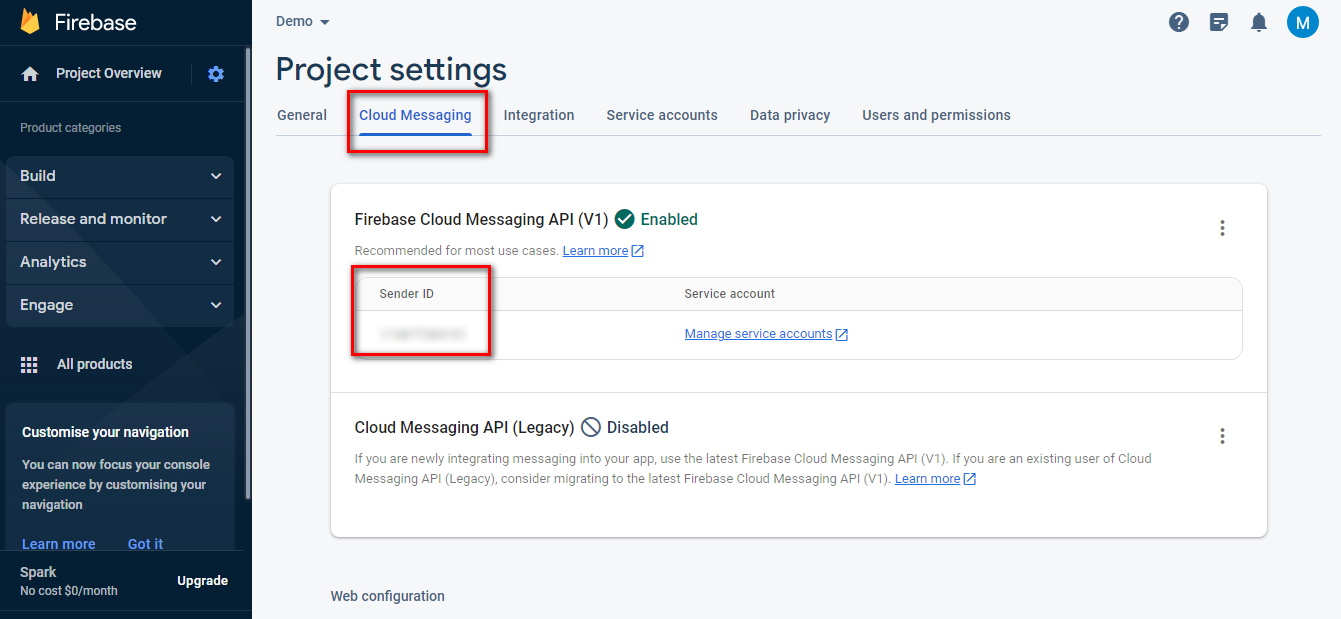
Step 12: Now go to the Cloud Messaging tab from the top menu and copy Sender ID.
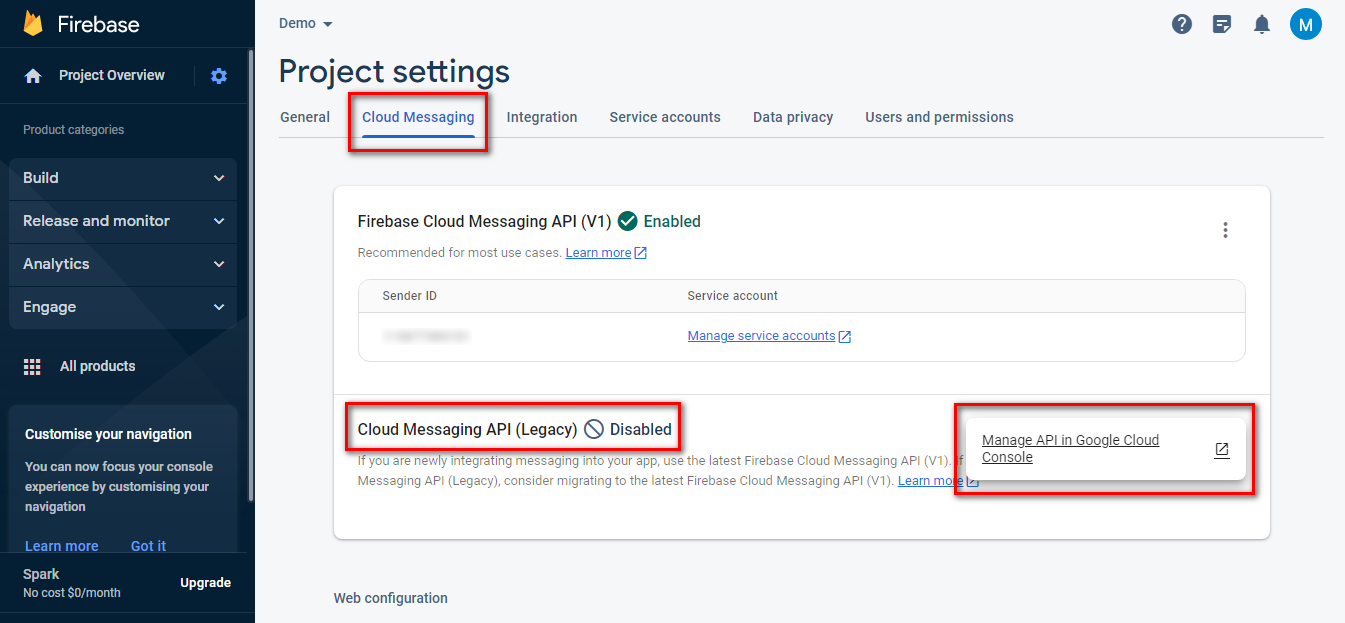
Step 13: In the Cloud Messaging tab, go to the Cloud Messaging API section, click on 3 dots and select Manage API in Google Cloud Console. You will be redirected to Google Cloud Console.
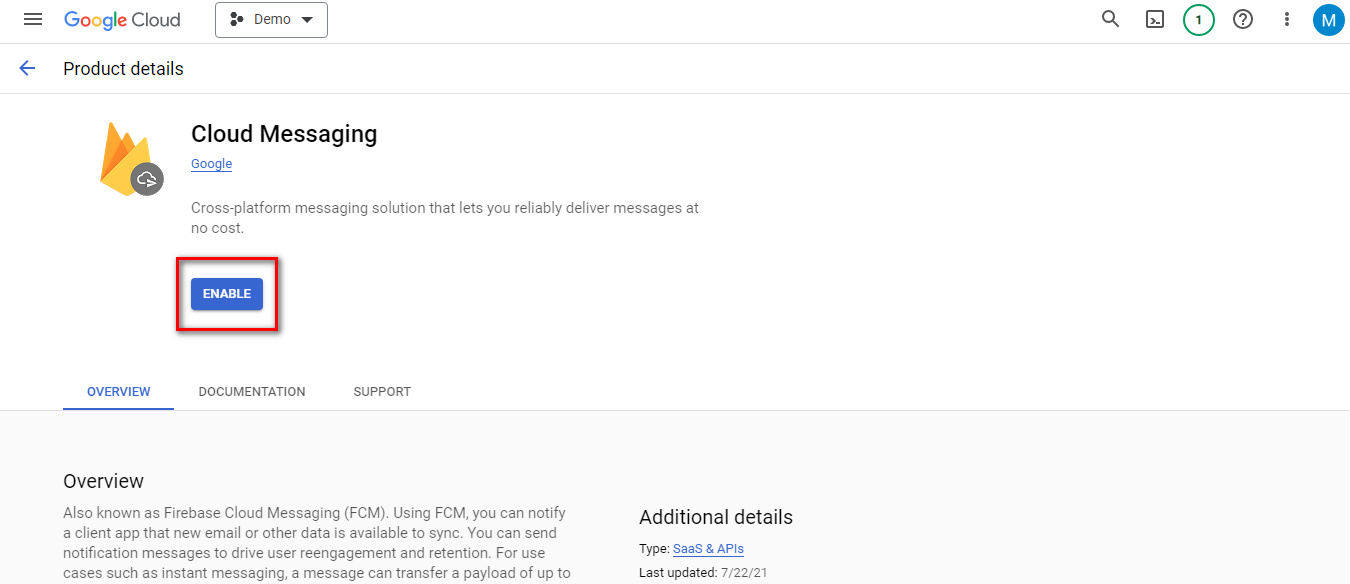
Step 14: In the Google Cloud Console, click on Enable.
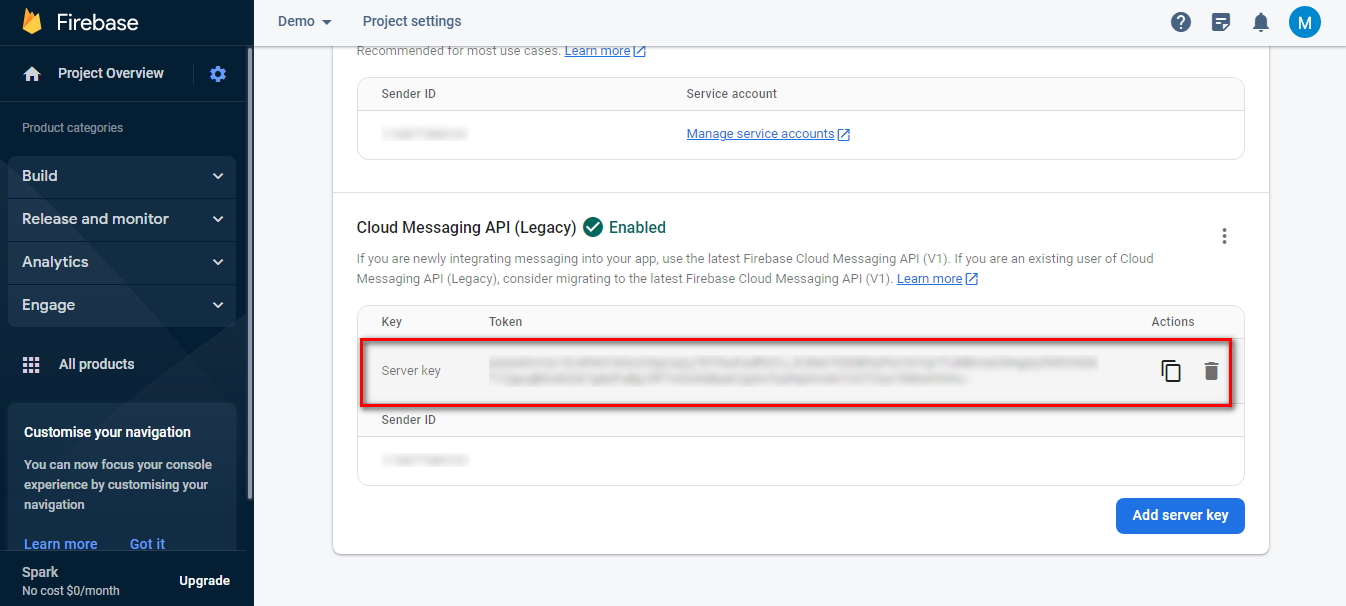
Step 15: Come back to Firebase Project settings and reload it. You can copy the Server Key.
If anything goes wrong, please contact us at support@magecomp.com
