Magento Tutorials

How to Update a Customer Profile in Magento 2

Hello Magento Friends,

In this article, I will explain How to Update Customer Profile in Magento 2.

The customer profile contains personal details, email, date of birth, addresses, orders, and other information. In Magento 2, customers can update their information from the My Account section. Allow customers to add profile image on your Magento 2 website to provide a personalized user experience.

Sometimes the admin needs to update customer information. The admin can manage all customer profiles from the admin panel. Let’s find out more.

Steps to Update a Customer Profile in Magento 2:

Step 1: Login to your Magento 2 Admin Panel.

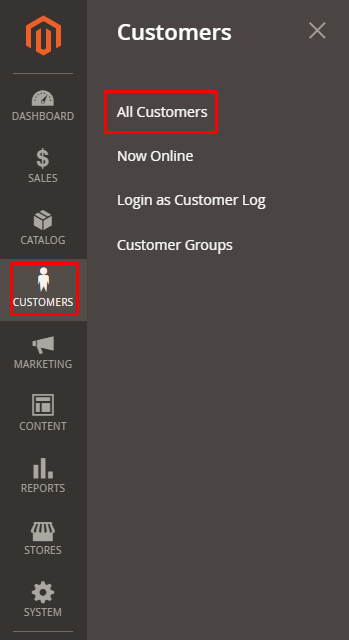
Step 2: Navigate to Customers > All Customers.

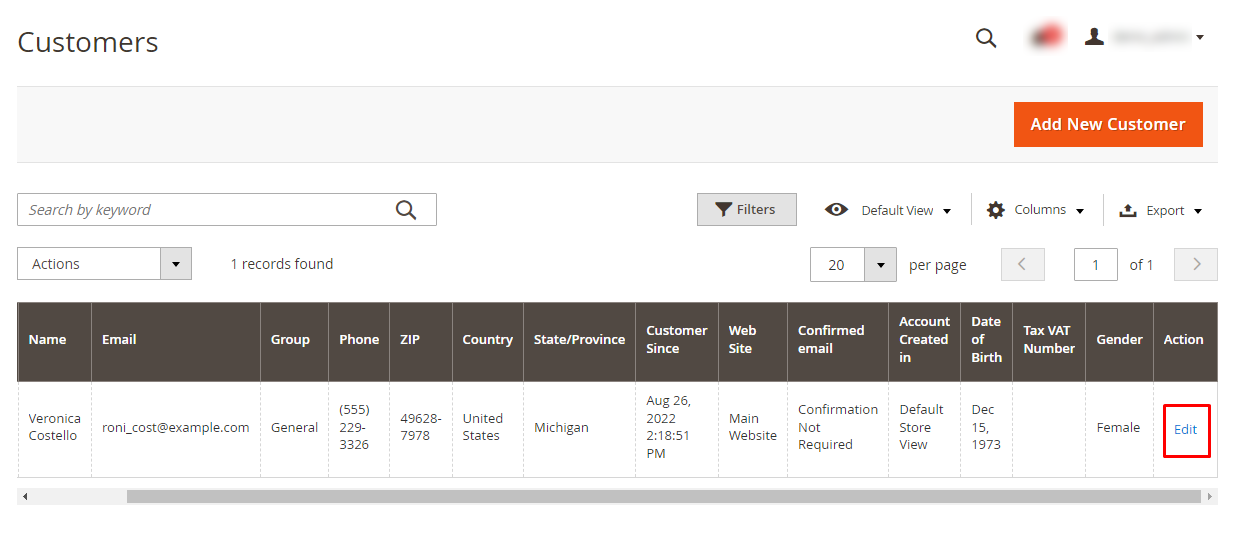
Step 3: Find the customer from the grid and click Edit in the action column.

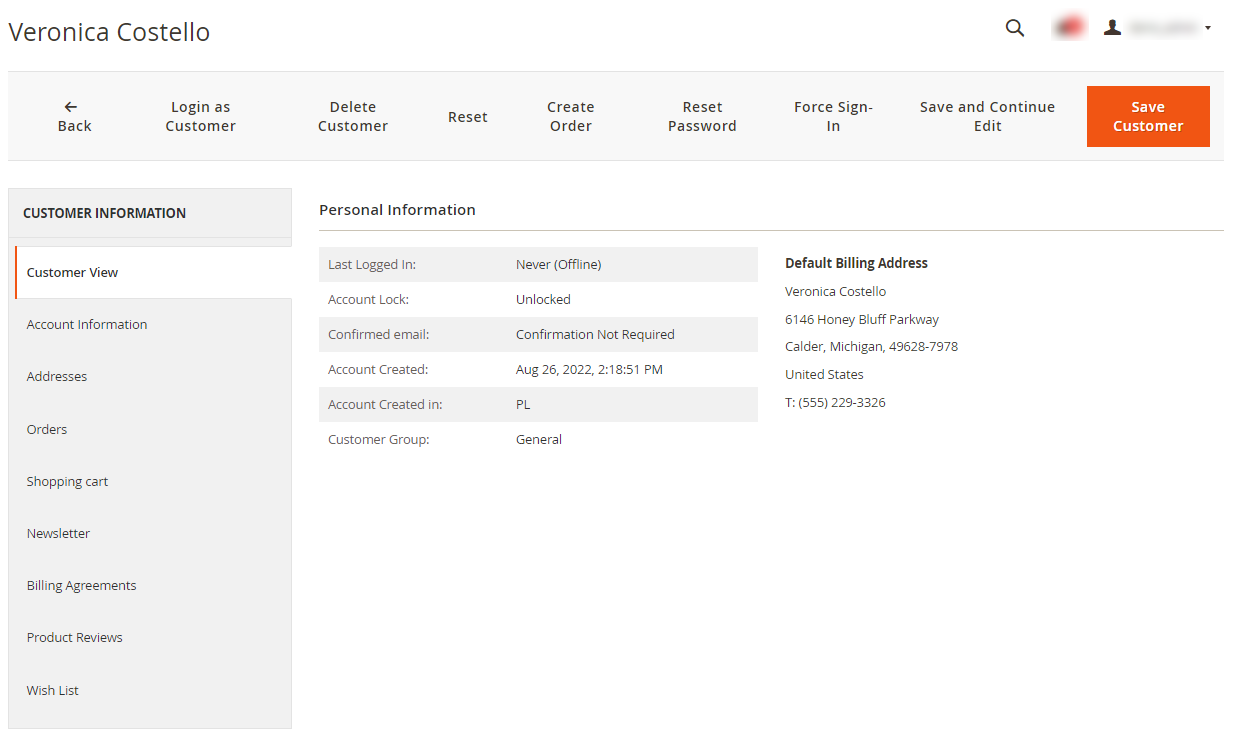
Step 4: Choose the type of information you want to edit from the left panel and make the necessary changes.

Customer Information

  • Customer View – It shows the personal information of the customer.
  • Account Information – It provides detailed information about the customer where the admin can edit the personal details, date of birth, email, and associate the customer to a website.
  • Addresses – It allows editing default billing and shipping addresses and even adding a new address.
  • Orders – It contains detailed information of customer orders.
  • Shopping Cart – It shows the shopping cart of the customer. This means the products are currently in the cart and have not been purchased yet.
  • Newsletter – It displays all the emails sent to the customer.
  • Billing Agreements – Contain all the PayPal billing agreements between the customer and the store.
  • Product Reviews – It shows the product reviews that the customer has submitted.
  • Wish List – It shows a list of products the customer wishes to buy and can add to the cart later.

Step 5: When complete, click on the Save Customer button.

Final Words:

This is how the admin can update the customer profile in Magento 2. Share the tutorial with your other Magento 2 friends and stay updated with us.

Happy Reading!

Click to rate this post!
[Total: 4 Average: 5]
Gaurav Jain

Gaurav Jain is Co-Founder and Adobe Certified Expert-Magento Commerce Business Practitioner. Being Computer Engineer👨‍💻 and possessing Extensive Marketing skills he handles all kinds of customer Queries and his Happy😀 & Helping🙏 Nature makes customer's day Delightful. When he isn’t working, you’ll find Gaurav Reading on Books📖 or Traveling🚗. Also, he is Speaker at Magento Meetups.

Recent Posts

Magento 2: Add Quantity Increment and Decrement on Category Page

Hello Magento Friends, In this blog, we will discuss about adding quantity increment and decrement…

4 hours ago

How to Integrate ChatGPT with Laravel Application?

In this guide, we'll explore how to integrate ChatGPT, an AI-powered chatbot, with a Laravel…

3 days ago

What are Net Sales? How to Calculate Your Net Sales?

In the world of business, understanding financial metrics is crucial for making informed decisions and…

5 days ago

Magento 2 Extensions Digest April 2024 (New Release & Updates)

Welcome to the MageComp Monthly Digest, where we bring you the latest updates, releases, and…

5 days ago

The ABCs of Geofencing: Definition, Features and Uses

In this era, businesses are always on the lookout for ways to engage with their…

6 days ago

How to Delete Product Variant in a Shopify Remix App using GraphQL Mutations?

Managing a Shopify store efficiently involves keeping your product catalog organized. This includes removing outdated…

1 week ago