While shopping have you come across doubts in your mind? If yes, what do you do? You definitely try to contact the seller and if you cannot find any way to reach the seller, you abandon the site and move to another one.
The same thing happens with your customers for your site. To hold back the visitors to your site, you must provide a prompt link where the customers can contact you from anywhere on your website.
Magento 2 owners need not worry about the above-mentioned situation. Using the Quick Contact Form Extension for Magento 2, Magento store owners can easily include a quick contact link on the storefront.
Contents
Firstly, you need to Download the Quick Contact Form Plugin for Magento 2.
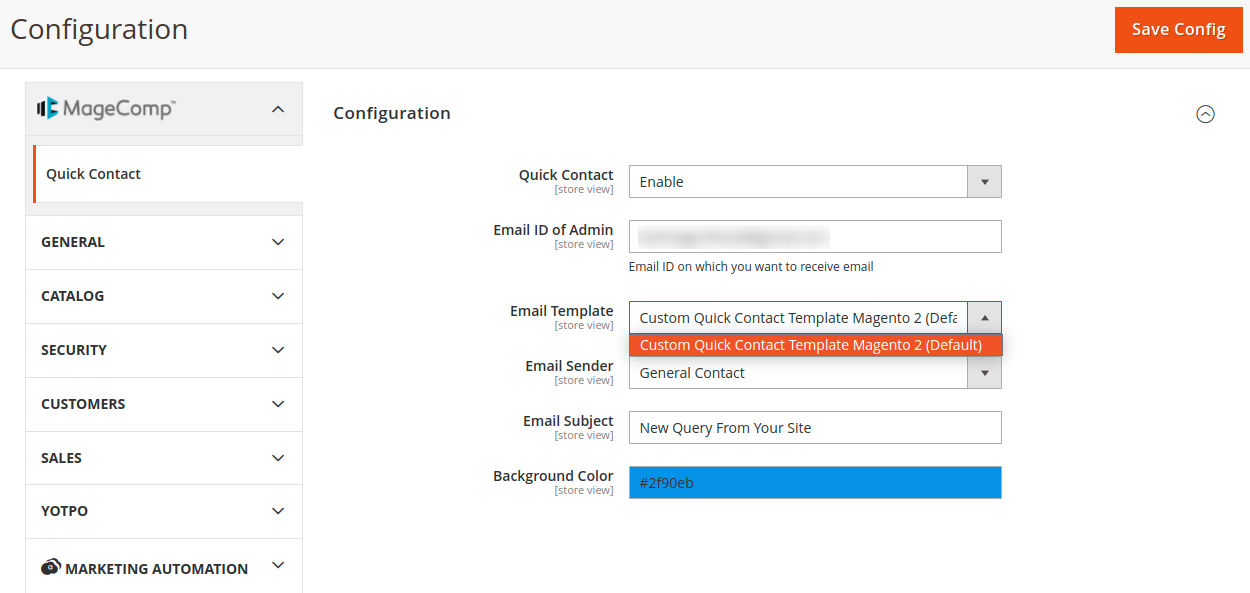
Quick Contact – You can enable or disable the module easily from here.
Email ID of Admin – Mention the email ID in which you want to receive email notifications of the query sent.
Email Template – Choose the template of the email for queries sent by customers.
Email Sender – From the dropdown menu select the sender of the email.
Email Subject – Enter the subject line for the email received to the admin.
Background Color – Set the color of the quick contact form in the front end.
The Magento 2 Store admin can handle quick contact details from the admin panel using the Quick Contact Manager.
Admin can view the customer query details from the store backend.
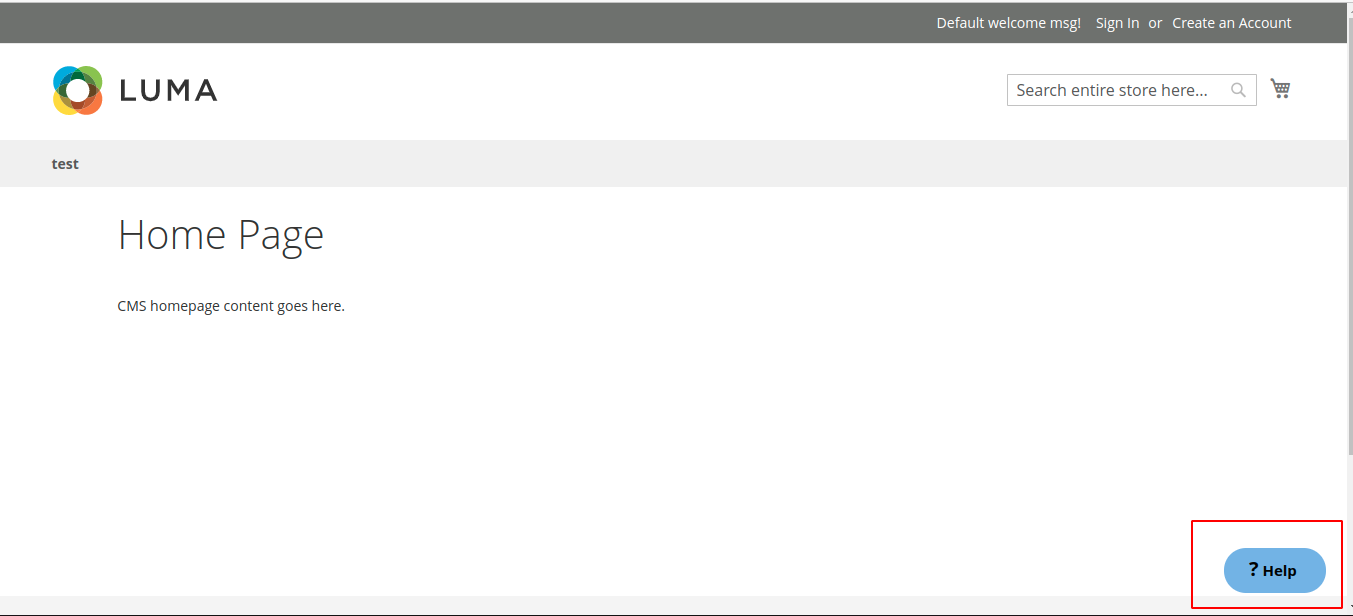
A quick contact button is displayed on the store frontend
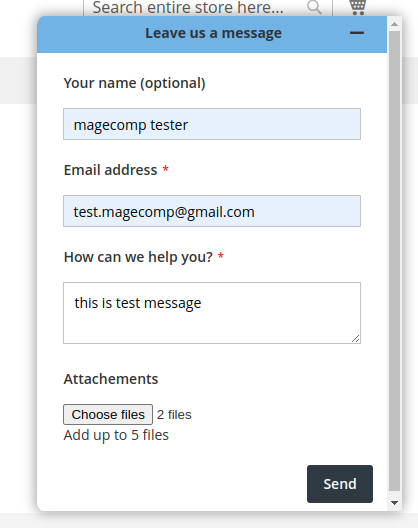
Customers can quickly send query details at any time by entering details like name, email address, query information, and even attach up to 5 files for accurate understanding.
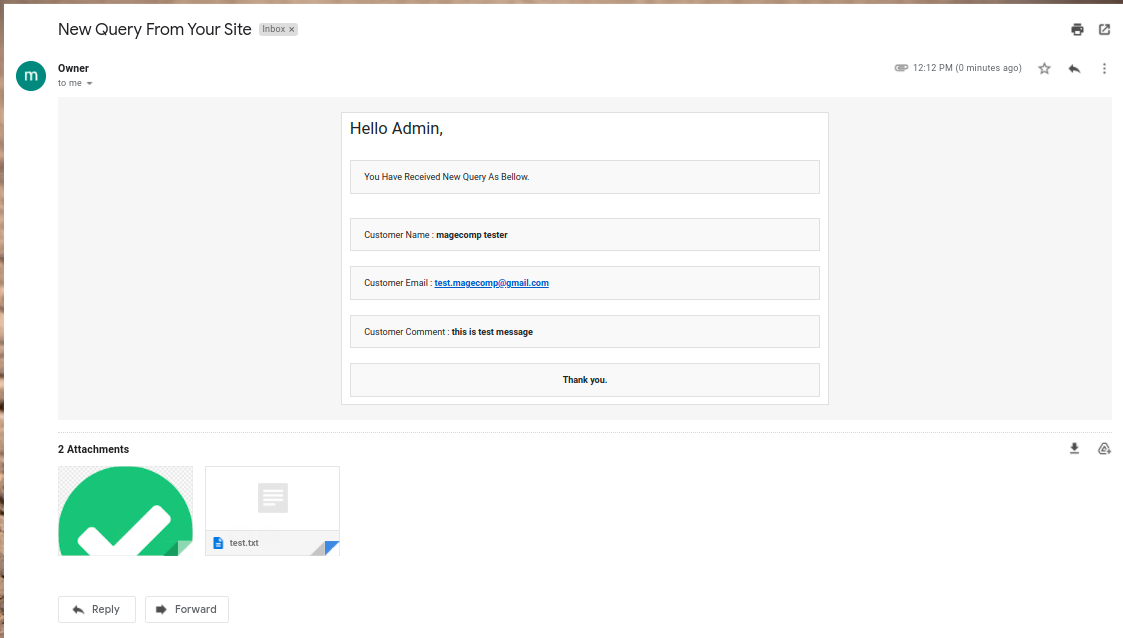
Admin receives mail for every query with complete details and can reply to customers quickly.
So the Quick Contact Form Module for Magento 2 can help you a lot in increasing the customer experience of the store. If you want any customization for this module, freely contact us with your requirements.
Happy Reading!
E-commerce has transformed the way consumers shop for products and services and interact with businesses.…
The e-commerce world is constantly in flux. New tech and strategies emerge daily to help…
Hello Magento Friends, In today’s blog, we will discuss adding a header and footer to…
Hello React Native Friends, Building a visually appealing and responsive mobile app is crucial in…
We're thrilled to announce the release of Hyvä Themes 1.3.6 and 1.3.7! These latest updates…
Your e-commerce platform is surging - orders are rolling in, traffic spikes are becoming the…