Want to get rid of the boring blank page when your site is under maintenance? MageComp’s Maintenance Page Extension for Magento 2 is beneficial for you. Let’s discuss it more.
Usually, when the site is under maintenance, upgrading to a new version, bug fixing, or updating a new theme, a blank page is displayed to the visitors. This loses the user’s interests and they are shifted elsewhere. Magento merchants cannot afford to lose customers as it directly affects the revenue of the business.
Maintenance Page Extension for Magento 2 allows displaying engaging and informative maintenance and coming soon pages to the visitors. Maintenance and coming soon pages can be fully customized in order to increase the user experience of the customers. The extension helps to send notifications to customers when the site is available for use.
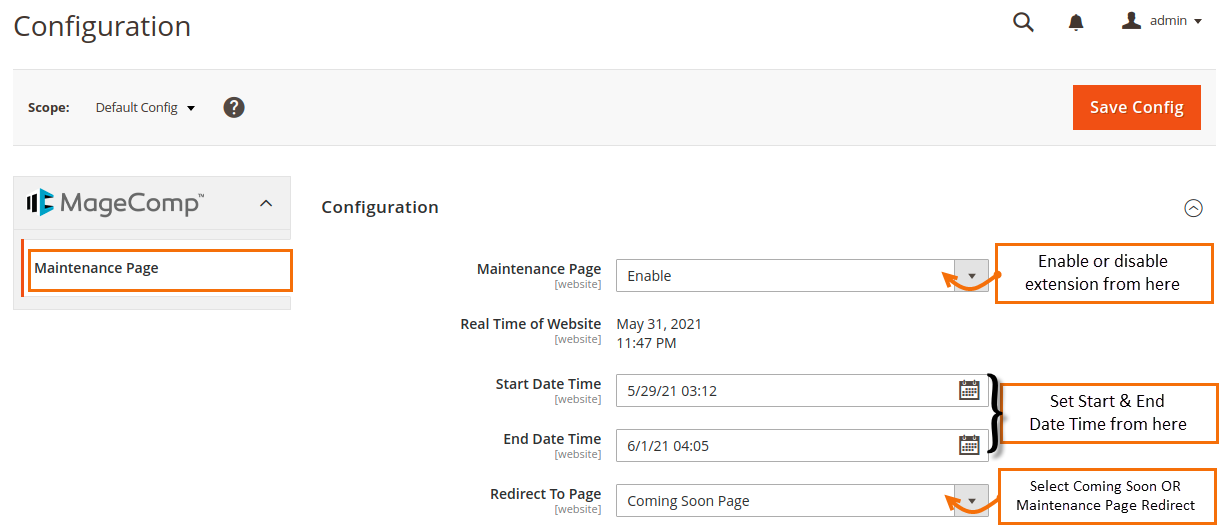
After the successful installation of the extension go to Stores > Configuration to configure the extension.
Maintenance Page: The admin can enable or disable the extension from here.
Real Time of Website: The current date and time are displayed here.
Start Date Time: Determine the start date and time here.
End Date Time: Determine the end date and time here.
Redirect To Page: Determine the page – Coming Soon Page or Maintenance Page to redirect the customers.
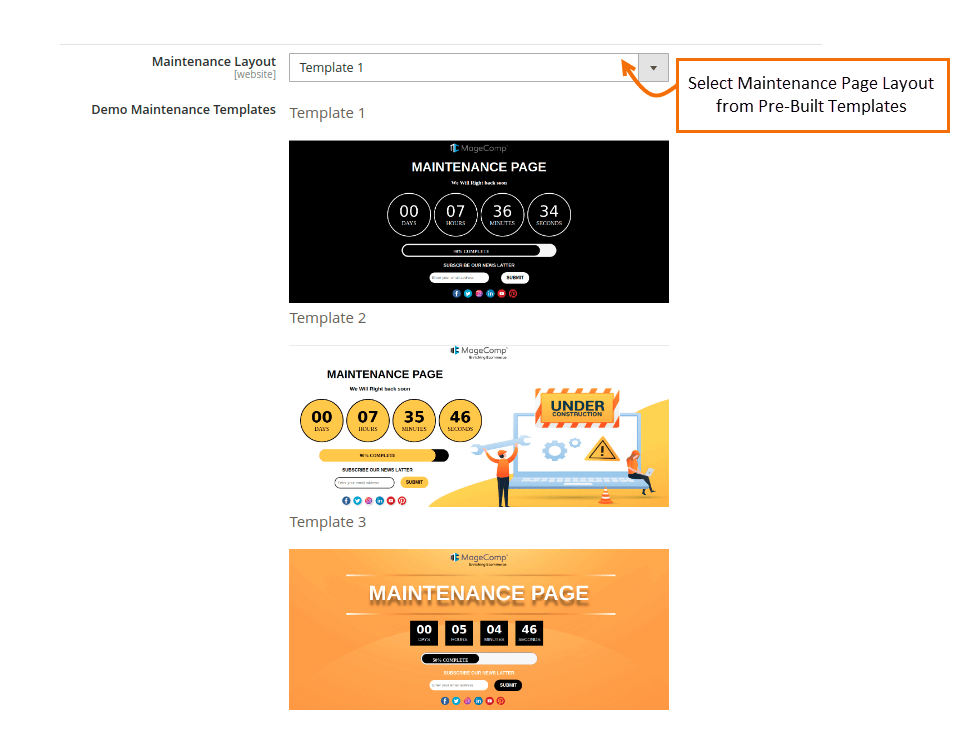
Maintenance Layout: Select the template for the Maintenance Page.
Demo Maintenance Templates: This displays all the demo templates for the Maintenance Page.
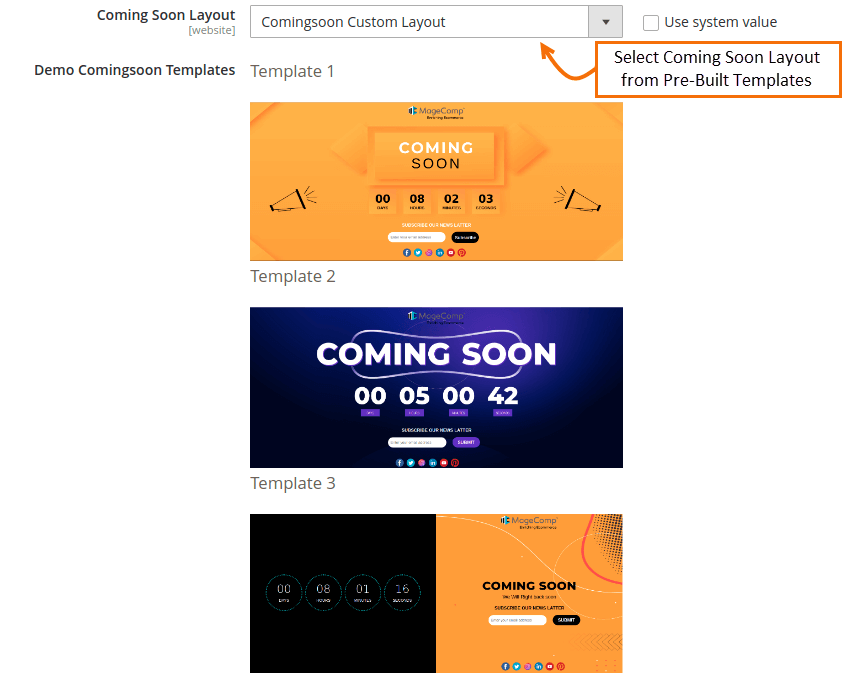
Coming Soon Layout: Select the template for the Coming Soon Page.
Demo Coming Soon Templates: This displays all the demo templates for the Coming Soon Page.
Auto Switch to Live Site Mode: Enabling it will automatically switch your site to live mode when the fixed time is completed.
Whitelist IP(s): White-list IPs must be added here to disable maintenance mode.
Whitelist Page Link(s): White-list Page Links must be added here to disable maintenance mode.
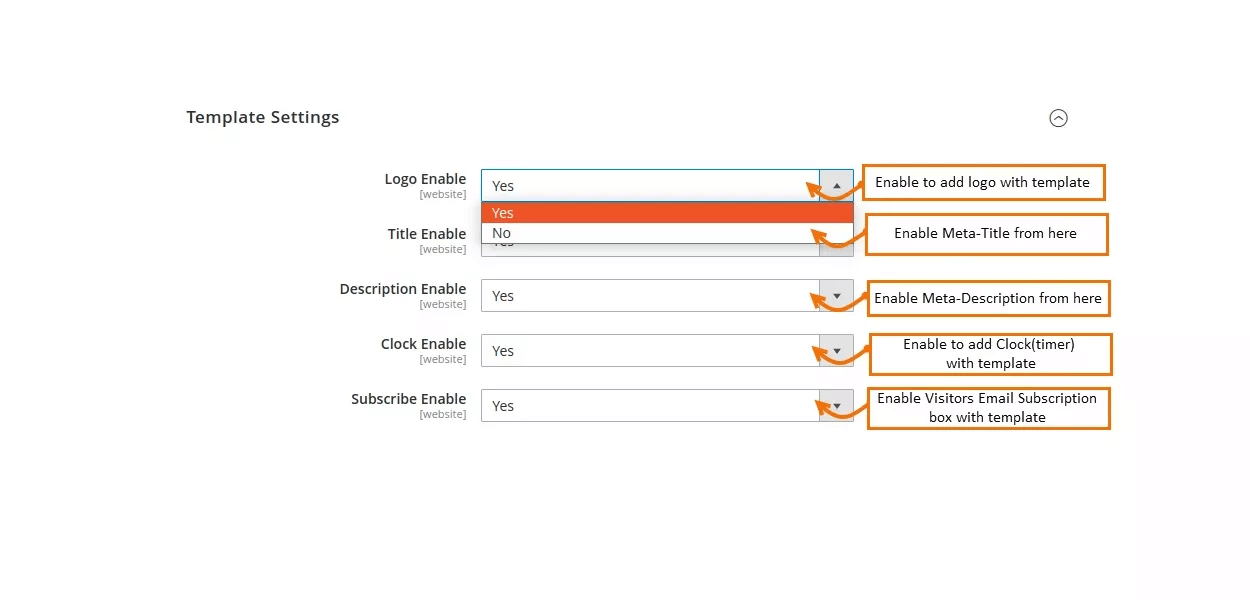
Step 3: Template Settings
Logo Enable – To include your logo with the template, set it to YES.
Title Enable – To include meta-title with the template, set it to YES.
Description Enable – To include meta-description with the template, set it to YES.
Clock Enable – To include a clock timer with the template, set it to YES.
Subscribe Enable – To include an email subscription box for visitors with the template, set it to YES.
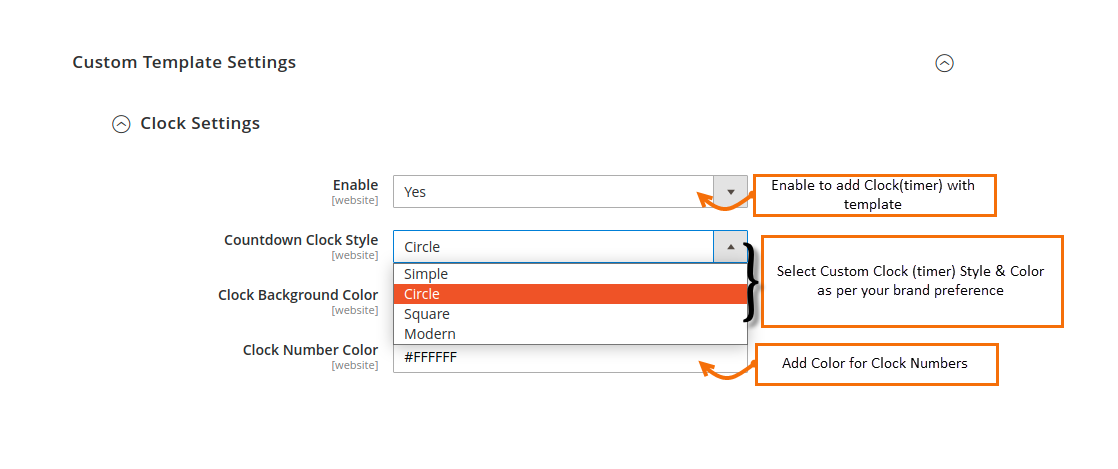
Step 4: Custom Template Settings
Clock Settings
Enable: Set it to YES to enable the clock timer with the template.
Countdown Clock Style: Select the style of the clock timer according to your choice.
Clock Background Color: Select your preferred background color of the clock timer.
Clock Number Color: Enter your desired color for the clock numbers.
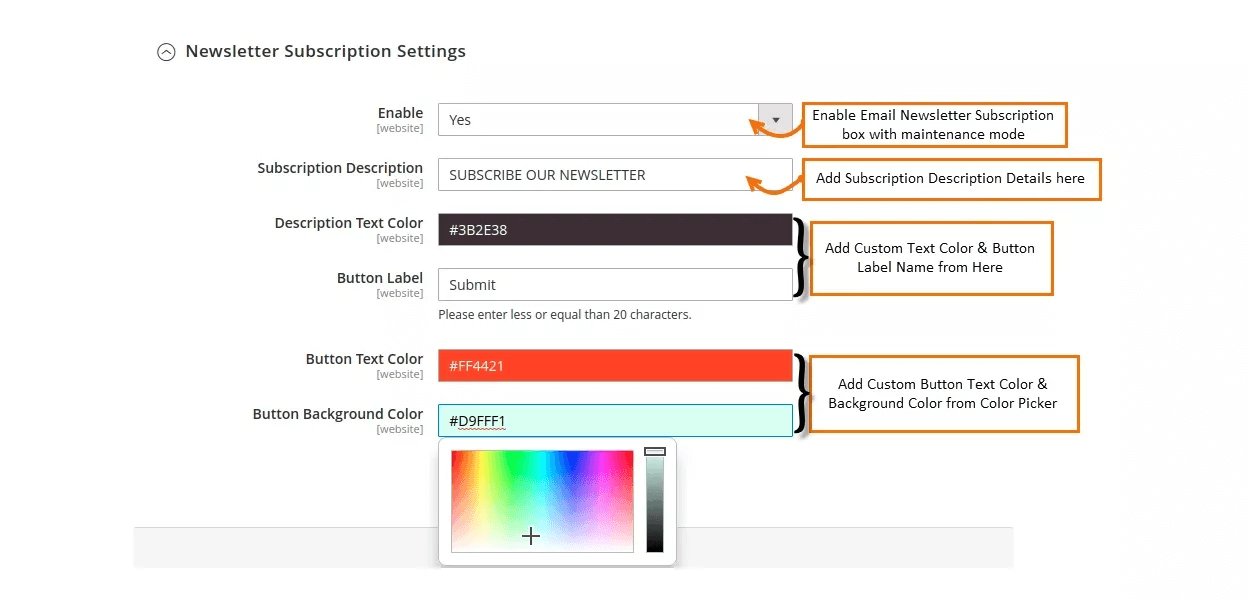
Newsletter Subscription Settings
Enable: To display Email Newsletter Subscription Box with Maintenance Page, enable it from here.
Subscription Description: Enter the text to be displayed for the Newsletter Subscription.
Description Text Color: Enter the text color of the Newsletter Subscription description.
Button Label: Enter the label of the Newsletter Subscription button.
Button Text Color: Enter the color of the Newsletter Subscription button.
Button Background Color: Enter the background color of the Newsletter Subscription button.
Social Settings
Enable: To add social media buttons, enable it from here.
Facebook Link: Add the Facebook link of your business here to be added to the template.
Twitter Link: Add the Twitter link of your business here to be added to the template.
Instagram Link: Add the Instagram link of your business here to be added to the template.
Linkedin Link: Add the Linkedin link of your business here to be added to the template.
Youtube Link: Add the Youtube link of your business here to be added to the template.
Pinterest Link: Add the Pinterest link of your business here to be added to the template.
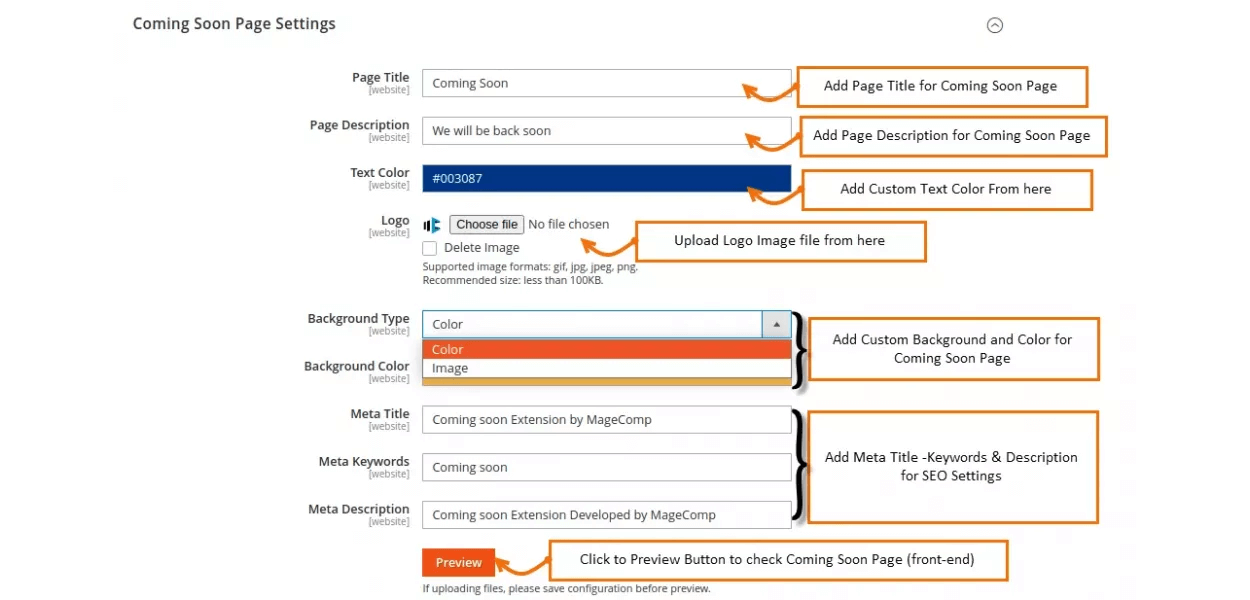
Step 5: Coming Soon Page Settings
Page Title: Enter the Title of the Coming Soon Page.
Page Description: Add the Description of the Coming Soon Page.
Text Color: Add the Color of the text.
Logo: Enter your business logo to be displayed on the Coming Soon Page.
Background Type: Select the type of background you want for the Coming Soon Page.
Background Color: Select the background color you want for the Coming Soon Page.
Meta Title: Add the Meta title for SEO purposes.
Meta Keywords: Add the Meta keywords for SEO purposes.
Meta Description: Add the Meta description for SEO purposes.
When you are done with configuration, select Preview to check how the Coming Soon Page will appear in the front-end.
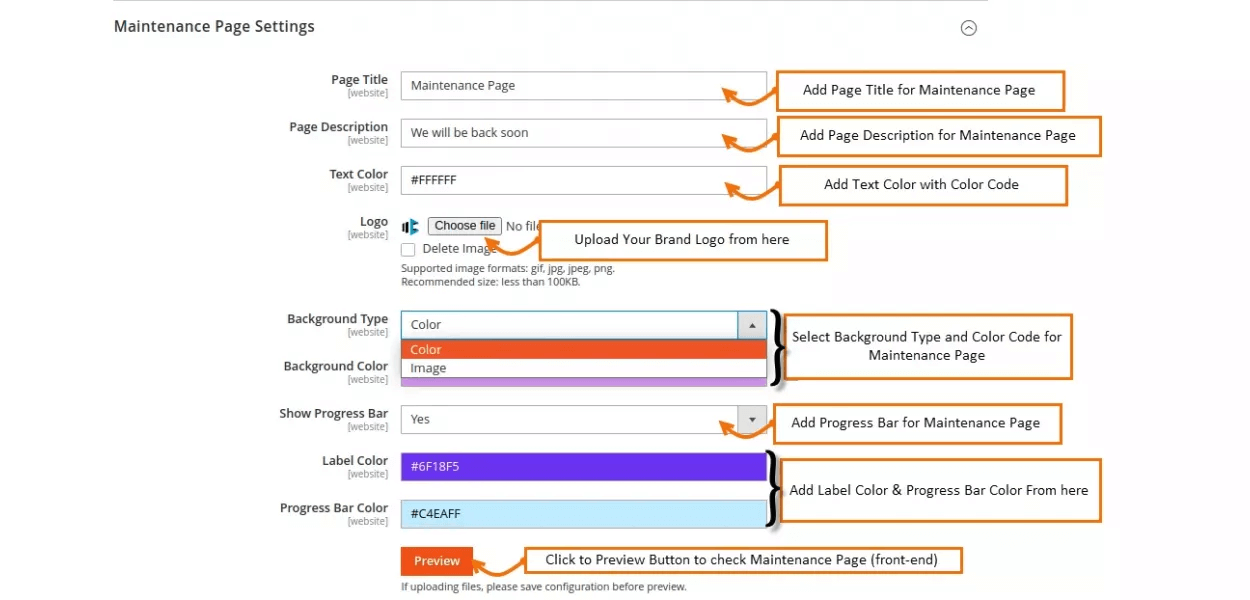
Step 6: Maintenance Page Settings
Page Title: Enter the Title of the Maintenance Page.
Page Description: Enter the Description of the Maintenance Page.
Text Color: Add the Color of the text.
Logo: Enter your business logo to be displayed on the Maintenance Page.
Background Type: Select the type of background you want for the Maintenance Page.
Background Color: Select the color of the background you want for the Maintenance Page.
Show Progress Bar: Select YES to display the progress bar on the Maintenance Page.
Label Color: Add the color for the label.
Progress Bar Color: Enter the color for the progress bar.
When you are done with configuration, select Preview to check how the Maintenance Page will appear in the front-end.
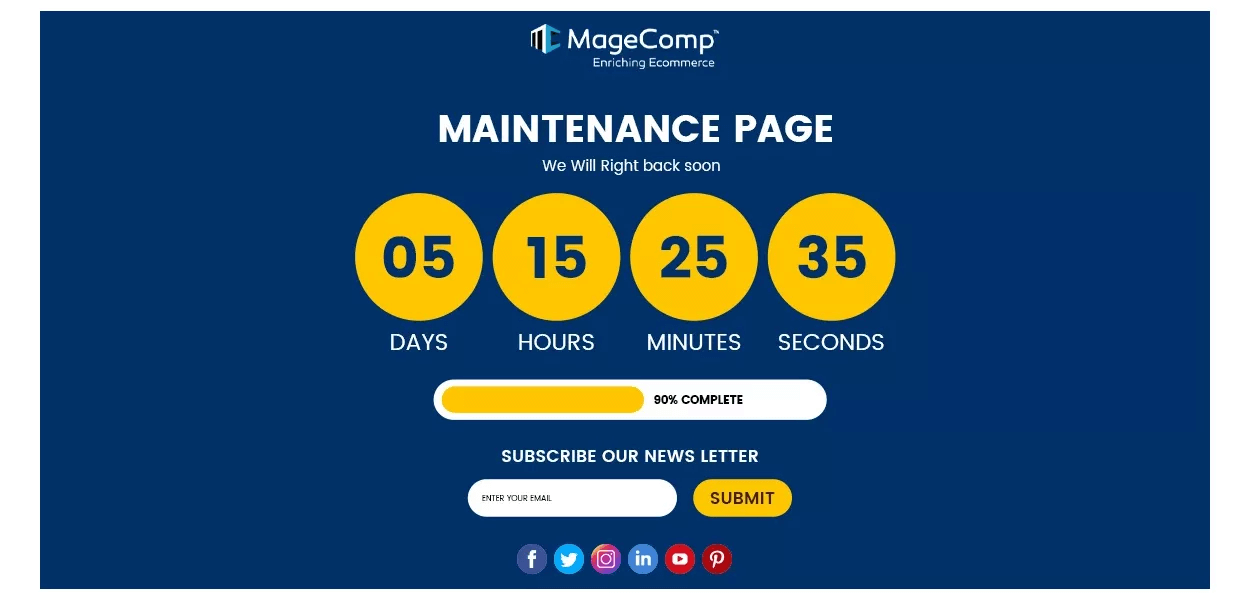
Front-end Display of Maintenance Page:
Final Words:
Hence, this way you can integrate Maintenance Page Extension for Magento 2. If you face any issues with the above configuration steps, feel free to contact our support team.
Share the article with your Magento friends and colleagues. Stay updated with us for more.
Happy Reading!
Click to rate this post!
[Total: 5 Average: 5]
Gaurav Jain
Gaurav Jain is Co-Founder and Adobe Certified Expert-Magento Commerce Business Practitioner. Being Computer Engineer👨💻 and possessing Extensive Marketing skills he handles all kinds of customer Queries and his Happy😀 & Helping🙏 Nature makes customer's day Delightful. When he isn’t working, you’ll find Gaurav Reading on Books📖 or Traveling🚗. Also, he is Speaker at Magento Meetups.