Hello, Magento Buddies!
Today, I have come up to give y’all an elaborative idea on How to Add a Custom Filter to the Product Grid in Magento 2. So, let’s get going without any further wait!
When there are a huge number of products in your Magento 2 store, it gets difficult to find them at hand when a specific product is required urgently. When this happens, you can easily add the inline product grid to add a custom filter in your Magento 2 store. Let’s get to the steps of how you can Add a Custom Filter to the Product Grid in Magento 2.
Step 1: Create a product_listing.xml file in the below-given path:
app\code\Vendor\Extension\view\adminhtml\ui_component\
Now, add the below code:
<?xml version="1.0"?>

<listing xmlns:xsi="http://www.w3.org/2001/XMLSchema-instance" xsi:noNamespaceSchemaLocation="urn:magento:module:Magento_Ui:etc/ui_configuration.xsd">

    <columns name="product_columns" class="Magento\Catalog\Ui\Component\Listing\Columns">

        <column name="monthly_views" sortOrder="50">

            <settings>

                <addField>true</addField>

                <filter>dateRange</filter> <!-- Range component represents two input fields of date or text type-->

                <label translate="true">Monthly views</label>

            </settings>

        </column>

    </columns>

</listing>
Step 2: Create a di.xml file in the below-given path:
app\code\Vendor\Extension\etc\adminhtml\
Now, add the below code:
<?xml version="1.0"?>

<config xmlns:xsi="http://www.w3.org/2001/XMLSchema-instance" xsi:noNamespaceSchemaLocation="urn:magento:framework:ObjectManager/etc/config.xsd">

    <type name="Magento\Catalog\Ui\DataProvider\Product\ProductDataProvider">

        <arguments>

            <argument name="addFieldStrategies" xsi:type="array">

                <item name="monthly_views" xsi:type="object">

                    Vendor\Extension\Ui\DataProvider\Product\Monthlyviewsfieldtocollection

                </item>

            </argument>

            <argument name="addFilterStrategies" xsi:type="array">

                <item name="monthly_views" xsi:type="object">

                     Vendor\Extension\Ui\DataProvider\Product\Monthlyviewsfiltertogrid

                </item>

            </argument>

        </arguments>

    </type>

</config>
Step 3: Create a Monthlyviewsfieldtocollection.php file in the below-given path:
app\code\Vendor\Extension\Ui\DataProvider\Product\
Now, add the below code:
<?php

namespace Vendor\Extension\Ui\DataProvider\Product;


use Magento\Framework\Data\Collection;

use Magento\Ui\DataProvider\AddFieldToCollectionInterface;


class Monthlyviewsfieldtocollection implements AddFieldToCollectionInterface

{

    public function addField(Collection $collection, $field, $alias = null)

    {

        $collection->joinField(

            'monthly_views',

            'report_viewed_product_aggregated_monthly',

            'views_num',

            'product_id=entity_id',

             null,

            'left'

        );

    }

}
Step 4: Create a Monthlyviewsfiltertogrid.php file in the below-given path:
app\code\Vendor\Extension\Ui\DataProvider\Product\
Now, add the below code:
<?php
namespace Vendor\Extension\Ui\DataProvider\Product;
use Magento\Framework\Data\Collection;
use Magento\Ui\DataProvider\AddFilterToCollectionInterface;
class Monthlyviewsfiltertogrid implements AddFilterToCollectionInterface
{
public function addFilter(Collection $collection, $field, $condition = null)
{
if (isset($condition['gteq'])) {
$collection->addFieldToFilter([['attribute' => 'monthly_views', 'gteq' => $condition['gteq']]]);
}
if (isset($condition['lteq'])) {
$collection->addFieldToFilter([['attribute' => 'monthly_views', 'lteq' => $condition['lteq']]]);
}
}
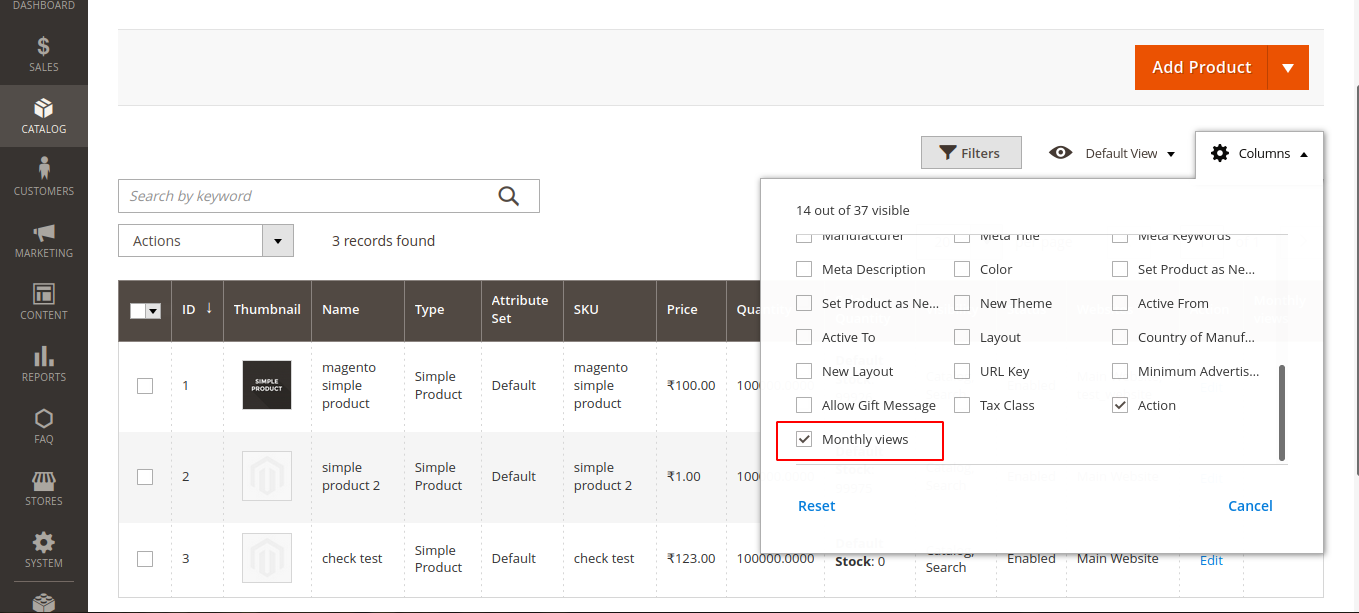
} Once you implement the above steps, a custom filter gets successfully added to the product grid list in Magento 2 as shown below:
Let us look at the customer filter with other filter options as seen in the image below:
Execute all the above steps rightly to Add a Custom Filter to the Product Grid in Magento 2 and you will get the intended results.
Furthermore, Hire a Magento Developer to modify your Magento 2 store as per your requirement. Hit the 5 stars ratings below. Feel comfortable reaching out to us via the comments section below.
Happy Coding!
In this guide, we'll explore how to integrate ChatGPT, an AI-powered chatbot, with a Laravel…
In the world of business, understanding financial metrics is crucial for making informed decisions and…
Welcome to the MageComp Monthly Digest, where we bring you the latest updates, releases, and…
In this era, businesses are always on the lookout for ways to engage with their…
Managing a Shopify store efficiently involves keeping your product catalog organized. This includes removing outdated…
E-commerce has transformed the way consumers shop for products and services and interact with businesses.…
View Comments
Is it possible to add custom filter without adding a column to grid?