Hello Magento Friends,
How are you all doing? Today I am going to figure out How to Create a Form Popup Modal in Magento 2. Before starting, have a look at our previously published blog, How to get Magento 2 all stores programmatically (Retrieve a list of all stores).
Let’s start with our today’s discussion,
The modal popup is a child window that requires user interaction before the user can return to the parent window. They help to get work done without showing all information on the main screen.
In Magento 2, you can create modal popups for forms. To create a form popup modal in Magento 2, follow the below steps.
Step 1: Firstly, we need to create a “registration.php” file inside our extension folder on this path.
app\code\Vendor\Extension
Now, add the below code as mentioned below
<?php
\Magento\Framework\Component\ComponentRegistrar::register(
    \Magento\Framework\Component\ComponentRegistrar::MODULE,
    'Vendor_Extension',
    __DIR__
);
Step 2: After that, we need to create a “module.xml” file inside the etc directory of our extension
app\code\Vendor\Extension\etc
And add the below code
<?xml version="1.0"?>
<config xmlns:xsi="http://www.w3.org/2001/XMLSchema-instance" xsi:noNamespaceSchemaLocation="urn:magento:framework:Module/etc/module.xsd">
    <module name="Vendor_Extension" setup_version="1.0.0" schema_version="1.0.0"/>
</config>
Step 3: After that, we need to create a “routes.xml” file inside etc frontend directory of our extension
app\code\Vendor\Extension\frontend\etc
And add the below-mentioned code
<?xml version="1.0"?>
<config xmlns:xsi="http://www.w3.org/2001/XMLSchema-instance" xsi:noNamespaceSchemaLocation="urn:magento:framework:App/etc/routes.xsd">
    <router id="standard">
        <route id="extension" frontName="extension">
            <module name="Vendor_Extension"/>
        </route>
    </router>
</config>
Step 4: First, we need to create an “extension_index_index.xml” file inside the extension at the following path
app\code\Vendor\Extension\view\frontend\layout
Now, add the code as follows
<?xml version="1.0"?>
<page xmlns:xsi="http://www.w3.org/2001/XMLSchema-instance" xsi:noNamespaceSchemaLocation="urn:magento:framework:View/Layout/etc/page_configuration.xsd">
    <body>
        <referenceContainer name="content">
            <block class="Magento\Framework\View\Element\Template" name="custom-form-popup" template="Vendor_Extension::custom.phtml" />
        </referenceContainer>
    </body>
</page>
Step 5: After that, we need to create a “custom.phtml” file inside the extension on the following path.
app\code\Vendor\Extension\view\frontend\templates
Finally, add the below code
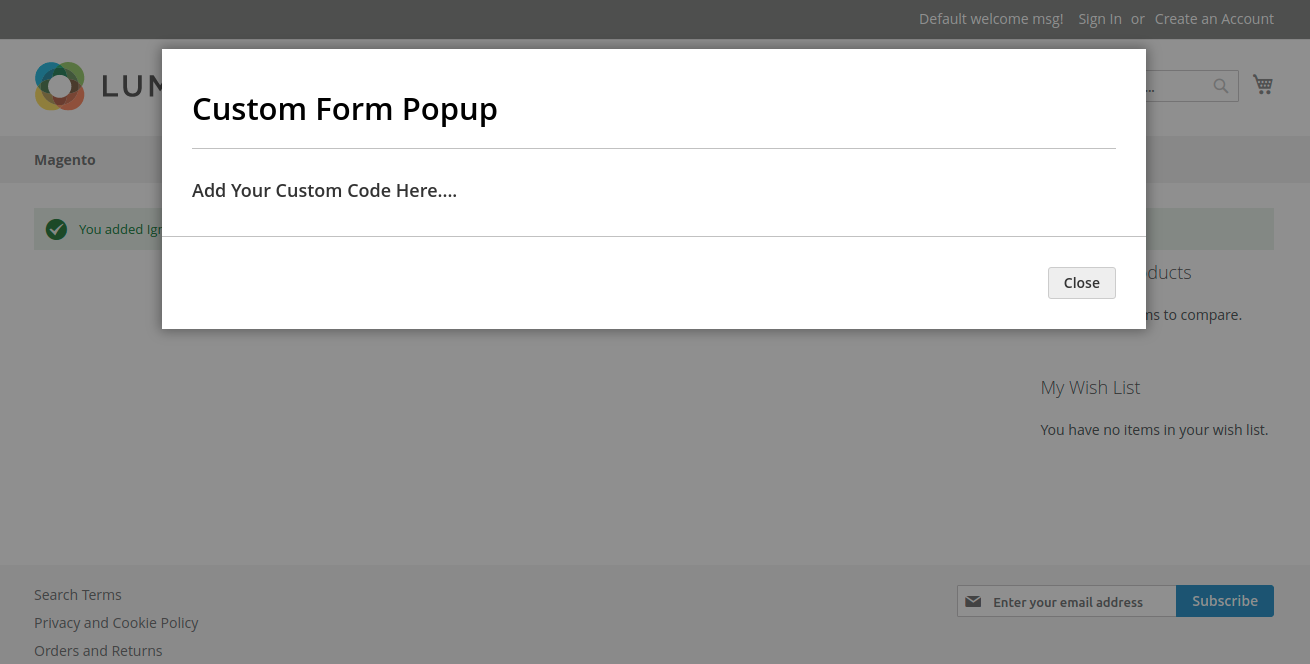
<div id="popup-modal">
    <h3> Add Your Custom Code Here.... </h3>
</div>
<script>
    require(
        [
            'jquery',
            'Magento_Ui/js/modal/modal'
        ],
        function(
            $,
            modal
        ) {
            var options = {
                type: 'popup',
                responsive: true,
                innerScroll: true,
                title: 'Custom Form Popup',
                buttons: [{
                    text: $.mage.__('Close'),
                    class: '',
                    click: function () {
                        this.closeModal();
                    }
                }]
            };

            var popup = modal(options, $('#popup-modal'));

            $('#popup-modal').modal('openModal');
        }
    );
</script>
Successfully performing the above steps, will show the Custom Form Popup window.
This way you can Create a Form Popup Modal in Magento 2. If you come across any issues while implementing the above steps, feel free to reach me via the comment section. I will be happy to solve it. Share the article with your friends, colleagues, and social media platforms. Will catch you in the next tutorial, till then stay in the know.
Happy Coding!
Are you setting up a payroll system for your eCommerce startup? Ensuring compliance with myriad…
In the expansive universe of Laravel development, Blade serves as the stellar templating engine, propelling…
Hello Magento Friends, In this blog, we will discuss about adding quantity increment and decrement…
In this guide, we'll explore how to integrate ChatGPT, an AI-powered chatbot, with a Laravel…
In the world of business, understanding financial metrics is crucial for making informed decisions and…
Welcome to the MageComp Monthly Digest, where we bring you the latest updates, releases, and…
View Comments
Hi, i follow the steps but nothing shows up, any idea what it can be ?
This is not what you call a form. It's plain text inside the modal/popup
What is the url to test this custom form popup? /
The URL should be something like BaseURL/extension/index/index or BaseURL/extension/