Magento Tutorials

In Magento 2 How to Add Google reCAPTCHA (reCAPTCHA v3)?

Hello Magento Buddies,

reCAPTCHA developed by Google protects your website from bots and spammers with the power of Google reCAPTCHA V3 API. So, let’s take a peek at how to add reCAPTCHA in your Magento 2 store.

Why do you need Google reCAPTCHA Extension for your Magento 2 Store?

If your Magento store is flooded with unrelated advertisements, fake registrations, and email lists that are all gassed up with spam, Google ReCAPTCHA V3 Extension facilitates in reducing these types of spam and bots and increase the safety and security of your website.

MageComp’s Magento 2 Google ReCAPTCHA Extension helps in binding the latest Google Recaptcha V3 API along with your Magento store. It helps in identifying and blocking the bots from submitting the forms to your Magento 2 store. The reCAPTCHA v3 requires only one click to authenticate whether you are a human or a robot. If it is not sure, then it will ask the CAPTCHA to raise more signals.

Features of Google reCAPTCHA Extension for Magento 2:

  • Select themes from either light or dark as per your preference.
  • Enables advanced verification to recognize a human. In case it finds something suspicious, it generates reCAPTCHA.
  • Also operates with a Non-JavaScript/Disabled JavaScript browser.
  • Maintains the security of your store by keeping a safety check from irrelevant advertisements, fake registrations, and fraudulent emails.
  • Admin has full power to enable or disable the reCAPTCHA as per their requirement.
  • reCAPTCHA can be enabled on your Contact Us page, Customer Registration, Product Review, Forgot Password page, Checkout Registration, Newsletter Subscription.
  • User response is verified using server-side validation.

Steps to Setup Google reCAPTCHA with Magento 2:

Step 1: Registration

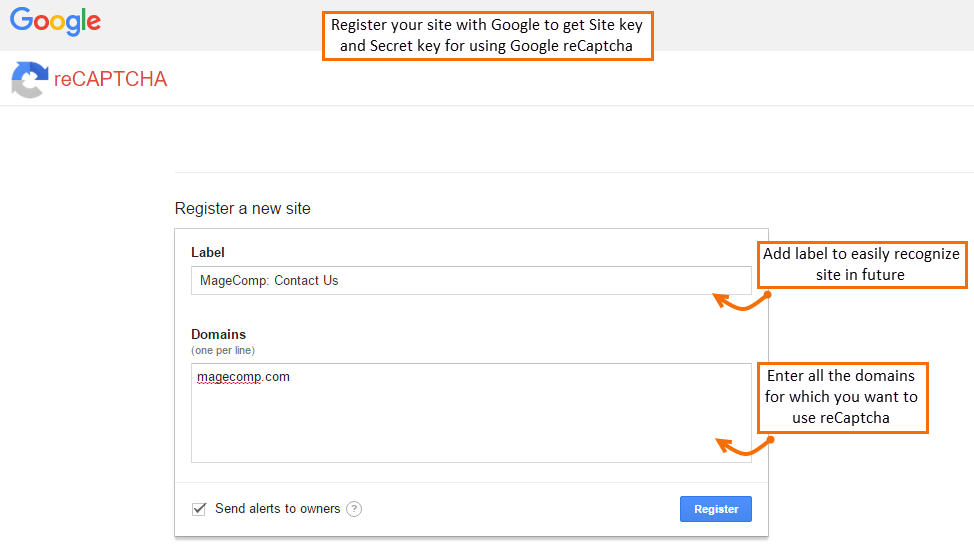
Before configuring the extension for use, you need to register your domains with Google reCAPTCHA. For that, Go to http://www.google.com/recaptcha/intro/index.html and click “Get reCAPTCHA”. 

Here you will find a form to register for reCAPTCHA for use in your domains.

  • Label: Enter label for the site.
  • Domains: Enter all the domains for which you want to use reCAPTCHA.

Step 2: Configuration

  • Install Google reCAPTCHA for your Magento 2 store.
  • Once the extension is successfully installed, go to Google reCAPTCHA -> Configuration to configure the extension for use.

Step 3: General Configuration Settings

  • Enable: Enable or disable your Google reCAPTCHA extension from here.
  • Site Key: Enter the site key you have got while registering for Google reCAPTCHA.
  • Secret Key: Enter the secret key you have got while registering for Google reCAPTCHA.
  • Recaptcha theme: Select your preferred Google reCAPTCHA theme either light or dark.
  • Recaptcha on Contact Us: You can enable or disable Google reCAPTCHA on Magento 2 contact us page from here.
  • Recaptcha on Customer Registration: You can enable or disable Google reCAPTCHA on the Magento 2 front-end customer registration page.
  • Recaptcha on Product Review: You can enable or disable Google reCAPTCHA on Magento 2 frontend product review page from here.
  • Recaptcha on Checkout Register Page: You can enable or disable Google reCAPTCHA on Magento 2 checkout register page.
  • Recaptcha on Newsletter Subscription: You can enable or disable Google reCAPTCHA on frontend newsletter subscription.
  • At the end after making changes to all the fields as per your preference, Save Config.

Front-end View:

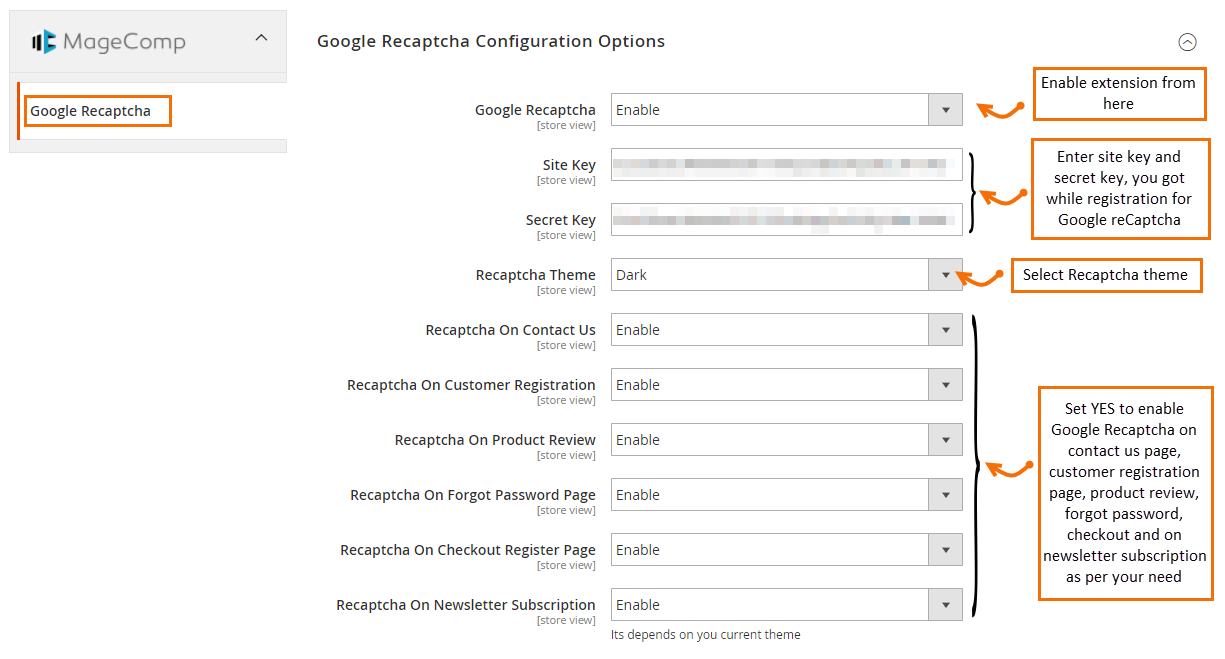
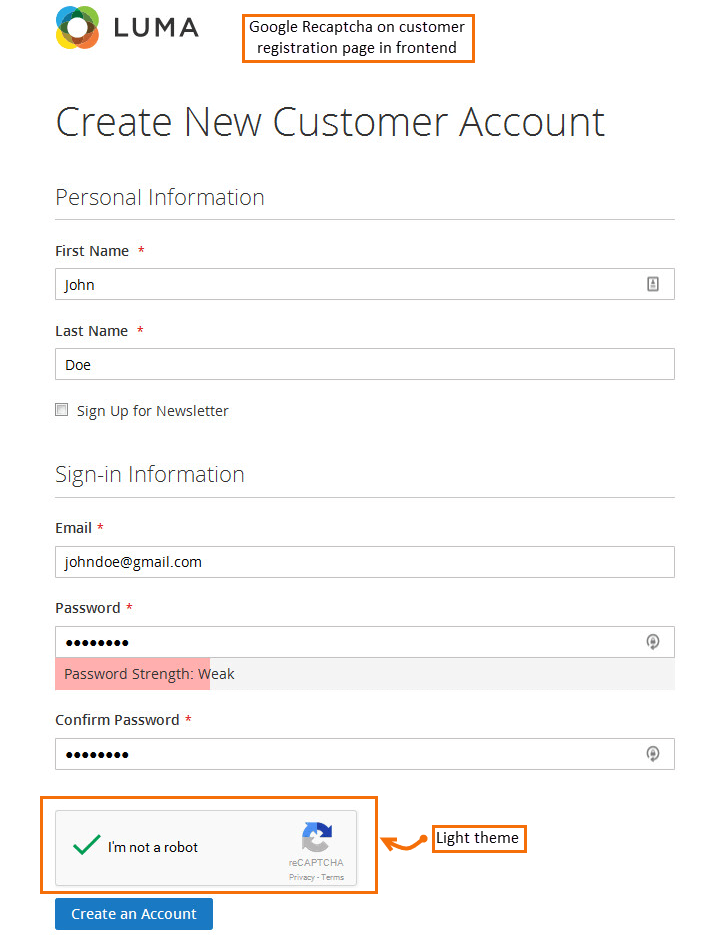
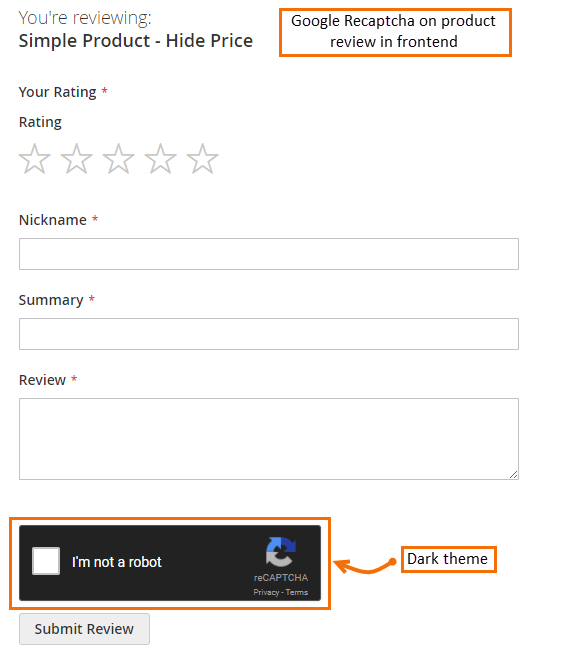
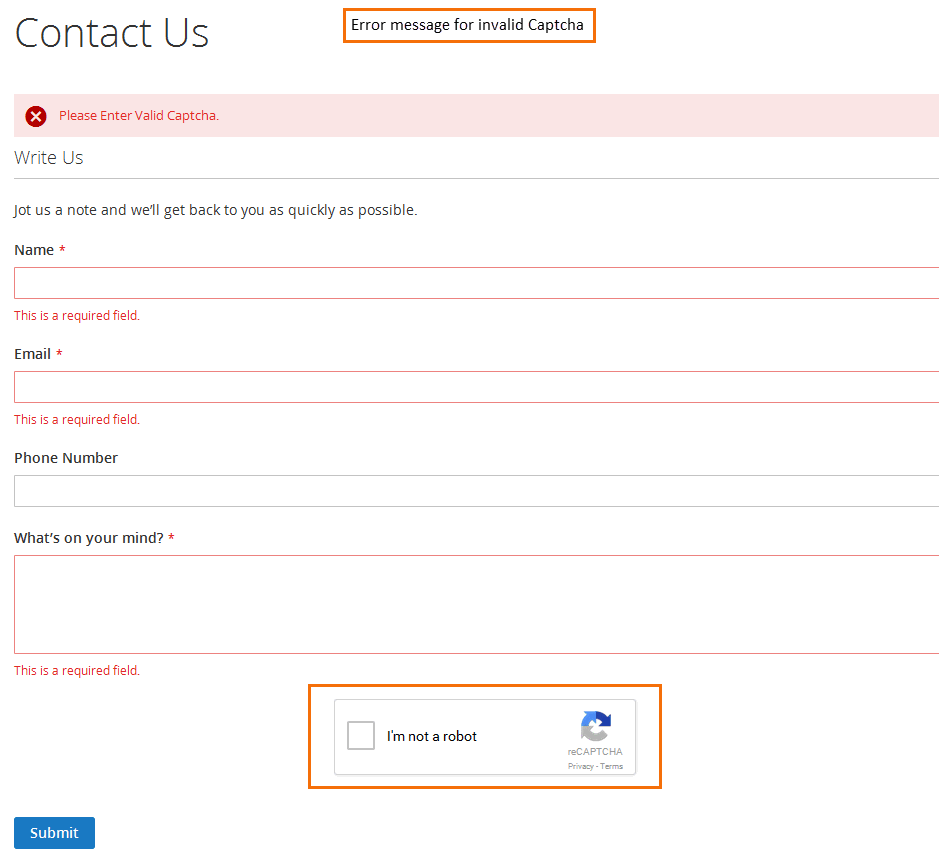
Once you save the configurations, you can see Google reCAPTCHA enabled on the page you have enabled in the frontend. Take a glance at the below-given on pages where Google reCAPTCHA can be visible through your Magento 2 store.

  • Google reCAPTCHA on Contact Us page:

  • Google reCAPTCHA on Frontend customer registration:

  • Google reCAPTCHA on Frontend Product review form:

  • Error message for invalid Google reCAPTCHA:

If you encounter difficulties while configuring your Google reCAPTCHA for your Magento 2 store, our support team is always up ready to assist you.

Closure:

Hence, here we end with today’s tutorial blog. Follow all the above-given steps carefully to Add Google reCAPTCHA in Magento 2 (reCAPTCHA v3). In case of any queries or doubts, please drop in the comments box below. Also, do not forget to share this article on all your social media platforms.

Happy Reading!

Click to rate this post!
[Total: 3 Average: 5]
Gaurav Jain

Gaurav Jain is Co-Founder and Adobe Certified Expert-Magento Commerce Business Practitioner. Being Computer Engineer👨‍💻 and possessing Extensive Marketing skills he handles all kinds of customer Queries and his Happy😀 & Helping🙏 Nature makes customer's day Delightful. When he isn’t working, you’ll find Gaurav Reading on Books📖 or Traveling🚗. Also, he is Speaker at Magento Meetups.

Recent Posts

How to Integrate ChatGPT with Laravel Application?

In this guide, we'll explore how to integrate ChatGPT, an AI-powered chatbot, with a Laravel…

2 days ago

What are Net Sales? How to Calculate Your Net Sales?

In the world of business, understanding financial metrics is crucial for making informed decisions and…

4 days ago

Magento 2 Extensions Digest April 2024 (New Release & Updates)

Welcome to the MageComp Monthly Digest, where we bring you the latest updates, releases, and…

4 days ago

The ABCs of Geofencing: Definition, Features and Uses

In this era, businesses are always on the lookout for ways to engage with their…

5 days ago

How to Delete Product Variant in a Shopify Remix App using GraphQL Mutations?

Managing a Shopify store efficiently involves keeping your product catalog organized. This includes removing outdated…

6 days ago

6 Innovative Tools Revolutionizing E-Commerce Operations

E-commerce has transformed the way consumers shop for products and services and interact with businesses.…

1 week ago