Hello Magento Friends,
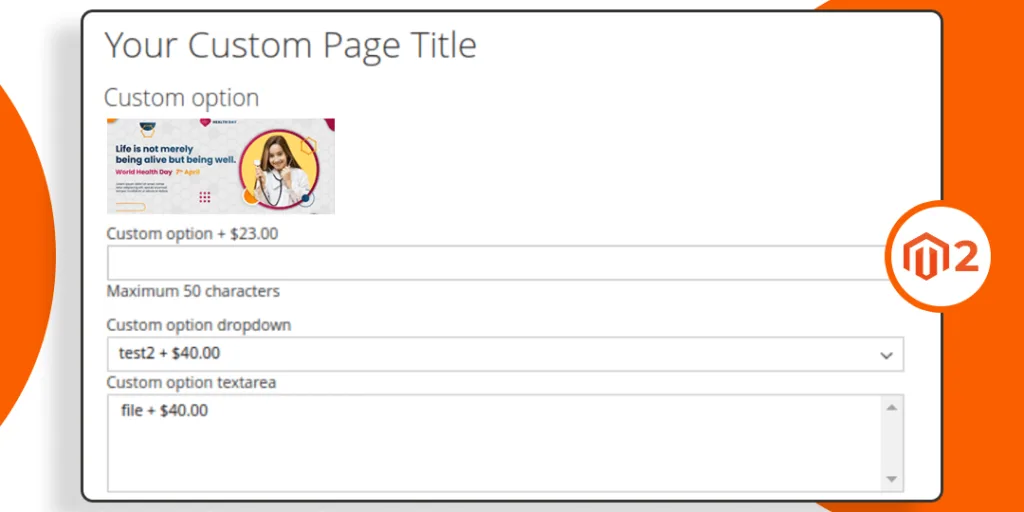
In this blog, I will throw light on How to Display Product Custom Options in the Custom Page in Magento 2.
Displaying product custom options on a custom page can be useful for showcasing product variations or additional choices to customers without them having to go to the product detail page.
Related Articles
- How to Configure Product Custom Options in Magento 2
- How to add Custom Options to the Product Programmatically in Magento 2
- How to Remove Customizable Options of All Products Programmatically in Magento 2
Let’s find out How you can Show Product Custom Options into Custom Page in Magento 2.
Steps to Show Product Custom Option into Custom Page in Magento 2:
Step 1: Create a routes.xml file in the path given below.
{{magento_root}}\app\code\Vendor\Extension\etc\frontend\routes.xml
And include the below code
<?xml version="1.0"?>
<config xmlns:xsi="http://www.w3.org/2001/XMLSchema-instance" xsi:noNamespaceSchemaLocation="urn:magento:framework:App/etc/routes.xsd">
    <router id="standard">
        <route id="frontroute" frontName="frontroute">
            <module name="Vendor_Extension"/>
        </route>
    </router>
</config>
Step 2: Create a controller file in the following path
{{magento_root}}\app\code\Vendor\Extension\Controller\Index\Index.php
Now add the code as follows
<?php

namespace Vendor\Extension\Controller\Index;

use Magento\Framework\App\Action\Action;

class Index extends \Magento\Framework\App\Action\Action
{
    protected $customerSession;
    protected $resultPageFactory;

    public function __construct(
        \Magento\Framework\App\Action\Context $context,
        \Magento\Framework\View\Result\PageFactory $resultPageFactory
    ) {
        $this->resultPageFactory = $resultPageFactory;
        parent::__construct($context);
    }
    public function execute()
    {
        $resultPage = $this->resultPageFactory->create();
        $resultPage->getConfig()->getTitle()->set(__('Your Custom Page Title'));
        return $resultPage;
    }
}
Step 3: Create a Block file at the below-given path
{{magento_root}}\app\code\Vendor\Extension\Block\Index\Index.php
Then add the below code snippet
<?php

namespace Vendor\Extension\Block\Index;

use Magento\Framework\View\Element\Template;

class Index extends Template
{
    protected $_productloader;
    protected $_imageBuilder;
    protected $_customOptions;

    public function __construct(
         Template\Context $context,
        \Magento\Catalog\Model\ProductFactory $_productloader,
        \Magento\Catalog\Block\Product\ImageBuilder $_imageBuilder,
        \Magento\Catalog\Model\Product\Option $customOptions,
        array $data = []
    ) {
        $this->_productloader = $_productloader;
        $this->_imageBuilder = $_imageBuilder;
        $this->_customOptions = $customOptions;
        parent::__construct($context, $data);
    }
    public function getLoadProduct($id)
    {
        return $this->_productloader->create()->load($id);
    }
    public function getImage($product, $attributes = [])
    {
        $imageId = 'product_base_image';
        return $this->_imageBuilder->setProduct($product)
            ->setImageId($imageId)
            ->setAttributes($attributes)
            ->create();
    }
    public function getCustomOptions($data)
    {
        return $this->_customOptions->getProductOptionCollection($data);
    }
    public function getOptionHtml($prd_data, \Magento\Catalog\Model\Product\Option $option)
    {
        $type = $this->getGroupOfOption($option->getType());
        $renderer = $this->getChildBlock($type);
        $renderer->setProduct($prd_data)->setOption($option);
        return $this->getChildHtml($type, false);
    }
    public function getGroupOfOption($type)
    {
        $group = $this->_customOptions->getGroupByType($type);
        return $group == '' ? 'default' : $group;
    }
}
Step 4: Create a layout file at the below-mentioned path
{{magento_root}}\app\code\Vendor\Extension\view\frontend\layout\frontroute_index_index.xml
Then add the below code
<?xml version="1.0"?>

<page xmlns:xsi="http://www.w3.org/2001/XMLSchema-instance" xsi:noNamespaceSchemaLocation="../../../../../../../lib/internal/Magento/Framework/View/Layout/etc/page_configuration.xsd">
    <update handle="customer_account"/>
    <body>
        <referenceContainer name="content">
             <block class="Vendor\Extension\Block\Index\Index"
                   name="index_index"
                   template="Vendor_Extension::index/index.phtml"
                   cacheable="false"
                   >
                <block class="Magento\Catalog\Block\Product\View\Options\Type\DefaultType"
                       name="product.info.options.default"
                       as="default"
                       template="Magento_Catalog::product/view/options/type/default.phtml"/>

                <block class="Magento\Catalog\Block\Product\View\Options\Type\Text"
                      name="product.info.options.text"
                      as="text"
                      template="Magento_Catalog::product/view/options/type/text.phtml"/>

                <block class="Magento\Catalog\Block\Product\View\Options\Type\File"
                      name="product.info.options.file"
                      as="file"
                      template="Magento_Catalog::product/view/options/type/file.phtml"/>

                <block class="Magento\Catalog\Block\Product\View\Options\Type\Select"
                      name="product.info.options.select"
                      as="select"
                      template="Magento_Catalog::product/view/options/type/select.phtml"/>

                <block class="Magento\Catalog\Block\Product\View\Options\Type\Date"
                      name="product.info.options.date"
                      as="date"
                      template="Magento_Catalog::product/view/options/type/date.phtml"/>
            </block>
        </referenceContainer>
    </body>
</page>
Step 5: Create a template file at the path given below
{{magento_root}}\app\code\Vendor\Extension\view\frontend\templates\index\index.phtml
Then add the below code
<?php
$id = 4; // Enter Productid

$prd_data = $block->getLoadProduct($id);

$image = $block->getImage($prd_data);
// get product option data
$prd_custom_op =  $block->getCustomOptions($prd_data);
?>
<div class="product-data-show-main">
    <div class="prd-name"><h2><?php echo $prd_data->getName(); ?></h2></div>
    <div class="product-image-part">
        <?= $image->toHtml() ?>
    </div>
    <div class="product-options-part">
        <?php foreach ($prd_custom_op as $_option): ?>
            <?= $block->getOptionHtml($prd_data, $_option); ?>
        <?php endforeach; ?>
    </div>
</div>
Step 6: After that, run the below commands.
php bin/magento setup:upgrade
php bin/magento setup:static-content:deploy -f
php bin/magento setup:di:compile
php bin/magento cache:flush
Conclusion:
This way, one can easily show custom options of products into custom page in Magento 2. If you have any difficulty in implementing the above steps, kindly let me know through the comment box. Share the tutorial with your friends and stay in touch with us for more.
Happy Coding!
